How To
How to Clean Air Ducts at Home: A Step-by-Step Guide

Indoor air quality plays a crucial role in maintaining a healthy and comfortable home environment. One often-overlooked aspect of achieving good indoor air quality is the cleanliness of your home’s air ducts. Over time, dust, debris, and allergens can accumulate in your ductwork, potentially reducing the efficiency of your HVAC system and affecting the air you breathe. If you’re ready to take matters into your own hands and improve your indoor air quality, here’s a step-by-step guide on how to clean your air ducts at home.
What You’ll Need:
Before you get started, gather the following tools and materials:
- Screwdriver
- Vacuum cleaner with a long hose and brush attachment
- Ductwork cleaning brushes or rods
- Rags or towels
- Disposable dust masks
- Eye protection
- Work gloves
- Flashlight
Step 1: Turn Off Your HVAC System
Safety first! Before you begin, turn off your heating and cooling system to prevent any dust and debris from circulating while you clean.
Step 2: Remove Vent Covers
Use a screwdriver to carefully remove the vent covers or grilles from the duct openings. These can usually be cleaned separately.
Step 3: Inspect the Ducts
Grab a flashlight and take a look inside the ducts. Look for visible dirt, dust, debris, or mold. If you notice extensive mold growth, consult a professional for remediation.
Step 4: Clean the Registers and Vents
Use a vacuum cleaner with a brush attachment to clean the interior of the registers and vents. Wipe them down with a damp cloth if necessary.
Step 5: Clean the Ducts
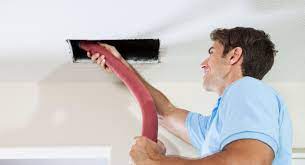
Insert a ductwork cleaning brush or rod into the duct and gently push it through. Ensure that you reach as far as you can, addressing every part of the ductwork. Use a vacuum with a long hose to suck up the loosened debris as you go.
Step 6: Repeat the Process
Continue this process for each duct in your home.
Step 7: Wipe Down the Interior
After cleaning, use a damp cloth or rag to wipe down the interior of the ducts if necessary.
Step 8: Replace Vent Covers
Once all ducts are cleaned, securely replace the vent covers or grilles.
Step 9: Turn on Your HVAC System
Turn your heating and cooling system back on and monitor it for any unusual odors or issues. Ensure that it’s functioning properly.
Step 10: Dispose of Debris
Empty the vacuum cleaner and dispose of the collected debris properly.
Remember, duct cleaning may not be necessary for all homes. If your ducts are significantly contaminated or if you have concerns about mold, it’s best to consult a professional duct cleaning service. Regular maintenance, such as changing air filters and keeping your home clean, can also help maintain better indoor air quality and system efficiency.
Cleaning your air ducts can be a worthwhile endeavor for improving the air quality in your home. By following these steps, you can take a proactive approach to ensuring cleaner, healthier air for you and your family. If you are not enough technical so we suggest you to take services from professional chimney cleaning services in Florida or air duct cleaning services in Florida. There are numerous service providers across the town but “Ultimate Duct Service” is the best in Florida


