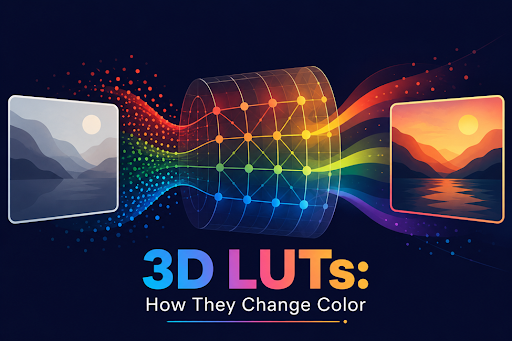
Adding a LUT to footage can quickly change its complete visual appearance. Colors shift, contrast changes, and flat footage gains a stronger visual mood. A 3D LUT makes these changes by mapping colors to new values. However, it cannot repair every problem already present in your original footage.
Poor exposure and incorrect white balance still require separate editing and correction. Wondershare Filmora offers simple controls to apply LUTs and adjust their strength.
Part 1. What Does LUT Mean?
LUT stands for lookup table, a simple system for changing color values. The name sounds technical, but the basic idea is easy to understand.
The Lookup Table Idea
Think of a LUT as a long list containing preset instructions for changing colors. Each input color has a matching output value already decided before editing begins. Software reads each pixel, finds its match, then replaces it without judging scenes.
What Makes It Three-Dimensional
A one-dimensional table maps individual channels separately, such as red or brightness values. Three-dimensional tables map colors together, considering their relationships across the entire color space. This approach changes contrast, saturation, and temperature together instead of adjusting them separately.
Part 2. Technical LUTs and Creative LUTs Serve Different Purposes
Technical and creative LUTs perform different jobs, so choosing the right type matters. The table below explains how 3D LUT Filmora options serve different editing purposes:
| Technical LUTs | Creative LUTs |
| Convert footage from one color space to another | Apply a chosen visual style to the image |
| Written for a specific camera or Log profile | Written for footage that is already normal-looking |
| Produce a neutral, accurate starting point | Produce a mood rather than accuracy |
| Applied to the wrong profile, the result looks broken | Applied to the wrong footage, the result looks exaggerated |
Many downloaded LUT packs combine footage conversion and visual styling in one step. A pack designed for Log footage can overwhelm a standard phone video clip. Check the LUT requirements before applying it to HDR or camera-original source footage.
Note: Both types usually arrive as .cube files, so the extension tells you nothing about what a LUT will do. Read the pack description before applying anything.
Part 3. What a 3D LUT Can Change
A lookup table can change several important parts of your footage at once. Below are 6 main areas where these color changes become most noticeable:
- Overall Color Balance: The image can become warmer or cooler, while gaining a noticeable color tint.
- Contrast Relationships: Dark and bright areas can move closer together, changing the image depth.
- Saturation: Colors can become stronger and more vivid, while reduced levels create muted results.
- Highlight and Shadow Character: Bright areas can soften, while shadows become lighter and deeper.
- Skin-Tone Appearance: Faces change with surrounding colors and may appear unnatural after strong adjustments.
- Perceived Mood: Combined color changes can make footage feel warm, nostalgic, clinical, and bleak.
The final result depends on the colors already present within your source footage. You can use Filmora 3D LUT options to create different looks across your footage. Applying one LUT to different clips creates different looks from their input values.
Part 4. What a 3D LUT Cannot Reliably Fix
A 3D LUT cannot identify problems because it only changes given color values. Look at the table below to see which problems require separate corrections:
| Problem | Why the Table Cannot Solve It |
| Incorrect Exposure | It remaps color and never measures whether a shot was bright enough |
| Inconsistent White Balance | Each clip needs its own correction, and one file applies one rule |
| Clipped or Crushed Detail | Information that was never recorded cannot be mapped to anything |
| Mixed Lighting | 2 light sources in one frame need separate treatment, not a global shift |
| Noise | Grading usually makes grain more visible rather than less |
| Different Camera Profiles | A file built around one camera will misjudge footage from another |
Part 5. Apply a 3D LUT in Filmora
You can preview each 3D LUT Filmora offers before applying it to your clip. Follow the 4 simple steps below to apply and adjust your chosen LUT:
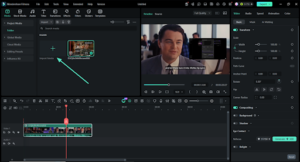
Step 1. Add a Representative Clip
First, create a new project in Filmora. Next, press the “Import Media” option to import your video clip and drag and drop it over the timeline to start working.
Step 2. Open the Color Panel
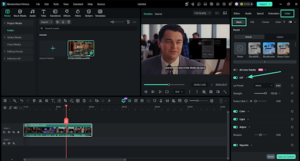
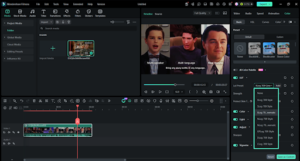
Afterward, choose the clip and move to the right-sided “Properties” panel. Press the “Color” tab, select the “Basic” option, and turn on the “LUT” option.
Step 3. Choose a Preset and Set the Strength
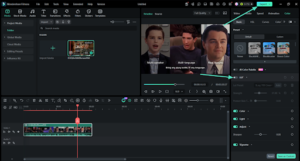
In the “Presets” section, try different options to find one that suits your clip. If the skin looks too contrasted, use the “Strength” slider to reduce the effect.
Step 4. Toggle It On and Off
Compare the before and after versions by turning off the “LUT” option and then on to see the effect. Once the video is finalized, simply press “Export” to save it.
Save a working combination as a custom preset for later project use. Read the Filmora color correction guide to learn more about improving tone and color across your footage. This keeps shots consistent without adjusting the strength again for every clip.
Part 6. Judge the Result on More Than One Frame
A preset may suit one frame but create problems across other footage. Let’s review 5 useful checks before choosing the final look for your video:
- Bright Frame: Check whether bright highlights retain visible texture and detail instead of clipping into flat, featureless white areas.
- Dark Frame: Make sure darker areas preserve useful shadow detail instead of being crushed into solid black or losing important texture.
- Skin Tones: Check faces carefully to ensure skin remains natural and balanced without shifting too orange, red, yellow, or overly saturated.
- Neutral Objects: Examine white, gray, or other neutral objects because they can quickly reveal unwanted warm, cool, green, or magenta color casts.
- Other Sequence Shots: Apply the preset to several different shots from the sequence to confirm it produces consistent results across changing lighting and exposure conditions.
Conclusion
A 3D LUT starts a look but cannot replace basic corrections. It changes color relationships and keeps the chosen look consistent throughout. Correct exposure and white balance before choosing your preferred Filmora look. Check several frames before trusting the final look across your footage.