Migrating Outlook data files (PST or OST files) to Microsoft 365 is not always as simple as uploading a file and waiting for the transfer to finish. Once multiple mailboxes, folder selection, date filters, and Microsoft 365 configuration are involved, the process can become more complicated.
We tested Stellar Migrator for Outlook to see how its migration workflow works in practice. The Windows-based application supports migration of Outlook PST and OST data to Microsoft 365 and Exchange Server, along with PST as a destination option. It also includes mailbox mapping, filtering, incremental migration, concurrent mailbox processing, and migration reporting.
In this review, we walk through the migration process, from selecting the source PST or OST file to configuring Microsoft 365, mapping mailboxes, applying filters, starting the migration, and checking the results. We also look at the features that can be useful during migration, the setup involved, pricing, and things to consider before using the software for a real migration project.
Our Experience with Stellar Migrator for Outlook
Before starting a migration, it is important to understand how the application handles the different stages of the process. Stellar Migrator for Outlook brings source selection, destination configuration, mailbox mapping, filtering, migration, and reporting into one workflow.
The application can be used without installing or configuring Microsoft Outlook on the computer running the migration software. This can be useful when the system is being used specifically for mailbox migration.
It supports both individual and multiple mailbox migrations. For multiple mailboxes, automatic, manual, and CSV-based mapping options are available.
Key Features We Looked At
PST and OST Migration to Microsoft 365
The primary workflow is the migration of Outlook PST and OST data to Microsoft 365.
Microsoft 365 can be selected as the destination during the migration setup. Exchange Server and PST are also available as destination options.
The application does not require Outlook desktop to be installed or configured on the migration computer.
Exchange Server Migration
Exchange Server can also be selected as the migration destination.
The documented compatibility includes:
- Exchange Server 2019
- Exchange Server 2016
- Exchange Server 2013
- Exchange Server 2010
Supported Mailbox Data
The application supports several Outlook mailbox item types:
- Emails
- Contacts
- Calendars
- Tasks
- Journals
- Notes
The mailbox folder structure can also be maintained during migration.
Folder-type filtering is available when only particular types of mailbox data need to be transferred.
Selective Migration and Filters
One of the useful parts of the migration setup is the ability to control which data is transferred.
Stellar Migrator for Outlook provides date-based filtering and folder-type filtering.
A date filter can be used to migrate data from a selected period, while folder-type filtering can be used to select the required mailbox data.
For example, an administrator may choose to migrate recent email while leaving older archived information in the original PST.
Incremental or Delta Migration
The application supports incremental or delta migration.
This option is intended for migration scenarios where the source data changes after an initial migration. A subsequent migration can be performed to transfer new or changed items rather than repeating the entire migration.
This can be useful when new mailbox data continues to be added between the initial and final migration stages.
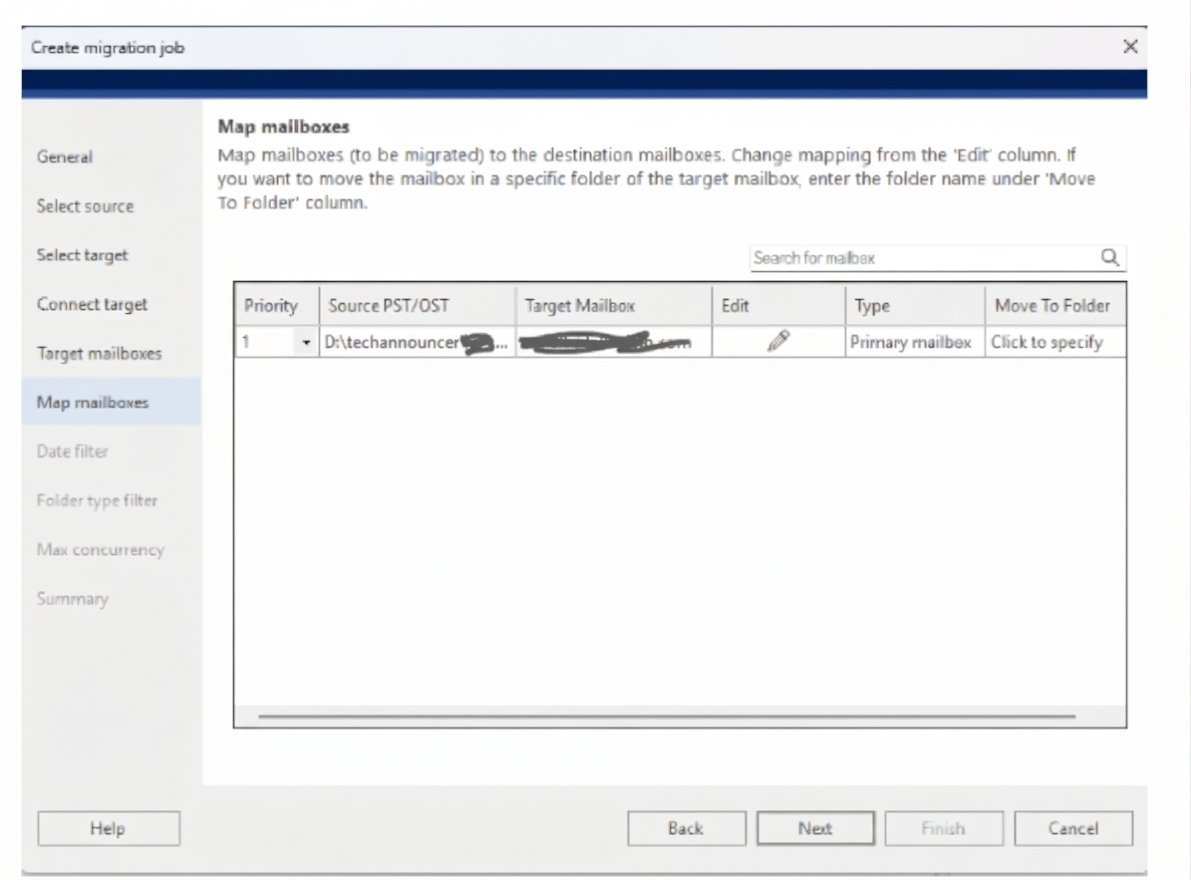
Mailbox Mapping and Bulk Migration
Mailbox mapping becomes important when multiple PST or OST files need to be migrated to different Microsoft 365 or Exchange Server mailboxes.
The application provides:
- Automatic mailbox mapping
- Manual mailbox mapping
- CSV-based mailbox mapping
The current product information indicates support for up to 10 concurrent mailbox migrations.
For a bulk migration, the source-to-destination mapping should be reviewed carefully before starting the job.
Specific Folder Migration
The application also supports migration to a specific destination folder.
This allows migrated data to be placed in a selected folder within a Microsoft 365 or Exchange Server mailbox rather than simply being added to the default mailbox structure.
Migration Monitoring and Reports
Once migration begins, the application provides Job Progress and Mailbox Progress views.
These provide information about the migration status, including:
- Migrated items
- Filtered items
- Unsuccessful items
- Folder-level progress
- Overall status
Migration reports can also be exported to a selected location for record keeping and review.
System Requirements and Compatibility
Stellar Migrator for Outlook is a Windows-based application.
The documented supported operating systems include:
- Windows 11
- Windows 10
- Windows 8.1
- Windows 8
- Windows Server 2022
- Windows Server 2019
- Windows Server 2016
- Windows Server 2012
The product information specifies 64-bit operating system support.
For destination environments, the application supports Microsoft 365 and Exchange Server. The documented Exchange Server versions include 2019, 2016, 2013, and 2010.
How We Migrated PST to Microsoft 365
We followed the migration workflow from creating a migration job through source-file selection, Microsoft 365 configuration, mailbox mapping, filtering, migration, and verification.
Step 1: Create a Migration Job
After launching Stellar Migrator for Outlook, start by creating a new migration job.
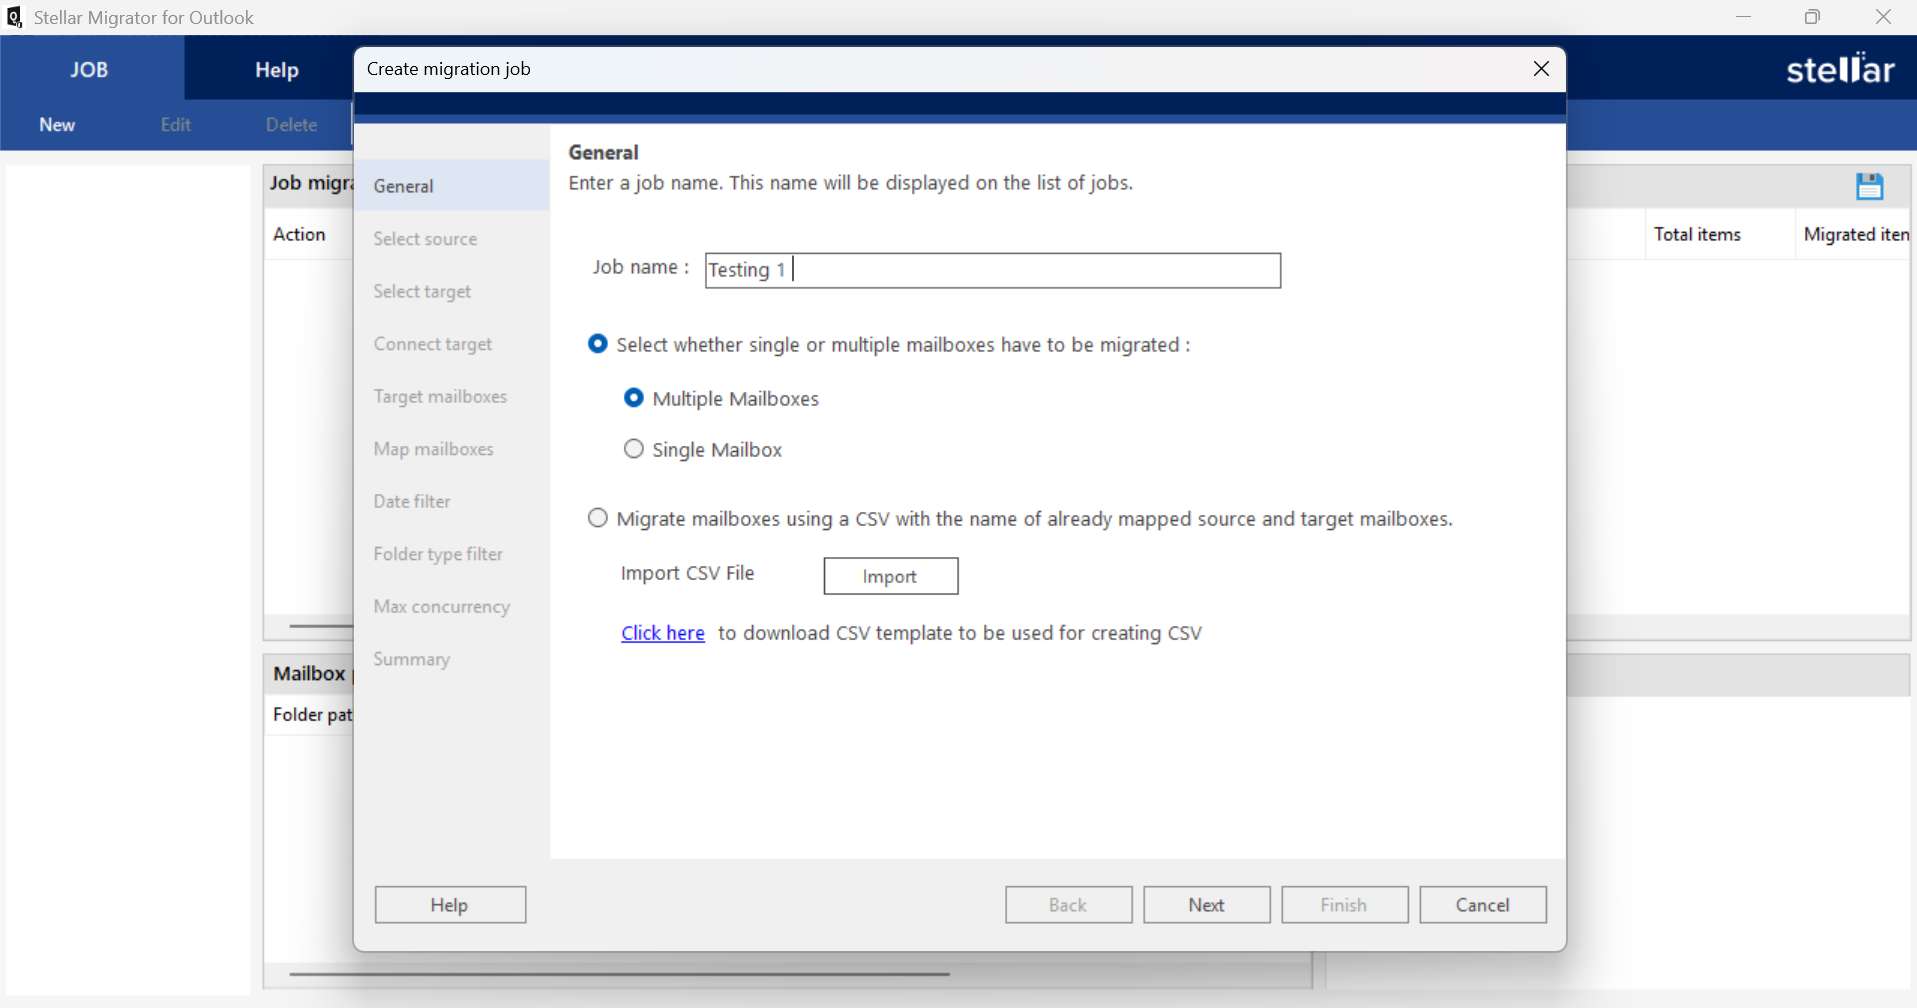
The application allows the migration configuration to be prepared before the actual data transfer begins.
What to check: Confirm that the required source files and destination mailbox information are available before creating the job.
Step 2: Select the PST or OST Files
Add the PST or OST files that need to be migrated.
The selected source files are displayed in the application so the source selection can be checked before continuing.
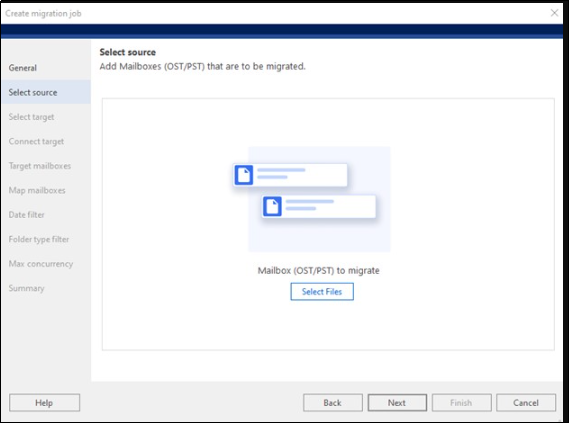
What to check: If a required file cannot be selected, verify its location and accessibility and confirm that the correct source file has been selected.
Step 3: Load the Source Mailbox Data
After adding the source files, the application loads the mailbox information required for the migration.
The source information is then used for mapping, filtering, and destination configuration.
What to check: Larger source files may take additional time to process. Avoid closing the application while the source data is being loaded.
Step 4: Select Microsoft 365 as the Destination
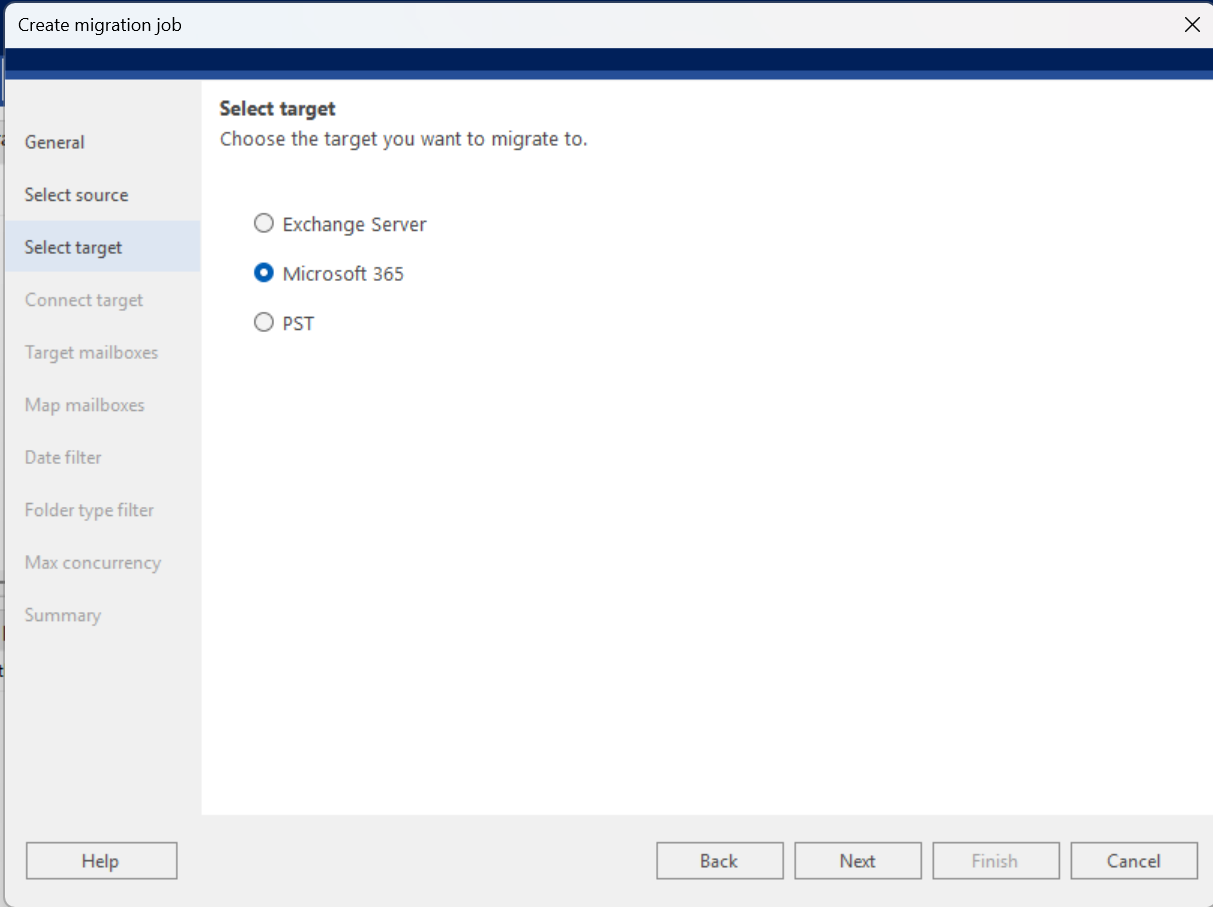
Next, select the destination for the migration.
The available destination options include:
- Microsoft 365
- Exchange Server
- PST
For this workflow, select Microsoft 365.
What to check: If the Microsoft 365 connection cannot be established, review the account details and Microsoft 365 configuration.
Step 5: Register and Connect to Microsoft 365
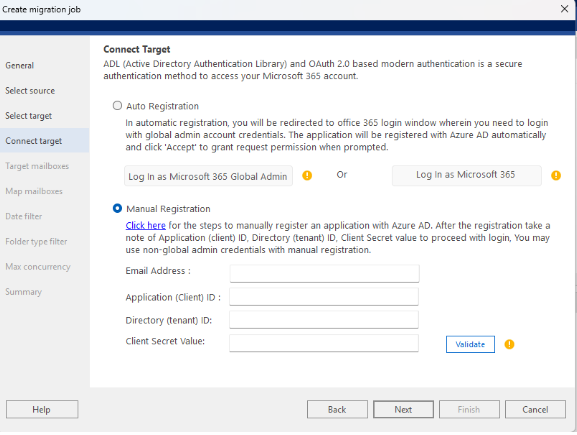
Stellar Migrator for Outlook provides Auto Registration and Manual Registration options for Microsoft 365.
With manual registration, the required information can include:
- Email Address
- Application/Client ID
- Directory/Tenant ID
- Client Secret Value
The Microsoft 365 application registration, authentication, and permissions should be configured according to the tenant being used.
What to check: If authentication fails, verify the email address, Application/Client ID, Directory/Tenant ID, and Client Secret Value. Also check the Microsoft 365 application registration and required permissions.
Step 6: Load the Destination Mailboxes
After connecting to Microsoft 365, load the available destination mailboxes.
The destination mailbox list can then be used to match each source PST or OST mailbox with its corresponding Microsoft 365 account.
What to check: If a required mailbox does not appear, verify the Microsoft 365 connection and confirm that the configured account has the required access.
Step 7: Map Source and Destination Mailboxes
Next, map each source mailbox to its corresponding destination mailbox.
Automatic and manual mapping options are available, while CSV mapping can be used when working with multiple mailboxes.
For a bulk migration, review the source-to-destination assignments before starting the transfer.
What to check: If automatic mapping does not produce the expected matches, use manual mapping or CSV mapping and review the final assignments.
Step 8: Apply Date and Folder Filters
If only specific mailbox data needs to be transferred, apply the available filters.
The application provides:
- Date-based filtering
- Folder-type filtering
A date range can be used to limit the data being migrated, while folder-type filtering can be used to select the required mailbox item types.
What to check: If expected data is missing after migration, review the date range and folder-type filters to make sure the required data was not excluded.
Step 9: Configure Concurrent Mailbox Migration
For bulk migration, configure the number of mailboxes that should be processed simultaneously.
The current product information indicates support for up to 10 concurrent mailbox migrations.
The appropriate number can depend on the source data, system resources, network conditions, and destination environment.
What to check: If migration performance varies during a bulk job, review the number of concurrent mailboxes along with available system and network resources.
Step 10: Review the Migration Summary
Before starting the migration, review the configured settings.
Check:
- Source files
- Destination mailboxes
- Mailbox mappings
- Filters
- Other selected migration settings
This provides an opportunity to identify incorrect mappings or filters before the migration starts.
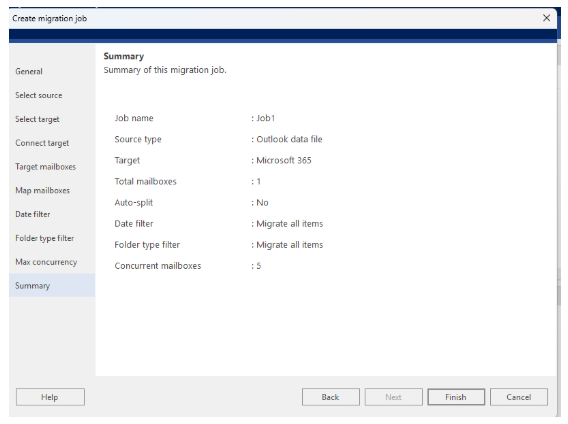
What to check: Correct any incorrect source file, mailbox mapping, or filter before creating or starting the migration job.
Step 11: Create and Start the Migration Job
After reviewing the configuration, create the migration job and start the migration.
The application begins transferring the selected Outlook mailbox data to the configured Microsoft 365 destination.
What to check: If the migration does not start, review the Microsoft 365 connection, mailbox mapping, source-file access, and migration configuration.
Step 12: Monitor Migration Progress
Once the migration begins, use the progress interface to monitor the job.
The Job Progress and Mailbox Progress views provide information about the migration status, including migrated, filtered, and unsuccessful items.
What to check: If a mailbox contains unsuccessful items or shows an incomplete status, review its progress information and migration report.
Step 13: Export the Migration Report
Migration information can be exported to a selected location.
The report can be used to review migration status and maintain a record of the job.
What to check: If the report cannot be saved, check whether the selected destination folder is accessible and writable.
Step 14: Verify the Migrated Data in Microsoft 365
The final step is to verify the migrated data in the destination Microsoft 365 mailbox.
Check representative folders, emails, attachments, contacts, calendars, tasks, journals, and notes, depending on what was included in the migration.
Where possible, compare the migrated information with the original PST or OST.
What to check: If expected data is missing, review the migration report and the filters used for the job. Also confirm that the correct source and destination mailboxes were mapped.
Migrating PST to another PST
Microsoft 365 is not the only destination available in the application.
PST can also be selected as the destination, allowing Outlook mailbox data to be exported to another PST file.
The general workflow is:
- Select the source PST or OST.
- Choose PSTas the destination.
- Configure the required migration settings.
- Start the migration.
- Verify the resulting PST.
Once the output PST is created, open it in Microsoft Outlook and verify the required folders and mailbox items.
Incremental or Delta Migration
Incremental migration is intended for situations where the source mailbox changes after an initial migration.
For example, if new messages are added to a source PST after the first migration, a subsequent incremental migration can be used to transfer new or changed items instead of repeating the entire migration.
Pricing and Licensing
Stellar Migrator for Outlook is currently offered on a pay-per-use basis.
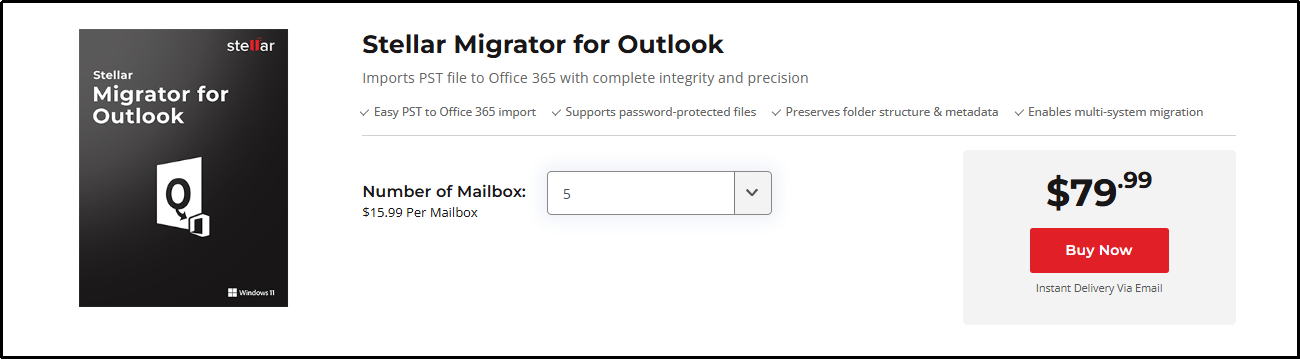
The current purchase information lists pricing starting at $15.99 per mailbox. The displayed price can vary depending on the quantity selected, so users should check the current purchase page for the applicable price before purchasing.
Pros and Cons
Pros
- Supports PST and OST migration
- Supports Microsoft 365 and Exchange Server destinations
- Can export mailbox data to PST
- Does not require Outlook desktop to be installed or configured
- Supports automatic, manual, and CSV-based mailbox mapping
- Provides date and folder-type filtering
- Supports incremental or delta migration
- Supports up to 10 concurrent mailbox migrations
- Provides job-level and mailbox-level migration progress
- Provides migration reports
- Supports migration to a specific destination folder
Cons
- Microsoft 365 migration can require additional configuration
- Manual Microsoft 365 registration requires application and tenant details
- Microsoft 365 permissions and authentication can add setup steps
- The application is designed for Windows environments
- Migration performance can vary depending on PST/OST size, mailbox count, system resources, network conditions, and destination environment
- Migrated data should be verified in the destination mailbox
Things to Keep in Mind Before Migration
● Check the Source Files
Make sure the correct PST or OST files have been selected and are accessible from the migration computer.
● Review Mailbox Mapping
For multiple mailboxes, carefully check the source-to-destination mapping before starting the migration.
● Check Microsoft 365 Configuration
If Microsoft 365 is the destination, confirm that the required application registration, authentication, and permissions have been configured.
● Review Filters
Date and folder-type filters can limit the data being transferred. Review them carefully if the entire mailbox needs to be migrated.
● Plan for Verification
After migration, check representative mailboxes, folders, messages, attachments, and other required mailbox items.
Keep the Original Data
Do not remove or modify the original PST or OST files until the migration has been reviewed and the required data has been verified in the destination environment.
Who Should Consider a Stellar Migrator for Outlook?
The application may be relevant for users and administrators who need to migrate Outlook PST or OST data to Microsoft 365, Exchange Server, or another PST file.
Potential use cases include:
- Migrating individual PST files to Microsoft 365
- Moving multiple PST files to different Microsoft 365 mailboxes
- Migrating Outlook archives to Exchange Server
- Exporting Outlook mailbox data to another PST
- Performing selective migration using date and folder filters
- Performing an incremental migration after an initial migration
- Mapping multiple source and destination mailboxes using CSV
- Monitoring larger migration jobs through progress information and reports
The appropriate workflow will depend on the source data, destination environment, mailbox count, Microsoft 365 configuration, and migration requirements.
Final Thoughts
Stellar Migrator for Outlook brings source selection, destination configuration, mailbox mapping, filtering, migration, progress monitoring, and reporting into a single Windows-based workflow.
The migration process provides several configuration options, particularly for administrators working with multiple mailboxes. Automatic, manual, and CSV-based mapping can be used depending on the migration setup, while date and folder-type filters provide control over the data being transferred.
The Microsoft 365 configuration stage deserves particular attention because application registration, authentication, and permissions may need to be configured before the migration can begin.
For larger migration projects, support for concurrent mailbox processing and migration reporting provides additional ways to organize and monitor the job. Incremental migration can also be useful when source data continues to change after an initial migration.
However, the migration status shown by the software should not be treated as the only verification step. The destination Microsoft 365 mailbox should be checked after migration to confirm that the expected folders, messages, attachments, and other mailbox items are available.
Frequently Asked Questions
Does Stellar Migrator for Outlook migrate PST files to Microsoft 365?
Yes. Stellar Migrator for Outlook supports migration of PST and OST data to Microsoft 365. Exchange Server and PST are also available as destination options.
Does the software require Microsoft Outlook to be installed?
No. The application can work independently of the Outlook desktop application, so Outlook does not need to be installed or configured on the migration computer.
Can multiple PST files be migrated?
Yes. The application supports multiple mailbox migrations and provides automatic, manual, and CSV-based mailbox mapping. It also supports up to 10 concurrent mailbox migrations.
Can only selected mailbox data be migrated?
Yes. Date-based and folder-type filters can be used to control which mailbox data is included in the migration.
What mailbox items can be migrated?
Supported mailbox data includes emails, contacts, calendars, tasks, journals, and notes.
Does Stellar Migrator for Outlook support incremental migration?
Yes. The application supports incremental or delta migration for transferring new or changed items during a subsequent migration pass.
Can PST data be migrated to another PST?
Yes. PST can be selected as the destination, allowing Outlook mailbox data to be exported to PST.
Does it support Exchange Server?
Yes. The documented supported Exchange Server versions include Exchange Server 2019, 2016, 2013, and 2010.
Does Stellar Migrator for Outlook support mailbox mapping?
Yes. The application supports automatic and manual mailbox mapping, as well as CSV-based mapping for multiple mailboxes.
Can data be migrated to a specific Microsoft 365 folder?
Yes. The application supports migration to a specific destination folder in Microsoft 365 or Exchange Server.
How many mailboxes can be migrated simultaneously?
The current product information indicates support for up to 10 concurrent mailbox migrations.
Does the software provide migration reports?
Yes. Job Progress and Mailbox Progress information is available, and migration reports can be exported to a selected location.