
Getting your house set up with smart tech can seem a bit much at first, right? Like, where do you even start? Apple HomeKit is a pretty solid way to get things going, especially if you’re already using iPhones or iPads. It lets you control lights, locks, and all sorts of gadgets with your voice or just a tap on your phone. This guide is going to break down how to get your apple homekit system up and running, from picking the right gear to making it do cool stuff automatically. We’ll cover the basics and some of the more advanced bits too, so you can make your home work for you.
Key Takeaways
- Apple HomeKit lets you control smart devices using Apple products and Siri.
- You need specific Apple devices and software versions to use HomeKit.
- Look for the ‘Works with Apple HomeKit’ logo when buying new devices.
- Organize your devices into rooms and zones in the Home app for easier control.
- Scenes and automations can make multiple devices work together with a single command or trigger.
Understanding Apple HomeKit Fundamentals
So, you’re thinking about making your home a bit smarter, huh? Apple’s HomeKit is a pretty neat way to get started, letting you control things like lights, locks, and thermostats right from your iPhone or with just your voice. It’s all about making your home work for you, a little more conveniently. HomeKit is Apple’s platform for connecting and managing smart home devices. It’s designed with privacy and security in mind, which is a big plus for a lot of people.
What is Apple HomeKit?
At its core, HomeKit is the system that lets your Apple devices talk to your compatible smart home gadgets. Think of the Home app on your iPhone or iPad as the central command center. From there, you can manage everything. It’s been around since 2014 and has grown a lot, with tons of different devices now working with it. You can control lights, adjust your heating, check on your security cameras, and a whole lot more. The cool part is that it tries to keep things private, encrypting communication and doing as much as possible right on your devices or home hub.
Essential HomeKit Requirements
Before you go out and buy a bunch of smart stuff, make sure your Apple gear is ready. You’ll need at least one of these devices running a recent version of its operating system:
- iPhone or iPod touch: Needs iOS 16.0 or later.
- iPad: Needs iPadOS 16.0 or later.
- Apple Watch: Needs watchOS 9.0 or later.
- Apple TV (4th gen or newer): Needs tvOS 16.0 or later.
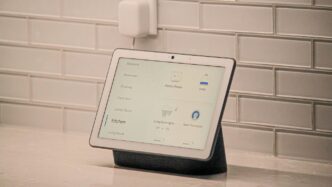
- HomePod or HomePod mini: These also act as hubs.
Having one of these devices means you’ve got the basic ticket to entry for controlling your smart home accessories. The Home app is where all the magic happens.
Choosing Compatible Devices
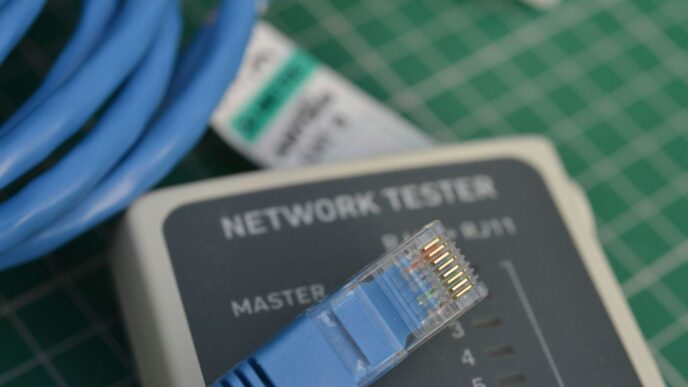
This is where things get fun, but also where you need to pay attention. Not every smart device out there works with HomeKit. You need to look for the "Works with Apple HomeKit" badge on the packaging or in the product description. It’s like a little stamp of approval. You can also find lists of compatible accessories on Apple’s website, though checking the manufacturer’s site is usually the most up-to-date way. Brands like Philips Hue for lights, ecobee for thermostats, and August for locks are popular choices that play nicely with HomeKit. As you shop, you’ll also see terms like Thread and Matter popping up more often, which are newer technologies that help devices connect more reliably and even work across different smart home systems, not just Apple’s.
Setting Up Your Apple HomeKit Ecosystem
So, you’ve got your first HomeKit device, maybe a smart plug or a light bulb. Now what? Getting it into your Apple ecosystem is usually pretty simple, but there are a few steps to make sure it all works smoothly. The Home app on your iPhone or iPad is going to be your main command center for all of this.
Adding Your First HomeKit Device
Adding a new gadget is generally a quick process. You’ll want to have the device itself ready, and usually, the manufacturer’s instructions will point you to the Home app. Here’s the typical flow:
- Install the device: Follow the physical setup guide that came with your smart light, lock, or whatever it is.
- Open the Home app: Find it on your iPhone or iPad. If you don’t have it, well, you’ve got bigger issues!
- Tap the ‘+’ icon: This is usually in the top right corner. Then, select ‘Add Accessory’.
- Scan the code: You’ll see an option to scan a HomeKit setup code. This is a small code, often with a QR code too, that’s usually on the device itself, its packaging, or in the manual. Just point your phone’s camera at it.
- Follow the prompts: The app will guide you through naming the device and assigning it to a room. Make sure to give it a name you’ll actually remember and can say easily to Siri, like "Living Room Lamp" instead of "Smart Bulb XYZ123."
Sometimes, a device might need its own app for initial setup before it can be added to HomeKit. Always check the manufacturer’s instructions if you get stuck. Some devices might also require you to press and hold a button to put them in pairing mode.
Configuring Your Home Hub
To really get the most out of HomeKit, especially when you’re away from home or want to use automations, you’ll need a Home Hub. This is basically a device that stays at your house and acts as a central point for controlling your accessories. Your options are:
- HomePod or HomePod mini: These are Apple’s own smart speakers and work great as hubs.
- Apple TV (4th generation or later): If you have one connected to your TV, it can also serve as a hub.
- An iPad (Wi-Fi + Cellular models recommended): An iPad can also act as a hub, but it needs to be connected to your home Wi-Fi and powered on.
To set one up, just make sure it’s signed into your iCloud account with the same Apple ID you use for the Home app. The Home app will usually detect it automatically and prompt you to set it up as a hub. It’s pretty hands-off once you’ve got it running. This hub is what allows you to control devices remotely and run automations even when your iPhone isn’t home.
Organizing Devices with Rooms and Zones
Once you start adding more devices, things can get messy fast. That’s where organizing comes in. The Home app lets you group devices into ‘Rooms’ and then group those rooms into ‘Zones’.
- Rooms: These should match the actual rooms in your house – Kitchen, Bedroom, Office, etc. Assigning devices to the correct room makes it easy to control them. Saying "Hey Siri, turn off the kitchen lights" is way easier than listing each individual light.
- Zones: These are broader groupings. You might have an ‘Upstairs’ zone that includes all the bedrooms and bathrooms, or a ‘Downstairs’ zone for the living areas. This is super handy for commands like "Hey Siri, turn off the upstairs lights" when you’re heading to bed.
Good naming conventions and a logical room/zone setup make your smart home feel much more intuitive and responsive. It’s not just about aesthetics; it’s about making your system actually usable day-to-day.
Mastering HomeKit Scenes and Automations
Okay, so you’ve got your smart lights, maybe a thermostat, and a smart lock or two. That’s cool and all, but the real magic of HomeKit happens when these devices start working together. That’s where scenes and automations come in. Think of them as the brains of your smart home, making things happen without you lifting a finger.
Creating Powerful Scenes
Scenes are basically pre-set commands that control multiple devices at once. You know, like when you want to watch a movie? Instead of telling Siri to dim the lights, then close the blinds, then turn on the TV (which is a pain), you just say, "Hey Siri, Movie Time." And boom, everything adjusts perfectly. It’s all about setting up these custom scenarios for different parts of your day.
Here are some ideas to get you started:
- Good Morning: Imagine waking up to lights gently turning on, your coffee maker starting, and the thermostat kicking in. This scene can make mornings way less jarring.
- Leaving Home: A single command to turn off all lights, lock the doors, and adjust the thermostat to save energy. Super handy for when you’re rushing out.
- Dinner Party: Set the mood with dim, warm lighting in the dining area and maybe some soft music playing.
- Bedtime: Turn off everything except your bedside lamp, lock up, and set the temperature for sleep.
To create a scene, you just open the Home app, tap the plus sign, and choose "Add Scene." Then, you pick the devices you want to control, set their states (like brightness or color), and give the scene a name Siri can understand. Easy peasy.
Building Effective Automations
Automations take things a step further. While scenes are things you trigger, automations are things that happen automatically based on certain conditions. This is where your smart home really starts to feel, well, smart.
Automations can be triggered by a few different things:
- Time: This is the most common. You can set lights to turn on at sunset, or have your sprinklers run at a specific time on certain days. For example, "Turn on the porch light at sunset every day."
- Location: This is super cool. When you arrive home, your lights can turn on, your doors can unlock, and your thermostat can adjust to your preferred temperature. Or, when you leave, it can do the opposite to save energy and secure your home.
- Sensors: If you have motion sensors, you can set lights to turn on when someone enters a room and turn off after a period of inactivity. Door or window sensors can trigger alerts or turn on lights when opened.
- Device Status: You can even have one device’s action trigger another. For instance, when your smart lock engages, it could automatically arm your security system.
When setting up an automation, you choose a trigger (like "When I Arrive Home" or "At Sunset"), then select the actions you want to happen (like "Turn on Living Room Lights" or "Set Thermostat to 72 degrees"). Start simple, test it out, and then add more complexity as you get comfortable. The key is to make your home work for you, not the other way around.
Leveraging Location and Sensor Triggers
Location and sensor triggers are where HomeKit really shines for convenience and security. Location-based automations use your iPhone’s GPS to know when you’re arriving or leaving home. This means you can have your home prepare for your arrival – lights on, temperature just right – without you even thinking about it. Conversely, when you leave, it can ensure everything is turned off and locked up, saving energy and giving you peace of mind.
Sensors add another layer of intelligence. Motion sensors are great for hallways or rooms you don’t use often; they can turn on lights when you walk in and turn them off after a few minutes of no motion. Door and window sensors can alert you if something is opened unexpectedly, or they can be used to trigger other actions, like turning on a light when a specific door is opened after dark. Combining these triggers with scenes makes your home incredibly responsive to your presence and activity.
Expanding Your Smart Home with HomeKit
So, you’ve got the basics down with HomeKit, and things are running smoothly. Maybe you’ve got a few lights on timers and Siri can dim the living room for movie night. That’s awesome! But what’s next? Your smart home journey doesn’t have to stop there. There’s a whole world of devices out there that can make your home even more convenient and, well, smarter.
Popular HomeKit Device Categories
When you’re ready to add more, think about what would actually make your life easier. Don’t just buy stuff because it’s shiny and new. Here are some common areas people expand into:
- Lighting: Beyond just on/off, think about smart bulbs that change color for mood lighting, or smart switches that control ceiling fans and other fixtures. Brands like Philips Hue and Lutron Caseta have a big presence here.
- Climate Control: Smart thermostats are a big one. Devices from ecobee or Honeywell can learn your schedule and help save energy by adjusting the temperature when you’re away or asleep. You can even control them from your phone while you’re on vacation.
- Security: This is a popular area. HomeKit Secure Video cameras offer encrypted recording that stays local, which is a nice privacy feature. Smart locks let you grant temporary access to guests, and door/window sensors can alert you if something’s amiss.
- Sensors: These are the unsung heroes. Motion detectors can turn on lights when you walk into a room, and environmental sensors can tell you about air quality or humidity. Some even detect water leaks, which could save you a lot of trouble.
Understanding Thread and Matter Support
As you look at newer devices, you’ll start seeing terms like "Thread" and "Matter." Don’t let them scare you off; they’re actually pretty important for the future of smart homes.
- Thread: Think of this as a more reliable way for your smart devices to talk to each other. It creates a mesh network, meaning devices can relay messages for each other. This makes your network stronger and less dependent on your Wi-Fi router being in the perfect spot for every single gadget.
- Matter: This is a newer standard that aims to make devices work across different smart home systems, not just HomeKit. So, a Matter-certified device should, in theory, work with Apple HomeKit, Google Home, and Amazon Alexa. It’s all about making things simpler and more compatible.
Look for the Matter logo on new devices; it’s a good sign for future-proofing your smart home.
Considering Professional Installation
Some smart home additions are simple plug-and-play. Others? Not so much. If you’re thinking about something more involved, like a whole-house lighting system, a complex security camera setup, or integrating smart controls with your HVAC, it might be worth calling in the pros.
- Electrical Work: Many smart switches, outlets, and hardwired devices require actual electrical wiring. If you’re not comfortable with that, it’s best to hire an electrician. Safety first, right?
- Complex Systems: Integrating multiple systems – like security, climate, and lighting – can get complicated. Professionals have the experience to make sure everything works together without conflicts.
- Time Savings: Sometimes, paying for installation just saves you a massive headache and a lot of time. If you’ve got a busy schedule, this can be a worthwhile investment.
Advanced Apple HomeKit Features
HomeKit Secure Video Explained
HomeKit Secure Video is a neat feature that lets you use your HomeKit security cameras to record video clips when motion is detected. The really cool part is that these recordings are stored securely in your iCloud account, and they’re encrypted end-to-end. This means only you can see them, not even Apple. It’s a big win for privacy. You can view these clips right in the Home app, and they’re kept for 10 days or as long as your iCloud storage plan allows. To use it, you’ll need a HomeKit Secure Video-compatible camera and an iCloud+ plan with enough storage. You also need a Home Hub set up, like an Apple TV or HomePod.
Utilizing Adaptive Lighting
Adaptive Lighting is a feature that automatically adjusts the color temperature of your compatible smart lights throughout the day. Think of it like natural sunlight. In the morning, the lights might be a cooler, brighter white to help you wake up and feel more alert. As the day goes on, they gradually shift to warmer, softer tones, which can be more relaxing in the evening. It’s all about making your home’s lighting feel more natural and supportive of your daily rhythm. To get this working, you need lights that support adaptive lighting and you’ll need to enable it for those lights in the Home app. It’s a subtle change, but it can make a difference in how your home feels.
Integrating with Apple Shortcuts
This is where things get really powerful. Apple Shortcuts lets you create custom commands or sequences of actions that can control your HomeKit devices. You can build shortcuts that do more than just turn on a light; you can create a "Movie Night" shortcut that dims the lights, locks the doors, and turns on the TV, all with a single tap or a voice command. You can even trigger shortcuts based on when you arrive home or leave. Here’s a quick look at how you might set one up:
- Open the Shortcuts app on your iPhone or iPad.
- Tap the ‘+’ icon to create a new shortcut.
- Search for "Home" actions and select the ones you want, like "Control My Home" or "Set Scene."
- Choose your devices or scenes and set their states (e.g., "Turn off all lights," "Set thermostat to 70°F").
- Give your shortcut a name (e.g., "Good Morning") and optionally add it to your Home Screen or set up a Siri phrase to activate it.
Troubleshooting Common HomeKit Issues
Even the most well-put-together smart home systems can hit a snag now and then. Don’t worry, most HomeKit problems are pretty straightforward to fix. It’s usually just a little hiccup in communication or a setting that’s gotten out of whack. Let’s walk through some common headaches and how to sort them out.
Resolving Device Connection Problems
So, your smart bulb or lock suddenly goes dark in the Home app. What gives? First off, take a breath. The most common culprit is a simple connectivity issue.
Here’s a checklist to get things talking again:
- Check Your Wi-Fi: Is your internet working? Sometimes, the whole network just needs a quick reboot. Try restarting your router and modem. Wait a few minutes for everything to come back online before checking your devices.
- Device Proximity: If you’re adding a new device, try moving it closer to your Home Hub (like an Apple TV or HomePod) or your Wi-Fi router during the setup process. Once it’s added, you can move it to its final spot.
- Home Hub Status: Make sure your Home Hub is powered on and connected to your network. If it’s offline, nothing else can control your accessories remotely.
- Device Power: It sounds obvious, but double-check that the device itself has power. Is the light switch on? Is the battery in the lock fresh?
- Restart the Device: Sometimes, a simple power cycle of the problematic accessory can do wonders. Unplug it, wait a bit, and plug it back in.
Diagnosing Automation Failures
Automations are the magic of HomeKit, but when they don’t fire off, it’s frustrating. Did your "Good Morning" scene not turn on the lights? Did the porch light forget to turn off?
- Verify Device Status: The first thing to check is if all the devices involved in the automation are actually online and responding in the Home app. If one device is offline, the whole automation might be blocked.
- Review Automation Settings: Go back into the Home app and look at the automation itself. Are the conditions still correct? For time-based automations, is the time zone correct? For location-based ones, are your location services enabled for the Home app and working properly?
- Toggle It Off and On: Sometimes, simply disabling the automation and then re-enabling it can reset whatever was causing the glitch.
- Check for Conflicting Automations: Do you have multiple automations that might be trying to do similar things at the same time? This can sometimes cause unexpected behavior.
Ensuring Home Hub Stability
Your Home Hub is the brain of your HomeKit setup when you’re away from home. If it’s not stable, you’ll run into all sorts of issues, from remote access problems to automations not running.
- Keep it Updated: Make sure your Apple TV or HomePod is running the latest version of its operating system. Apple often releases updates that fix bugs and improve performance.
- Network Connection: A solid network connection is key. If your Home Hub is on Wi-Fi, ensure it has a strong signal. If possible, using a wired Ethernet connection for an Apple TV can provide extra stability.
- Avoid Unplugging: Try not to unplug your Home Hub unnecessarily. It needs to be online consistently to manage your accessories. If you do need to move it, give it a few minutes to reconnect fully after plugging it back in.
- Check for Overheating: Ensure your Home Hub has good ventilation. If it’s tucked away in a hot, enclosed space, it might be overheating and becoming unstable.
Your Smart Home Journey Continues
So, that’s pretty much the rundown on Apple HomeKit for 2025. We’ve covered how to get started, pick out the right gear, and even make your devices work together without you lifting a finger. It’s not some futuristic fantasy anymore; it’s about making your everyday life a little easier and more comfortable. Remember, you don’t have to do it all at once. Start with one thing, like a smart plug for your living room lamp, and see how you like it. As you get more comfortable, you can add more. HomeKit is designed to grow with you, and with new tech like Matter becoming more common, things are only going to get more connected. Keep experimenting, keep learning, and enjoy the convenience of a home that works for you.
Frequently Asked Questions
What exactly is Apple HomeKit?
Think of Apple HomeKit as a special system from Apple that lets you control smart devices in your house using your iPhone, iPad, or even just by talking to Siri. It’s like having a remote control for your whole home, making things like lights, locks, and thermostats work together easily.
Do I need any specific Apple devices to use HomeKit?
Yes, you’ll need at least one Apple device like an iPhone or iPad that’s running a recent version of its operating system. You also need a ‘home hub,’ which can be an Apple TV or a HomePod, to control things when you’re away from home.
How do I know if a smart device will work with HomeKit?
Look for a label on the product’s box or in its description that says ‘Works with Apple HomeKit.’ Sometimes, devices might also mention support for ‘Matter,’ which is a newer standard that works with HomeKit and other smart home systems too.
What’s the difference between a HomeKit scene and an automation?
A ‘scene’ is like a preset button you tap to make several things happen at once, like a ‘Movie Night’ scene that dims the lights and turns on the TV. An ‘automation’ is something that happens automatically based on a trigger, such as your lights turning on when you arrive home or at sunset.
What is HomeKit Secure Video?
This is a cool feature for security cameras. It lets your camera record video safely and privately, storing it in your iCloud account. It can even tell you if it sees people, pets, or packages, and it doesn’t use up your regular iCloud storage space.
My HomeKit device isn’t working. What should I do?
First, check if your Wi-Fi is working well where the device is. Try restarting your router and the device itself. Make sure your home hub (like Apple TV or HomePod) is on and connected. If it’s a new device, try moving it closer to your router during setup.