Ever thought about making a tiny version of yourself? Like, a little plastic you that can sit on your desk? It sounds kind of wild, but it’s actually totally doable now, thanks to some cool AI tools. You can take a picture and turn it into a 3D model, and then print it. It’s a fun project, and honestly, pretty neat to see yourself as a miniature figure. We’ll walk through how to do it, from picking the right photo to holding your finished mini-me.
Key Takeaways
- You can 3D print yourself by using AI to turn a photo into a digital 3D model.
- Good lighting and a plain background in your starting photo help get better results.
- AI tools can help style your photo into a figurine and then convert it to a 3D model.
- Adjusting the 3D model’s details, like polygon count and wall thickness, is important before printing.
- After printing, you can remove supports and even paint your mini-me for a custom look.
Capturing Your Likeness For A 3D Print Myself
Alright, so you want to make a little version of yourself, a mini-me, right? The first big step is getting a good starting point, and that means a good picture. Think of it like taking a portrait, but for a 3D model. You don’t need a fancy camera or anything, but a clear, well-lit photo is going to make your life a whole lot easier down the line.
Selecting The Perfect Photo
When you’re picking your photo, try to stand in front of a plain background. Seriously, a busy background can really mess with the AI later on. Also, good lighting is your friend. Avoid harsh shadows or super dim shots. A simple, relaxed pose works best. Think standing up, maybe with your arms at your sides, not too much movement. This makes it easier for the software to figure out your shape. If you’re aiming for a full-body figurine, make sure your whole body is in the frame. It’s also helpful if the photo isn’t too dark or blurry. A clear shot is key!
Essential Tools For Your 3D Print Myself Project
So, what do you actually need to get this done? It’s not a huge list, thankfully.
- A good quality photo: Like we just talked about, this is number one.
- AI Software: You’ll need some kind of AI tool that can take your photo and turn it into a 3D model. There are a few options out there, some free, some paid. We’ll get into the specifics later, but just know you’ll need access to one of these.
- A 3D Printer or Service: This is how you’ll actually get the physical mini-me. If you have a 3D printer at home, great! If not, there are plenty of online services that can print your model for you. You can even find local shops that do it.
- Optional: A 3D Scanner: While not strictly necessary for this photo-to-3D method, if you want super accurate scans of objects or even people, a dedicated scanner like those from Revopoint can be a good investment.
Understanding AI’s Role In Creating Your Mini-Me
AI is doing a lot of the heavy lifting here. It’s not magic, but it’s pretty close. The AI looks at your 2D photo and tries to figure out the depth and shape to create a 3D representation. It’s like it’s guessing what your sides and back look like based on what it can see from the front. Different AI tools have different strengths, some are better at certain styles, and some are more accurate. We’ll explore how to pick the right one for your project in the next section. The goal is to get a digital file that looks like you, ready for the next stage of turning it into a physical object.
Transforming Your Image Into A Digital 3D Model
Okay, so you’ve got a great photo, maybe even a stylized version of yourself from an AI art tool. Now comes the really cool part: turning that 2D image into a 3D model that a printer can actually understand. This is where the magic really happens, and thankfully, AI has made this process way more accessible than it used to be.
Stylizing Your Photo With AI Editing Tools
Before we jump into the 3D conversion, it’s a good idea to get your source image just right. Think about the final look you want for your mini-me. Do you want it to look like a cartoon character, a Funko Pop, or something else entirely? AI editing tools are fantastic for this. You can upload your selfie and use prompts to change its style. For example, you could ask the AI to "turn me into a Pixar-style character with a plain background" or "make me look like a classic action figure." The key here is to get a clean, full-body image with a simple background. This makes the next step, the 3D conversion, much smoother. It’s like prepping your canvas before you start painting – a little effort upfront saves a lot of headaches later.
- Use clear, full-body photos. Avoid blurry images or close-ups. The AI needs to see your whole form.
- Experiment with different styles. Try prompts like "anime character," "superhero," or "vintage toy" to see what you like best.
- Aim for a neutral background. A plain white or gray background helps the AI focus on you and not get confused by busy scenery.
Converting Images To 3D Models
This is the core of turning your picture into something tangible. There are several AI-powered services designed specifically for this. You’ll typically upload your stylized 2D image, and the service will generate a 3D model. Some tools might ask you to pick a general style or preset, while others try to figure it out automatically. The output is usually a file format like GLB or OBJ, which is the digital blueprint for your figurine. The quality of the initial photo and the AI’s interpretation are key to a good 3D model. It’s not always perfect on the first try, so don’t be discouraged if you need to generate it a couple of times or tweak the settings.
Choosing The Right 3D Model Preset
When you’re using an image-to-3D service, you might encounter options for different model presets or quality settings. These presets are essentially pre-configured settings that tell the AI how to interpret your image and generate the 3D geometry. For example, you might see options like "low poly," "high detail," or presets named after specific styles like "figurine" or "character." For creating a mini-me, you generally want a preset that balances detail with printability. A preset that’s too complex might result in a model that’s difficult to print, while one that’s too simple might lose important features. Look for presets that are described as suitable for figurines or general character models. If you’re unsure, starting with a medium-detail preset is usually a safe bet. You can always refine it later if needed.
Optimizing Your 3D Model For Printing
So, you’ve got your digital model, looking pretty good, right? But before we send it off to the printer, we need to make sure it’s ready for the real world. Think of it like prepping a cake before baking – you want everything just right so it comes out perfect.
Remeshing For Improved Geometry
Sometimes, the AI magic that turns your photo into a 3D model can leave behind some messy geometry. This means the surfaces might be a bit lumpy or have too many tiny triangles, which can cause problems when printing. Remeshing is like tidying up that digital mess. It rebuilds the surface of your model with cleaner, more organized polygons. This can make the model smoother and easier for the printer to handle.
Adjusting Polygon Count For Better Prints
Models are made up of polygons, usually triangles. A super high polygon count means lots of detail, which sounds good, but it can also make the file huge and slow to process. On the flip side, too few polygons and your model might look blocky. For most desktop 3D printers, aiming for a polygon count somewhere between 5,000 and 15,000 is usually a good sweet spot. It balances detail with printability.
Here’s a rough guide:
| Model Type | Recommended Polygon Count |
|---|---|
| Simple Figurine | 5,000 – 8,000 |
| Detailed Character | 8,000 – 15,000 |
| Complex Object | 15,000+ (use with caution) |
Ensuring Wall Thickness For Durability
This is a big one. If parts of your model are too thin, they might just break off during printing or handling. We need to make sure that every part of your mini-me has enough thickness to stand up on its own. Most 3D printers can handle walls that are at least 1mm thick, but thicker is often better for smaller details or parts that might get bumped. You’ll want to check for any super-thin areas, like fingers or thin clothing details, and beef them up a bit. This step is key to making sure your creation doesn’t fall apart.
Preparing Your 3D Model For The Printer
Alright, so you’ve got your digital mini-me looking pretty sharp. Now it’s time to get it ready for the actual printing part. This stage is all about making sure your 3D model plays nice with the printer and comes out looking its best. Think of it like prepping a cake mix before you bake it – you gotta get the ingredients and measurements just right.
Exporting Your Model As An STL File
First things first, you need to get your 3D model out of whatever program you used and into a format the printer understands. The most common file type for 3D printing is STL (which stands for Stereolithography, fancy, right?). It’s basically a way to describe the surface geometry of your 3D object using triangles. Most AI tools that convert images to 3D models will have an export option for STL. Just look for a "Download" or "Export" button and select STL. If your tool gives you options like GLB or OBJ, make sure you pick STL for printing. This file format is pretty standard across most 3D printing software and services.
Adding Eyeballs And Fine-Tuning Details
Sometimes, the AI is amazing, but it might miss tiny details. For your mini-me, this could mean the eyes. Often, the AI might leave them blank or just as part of the face texture. You might want to add simple spheres for eyeballs, or even just paint a little black dot where the pupil should be. You can do this in some of the 3D modeling software or even in certain slicer programs. It’s these little touches that really bring your figurine to life. Also, check for any weird floating bits or parts that look too thin. You might need to go back and smooth out some areas or add a bit more material where it looks weak. The goal here is to make your model look as good on the printer bed as it does on your screen.
Color Selection For Multi-Color Printing
If you’re lucky enough to have a multi-color 3D printer, this is where you get to play with colors! Your 3D model might come out with a default color scheme, or the AI might have assigned colors based on your photo. You can usually adjust these colors in your slicer software. Think about what colors you want for your clothes, hair, and skin. You don’t need a million colors; sometimes just 2-4 well-chosen colors can make your mini-me look fantastic. If you’re printing in a single color, don’t worry about this step too much, but you can always plan to paint it later. For multi-color printing, it’s good to have a plan for which parts will be which color before you start slicing. This helps avoid any surprises when the print is done.
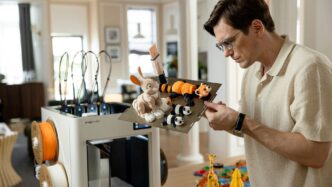
The 3D Printing Process For Your Mini-Me
Alright, so you’ve got your digital 3D model all prepped and looking sharp. Now comes the fun part – actually bringing your mini-me to life with a 3D printer! This stage is where your digital creation starts to take physical form. It might seem a bit technical, but we’ll break it down.
First up, you need to get your 3D model ready for the printer. This involves using something called ‘slicer’ software. Think of it as a translator that takes your 3D model and turns it into a set of instructions, layer by layer, that the 3D printer can understand. It figures out the path the print head needs to take, how much plastic to lay down, and all that good stuff.
Here are some key things the slicer helps with:
- Generating Support Structures: Sometimes, parts of your model might hang out in mid-air as the printer builds it up. The slicer can automatically add temporary "supports" made of plastic to hold these bits up while printing. You’ll pop these off later.
- Optimizing Print Speed and Quality: You can tweak settings to balance how fast the print finishes with how good it looks. Faster prints might be a bit rougher, while slower ones can be super detailed.
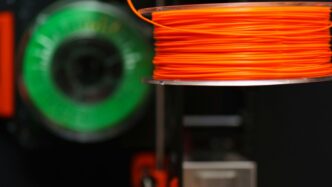
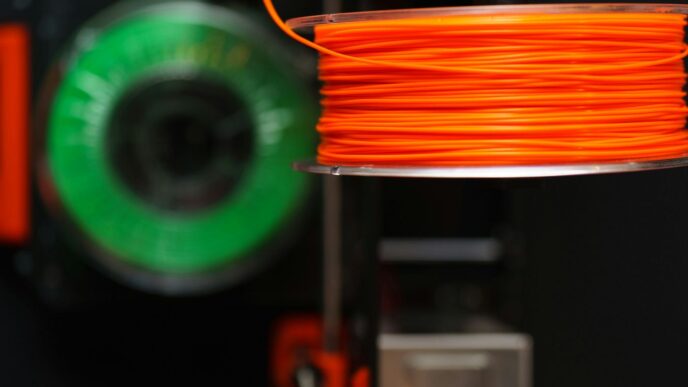
- Calculating Material Usage: It gives you an idea of how much filament you’ll need for the print, which is handy for planning.
If you’re aiming for a multi-color mini-me, things get a little more involved. Some advanced printers can switch between different colored filaments automatically during the print. This means you can have different colors for different parts of your figurine without having to do any manual swapping. It’s pretty neat, but it requires a printer that supports this feature and a model that’s been set up for multi-color printing, often by assigning different colors to different parts of the model in your 3D software before slicing.
The actual printing process can take anywhere from a few hours to a couple of days, depending on the size and complexity of your mini-me. It’s a bit of a waiting game, but seeing your digital self slowly materialize layer by layer is really something else. Just make sure your printer is calibrated and has enough filament before you hit ‘print’!
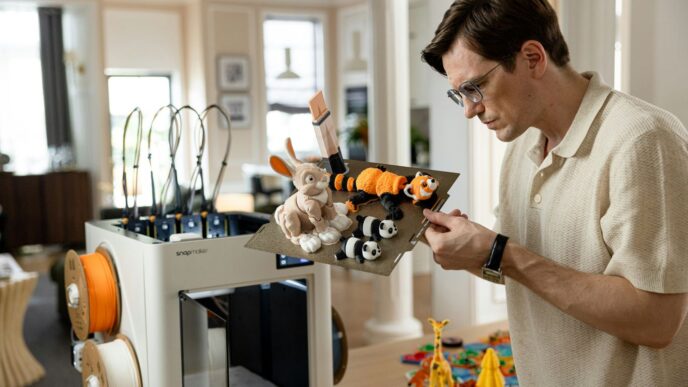
Finishing Your 3D Print Myself Creation
Alright, so you’ve got your mini-me figure fresh off the printer. It might look pretty cool already, but we’re not quite done yet. This is where we take it from a raw print to something you’ll actually want to show off.
Removing Support Materials
Those support structures did their job holding things up during printing, but now they’re just in the way. You’ll want to carefully break them off. Sometimes they snap away easily, other times you might need a small tool, like pliers or a craft knife, to gently pry them loose. Be patient with this step; you don’t want to accidentally break off a delicate part of your figurine. If you used a special support material, it should peel away much cleaner, leaving less mess.
Painting Your Figurine For Extra Detail
This is where your mini-me really comes to life. Even if your printer did a multi-color print, there are always small details that paint can bring out. Think about the eyes, buttons on clothes, or even just adding a bit of shading to make features pop.
- Gather your supplies: You’ll need acrylic paints, small brushes (different sizes are good), and maybe a palette to mix colors on.
- Start with the base colors: Paint the main areas of your figure first.
- Add details: Use smaller brushes for things like eyes, lips, or any patterns on clothing.
- Consider shading and highlights: A little bit of darker paint in crevices and lighter paint on raised areas can add a lot of depth.
- Seal it: Once the paint is dry, a clear coat can protect your work.
Displaying Your Custom Mini-Me
Now for the fun part – showing off your creation! You’ve put in the work, and your mini-me deserves a prime spot.
- Find a good location: A shelf, a desk, or even a dedicated display case works well.
- Consider a base: Sometimes adding a simple base, maybe painted to look like grass or a sidewalk, can make your figurine stand out even more.
- Group them: If you’ve made more than one mini-me, displaying them together can create a cool collection.
You’ve Made Your Mini-Me!
So there you have it! You’ve gone from a simple photo to a cool 3D figurine of yourself. It might have taken a few tries, and maybe your first print wasn’t perfect, but that’s part of the fun, right? Don’t be afraid to experiment with different photos, prompts, or even try making figurines of your friends (with their okay, of course!). This whole process shows just how wild and accessible this tech is becoming. Now you’ve got a unique little version of yourself to show off, or maybe even paint to add some extra flair. Keep playing around with it, and who knows what else you’ll create!