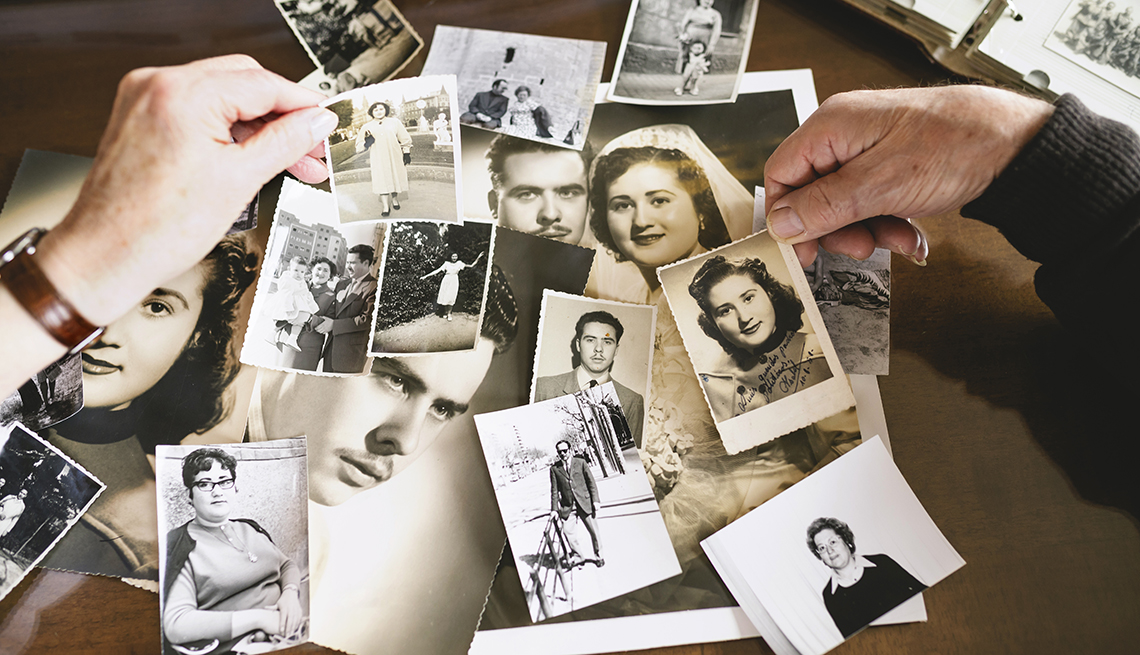
Are you ready to bring your old photos back to life?
In this article, we’ll show you how to digitize and print those cherished memories. You’ll learn the step-by-step process of organizing and cleaning your photos before choosing the best scanning method.
We’ll guide you through digital editing and backing up your files for safekeeping.
Finally, we’ll help you select the perfect printing method and offer tips on organizing and storing your newly printed photos.
Let’s get started!
Key Takeaways
-
Gathering and sorting photos from different sources is the first step in the digitization process.
-
Cleaning and enhancing old photos using photo editing software can significantly improve their appearance.
-
When scanning photos, it is important to choose the right type of scanner and handle fragile photos with care.
-
Backing up digital copies of old photos using cloud storage or external hard drives is crucial for preserving them. Additionally, considering factors such as budget, desired outcome, and print quality is important when selecting a printing method.
Step 1: Organize Your Photos
Before you can digitize and print your old photos, you’ll need to organize them. This step is crucial in ensuring a smooth and efficient digitizing process.
Start by gathering all your photos from different sources, such as albums, envelopes, or shoeboxes. Sort them into categories based on events, dates, or people featured in the photos. This will make it easier to locate specific pictures later on.
Once organized, assess the condition of each photo and prioritize any that require restoration. Photo restoration may involve removing dust, scratches, or discoloration to bring back their original quality. If you’re not comfortable doing this yourself, consider seeking professional help.
Next, invest in a good photo scanning software or hire a service that specializes in digitization. These tools will convert your physical photos into digital files with high resolution and clarity. Make sure to follow the instructions carefully for optimal results.
After digitizing your photos, create an archival storage system for both physical and digital copies. Store physical copies in acid-free sleeves or albums designed for long-term preservation. For digital copies, regularly back them up on multiple devices or cloud storage platforms to prevent loss.
Step 2: Clean Your Photos
Once you’ve gathered all your pictures, it’s time to start cleaning them. Cleaning your old photos is an essential step in the process of digitizing and preserving them. Restoring the quality of your photographs begins with removing dust and dirt that may have accumulated over time. To do this, use a soft brush or a clean microfiber cloth to gently wipe away any particles without causing damage.
Next, focus on enhancing the colors of your photos. Over the years, colors can fade or become dull. To bring back their vibrancy, use photo editing software or apps designed specifically for restoring old photographs. Adjusting brightness, contrast, and saturation can make a significant difference in reviving the original colors.
Retouching scratches and blemishes is another crucial aspect of cleaning old photos. With time, these imperfections can mar the overall appearance of your pictures. Using digital retouching tools like cloning and healing brushes can help repair minor scratches and restore the original look.
Lastly, remember that preserving memories is at the heart of this process. While cleaning your photos, handle them with care to avoid further damage. Store them in acid-free sleeves or albums to protect them from environmental factors such as humidity and sunlight.
Step 3: Choose Your Scanning Method
To choose the scanning method that works best for you, consider factors such as the type of scanner you have and the desired quality of your digital images.
When it comes to choosing equipment, you have two options: DIY or professional scanning. If you have a flatbed scanner at home, you can easily digitize your photos yourself. This option is cost-effective and allows you to have control over the process. However, keep in mind that DIY scanning may not produce the same high-quality results as professional scanning.
When it comes to scanning resolution options, consider how you plan to use your digital images. If you want to print large copies or zoom in on details, higher resolutions are recommended. On the other hand, if your goal is simply to view them on a screen or share them online, lower resolutions will suffice.
Another important aspect to consider is the scanning software options available to you. Most scanners come with their own software that allows you to adjust settings such as brightness and contrast. Additionally, there are various third-party software programs available that offer more advanced features and customization options.
Lastly, if your photos are fragile or delicate, it’s important to take extra precautions when handling them during the scanning process. Consider using gloves or a clean cloth when touching them and ensure that they are properly supported while being scanned.
Step 4: Digital Editing
When editing your digital images, you can use photo editing software to enhance their brightness, contrast, and colors. This allows you to bring out the best in your old photos and make them look as good as new.
There are several basic editing techniques that you can use to enhance and restore old photos. One of these techniques is removing scratches and blemishes from the image. With the help of various tools in the software, such as the healing brush or spot healing tool, you can easily eliminate any imperfections on your photo.
Another important aspect of digital editing is adjusting the brightness and color of your image. This allows you to correct any exposure issues or color casts that may be present in your old photos. By making adjustments to the levels or curves of your image, you can achieve a more balanced and vibrant look.
Overall, using photo editing software gives you the power to transform your old photos into stunning digital images that will last for years to come.
Step 5: Backup Your Digital Files
Backing up your digital files is essential to ensure the safety and preservation of all your valuable data. With the advancement of technology, there are various options available for backing up your files.
One popular option is cloud storage, where you can store your files on remote servers accessed through the internet. This provides an off-site backup solution that protects against physical damage or loss of devices.
Another option is using an external hard drive, which allows you to store large amounts of data locally. These drives are portable and offer a convenient way to back up your files without relying on an internet connection. Additionally, online backup services provide a secure way to store and access your files from anywhere with an internet connection. They often offer automatic backups and encryption for added security.
To manage and organize your backed-up photos effectively, photo management software can be used. This software allows you to easily categorize and tag your photos, making it easier to locate specific images when needed.
Step 6: Select Your Printing Method
If you want physical copies of your digital files, there are a few different printing methods you can choose from. When selecting a printing method, there are several factors to consider.
One option is printing at home using your own printer. This allows for convenience and immediate access to your prints. However, the quality may not be as high as professional printing services, and it can be more expensive in the long run due to ink and paper costs.
Using a professional printing service offers higher quality prints with a variety of options such as different paper finishes and sizes. They also have the expertise to enhance your photos before printing if needed. However, this option may require additional time for processing and shipping.
Choosing the right paper for printing old photos is crucial in preserving their quality. Archival-quality, acid-free paper is recommended to ensure longevity and prevent fading or discoloration over time.
Lastly, deciding whether to print in color or black and white depends on personal preference and the style of the photo. Black and white can add a timeless feel while color can bring vibrancy and depth.
Consider these factors when deciding on a printing method that best suits your needs, budget, and desired outcome for your old photos.
Step 7: Print Your Photos
To ensure the best results, you should carefully select the paper type for printing your cherished memories. When it comes to printing options, there are several factors to consider, with photo paper being a popular choice.
Photo paper is specifically designed to enhance the colors and details of your photos, resulting in a higher quality print. There are different types of photo paper available, such as glossy, matte, and satin finishes.
If you prefer a shiny and vibrant look for your prints, glossy photo paper is a great option. It provides a reflective surface that enhances the colors and contrast in your photos. On the other hand, if you want a more subdued and elegant finish, matte photo paper is ideal. It has a non-reflective surface that reduces glare and gives your prints a smooth texture.
When it comes to DIY printing at home, investing in good quality photo paper can make all the difference in achieving professional-looking results. However, if you don’t have access to high-quality printers or prefer convenience over DIY efforts, there are numerous online printing services available. These services offer various options for photo prints on different types of papers.
The choice between DIY printing or using professional services ultimately depends on your personal preferences and requirements. Whichever method you choose, make sure to prioritize photo quality by selecting the appropriate paper type that will bring out the best in your cherished memories.
Step 8: Organize and Store Prints
Once you have organized and stored your prints, it will be easier for you to access and enjoy your cherished memories whenever you want.
When it comes to storing your printed photos, there are several storage options available to you. One popular choice is using photo albums. These albums typically come with acid-free pages that help protect your photos from deterioration over time. It’s important to choose albums made of archival materials that won’t damage or fade your prints.
If you prefer a more versatile option, photo boxes are a great choice. These boxes allow you to store multiple prints in one place while keeping them safe from dust and light exposure. Look for photo boxes made of acid-free materials to ensure the longevity of your prints. You could also frame your picture and hang it on the wall for better display.
In addition to physical storage solutions, digital organization can also play a valuable role in preserving and accessing your printed photos. By scanning and digitizing your prints, you can create backups and easily organize them on your computer or cloud storage platforms.
Conclusion
Congratulations! You’ve successfully digitized and printed your old photos. By following these steps, you’ve preserved precious memories for generations to come.
Remember to always organize and backup your digital files to ensure their safety.
With the right scanning method and digital editing techniques, you were able to enhance the quality of your photos.
Finally, by choosing a suitable printing method and organizing and storing your prints properly, you can enjoy these timeless photographs anytime you want.
Enjoy your newly digitized and printed photos!


