Due to their complex operations and thread magic, beginners may find sewing machines intimidating. But worry not! Once you load a sewing machine, you may explore a new realm of creative possibilities. In this thorough tutorial, we will solve the puzzle of how to load a sewing machine step-by-step.
Knowing Your Machine for Sewing
Let’s take time to become acquainted with the essential parts of a standard sewing machine before we get started to load a sewing machine:
- Bobbin Case: The tiny, detachable container that stores the lower thread in the bobbin.
- The machine that winds thread onto the bobbin is called a bobbin winder.
- Needle Plate: The sewing instructions are on a metal plate.
- Thread guides: Tiny metal loops or hooks guide the thread through the machine.
- Tension Dial: Regulates the upper thread’s tension.
Let’s begin the process of how to load sewing machine now.
Step 1: Select the Correct Bobbin and Thread
Ensure you have chosen the correct bobbin and thread for your sewing project before loading the machine. Both the bobbin and the line should work with the fabric you use.
Step 2: The Bobbin is Winded
- Position the Thread Spool: Position the thread spool onto the spool pin located at the machine’s top.
- Thread the Bobbin Winder: Pass the thread through the bobbin’s tiny hole, and the thread guides.
- Pull or push the bobbin winder into place to activate it. When the bobbin is complete, it can disengage on its own.
- Begin Winding: To begin winding the bobbin, grasp the thread end, depress the foot pedal, or spin the handwheel. When the thread is complete, make sure it winds evenly and stops.
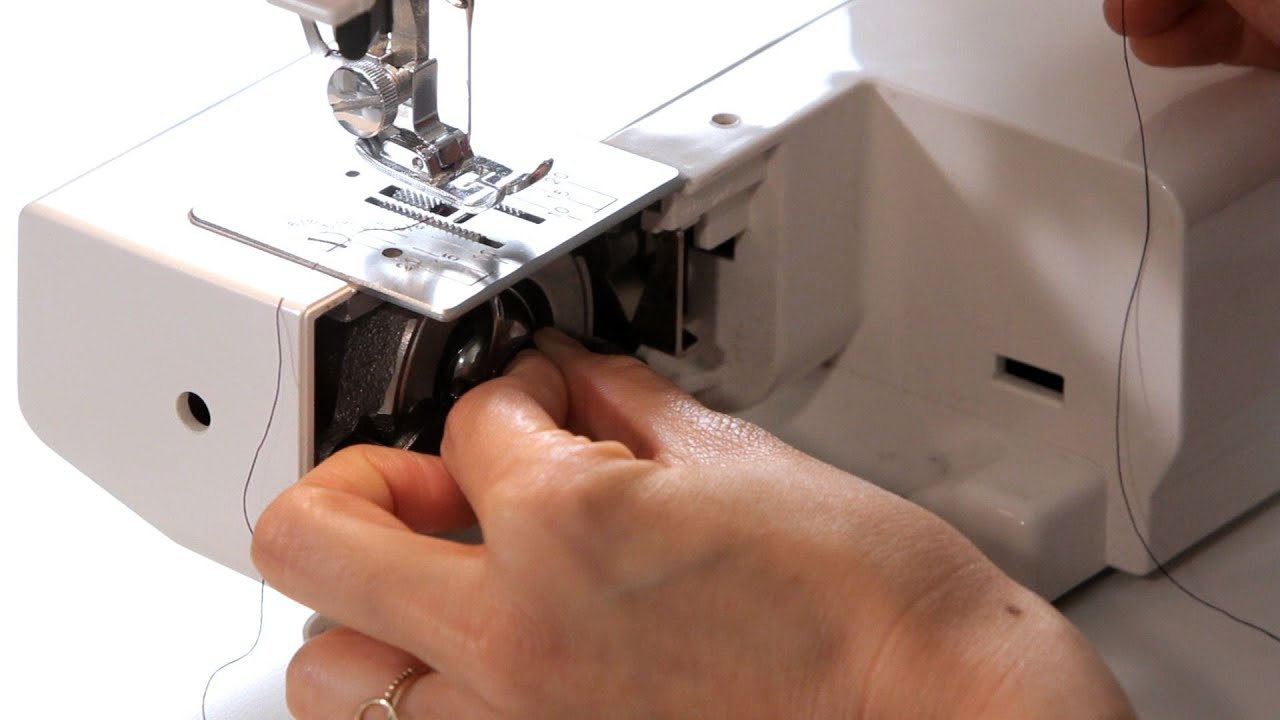
Step 3: Put the Bobbin in place
- Find the Bobbin Case: Lift the bobbin case, often under the needle plate.
- Insert the Bobbin: Make sure the wound bobbin rotates counterclockwise by inserting it into the casing.
- Thread the Bobbin Case: Insert the free end of the thread into the bobbin case’s slit or guides.
Step 4: Upper Thread Threading
- elevate the Needle: To promote the needle to its highest position, turn the handwheel in your direction.
- Thread Spool Placement: Position the thread spool onto the assigned spool pin.
- Thread the Guides: Adhere to the machine’s recommended threading path, typically denoted by arrows or numbers.
- Through the Tension Discs: Thread should be passed through the discs. More recent machines might have a distinct threading channel for the automatic needle threader.
- Thread the Needle: Work your way backwards through the front. Use the automated needle threader on your machine if it has one for increased convenience.
Step 5: Select the Bobbin Thread
- Hold the Needle Thread: Using your left hand, grasp the loose end of the needle thread.
- Rotate the Handwheel: To lower the needle, slowly crank the Handwheel in your direction. This facilitates the bobbin thread to emerge.
- Grab the Bobbin Thread: Pull up a loop of the bobbin thread using your fingers or a pair of tweezers.
Step 6: Check Your Setup
- close the bobbin box by making sure it is shut firmly.
- Choose a Straight Stitch: Select a simple straight stitch on your machine.
- Test Stitch: To ensure that the machine is stitching correctly, make a few stitches on a scrap of fabric.
In summary
Best wishes! Now that you know how to load a sewing machine and your sewing machine is loaded and ready to go, you may start your stitching journey. Recall that practice makes perfect. To increase your confidence and machine familiarity, take the time to experiment with various stitches and fabrics.
Never be afraid to ask other sewers for advice or review the handbook that came with your machine as you continue your sewing journey. Loading your machine is just the start of the fantastic projects you can do in the creative world of sewing. Now thread the needles and start sewing! Enjoy your stitching!