So, you’re looking to get a handle on Ubuntu and Python, huh? It’s a pretty solid combo for anyone wanting to do some serious coding. Whether you’re just starting out or you’ve been around the block a few times, this guide is meant to break things down. We’ll cover setting up your environment, getting cozy with Python’s basics, and even some Ubuntu command-line stuff that’ll make your life easier. Think of it as a friendly chat about making Ubuntu and Python work together for you.
Key Takeaways
- Setting up Python on Ubuntu is straightforward using the terminal and package manager.
- Understanding Python’s core concepts like variables, data types, and basic operations is the first step.
- Control flow statements (`if`, `else`, loops) are key to making your Python programs dynamic.
- Functions and modules help organize your Python code, making it easier to manage and reuse.
- Familiarity with basic Ubuntu commands for file management and text processing is helpful for developers.
Getting Started with Ubuntu and Python
Alright, so you’ve decided to dive into the world of Python, and you’re doing it on Ubuntu. Smart move! Ubuntu is a fantastic operating system for developers, and Python is just incredibly versatile. Getting these two to play nicely together is the first real step.
Installing Python on Ubuntu
First things first, let’s make sure Python is actually on your system. Most Ubuntu installations come with Python 3 already, but it’s good to check. Open up your terminal – that’s the black window where you type commands – and type python3 --version. If you see a version number pop up, great! If not, or if you want to make sure you have the latest, you’ll need to install it.
Here’s how you do that:
- Update your package list: Type
sudo apt-get update. This just refreshes the list of available software. You’ll need to enter your password. - Install Python 3: Then, type
sudo apt-get install python3. This command fetches and installs Python.
After that, run python3 --version again to confirm it’s there.
Choosing Your Integrated Development Environment
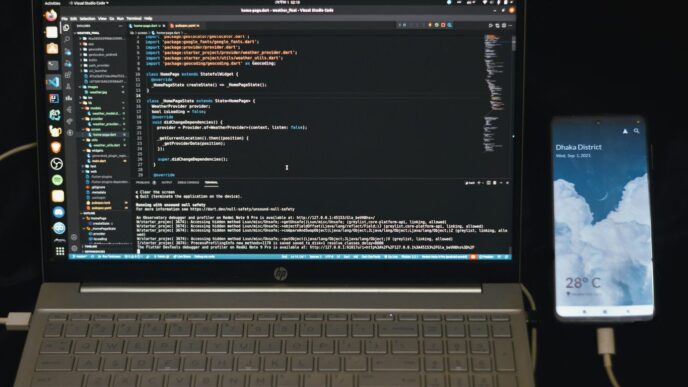
While you can write Python code in a basic text editor, it’s way easier and more productive to use an Integrated Development Environment, or IDE. Think of it as a souped-up notepad specifically for coding. There are tons of options, but here are a few popular ones:
- VS Code: It’s free, super flexible, and has a massive library of extensions, including excellent ones for Python. It’s a great all-around choice.
- PyCharm: This one is built specifically for Python. It has some really smart features that help you write code faster and catch errors early. There’s a free ‘Community’ version that’s more than enough for most people.
- Jupyter Notebooks: If you’re into data analysis or just like experimenting with code in chunks, Jupyter is awesome. It lets you mix code, text, and visualizations all in one place.
Pick one that feels comfortable to you. You can always switch later if you find something better suited to your style. Getting comfortable with your IDE is a big part of becoming a proficient developer, much like learning to use your phone efficiently [4621].
Verifying Your Python Installation
Once you’ve installed Python and maybe even your IDE, it’s time for a final check. Open your terminal again and type python3 --version. You should see the version number you just installed. If you want to start an interactive Python session, just type python3 and hit Enter. You’ll see a >>> prompt, which means Python is ready to take your commands. Type exit() to leave the interactive session. This confirms that your setup is good to go, and you’re ready to start writing some code!
Mastering Python Fundamentals
Alright, let’s get down to the nitty-gritty of Python. If you’re just starting out, this is where the real magic begins. We’re going to cover the absolute basics that every Python developer needs to know. Think of these as the building blocks for everything else you’ll do.
Understanding Variables and Data Types
So, what’s a variable? Basically, it’s a named storage location for data. You can put numbers, text, or other kinds of information into these "boxes" and give them names so you can use them later. Python is pretty cool because you don’t have to tell it what type of data a variable will hold beforehand; it figures that out on its own. This is called dynamic typing.
Here’s a quick look:
- Variables: Think
user_name = "Alice"orscore = 100. - Data Types: Python has several built-in types like integers (
int), floating-point numbers (float), strings (strfor text), and booleans (boolfor True/False). - Naming: Stick to lowercase letters and underscores for variable names, like
total_count.
Exploring Basic Python Operations
Once you have variables, you’ll want to do stuff with them. Python makes this pretty straightforward. You’ve got your standard arithmetic operations, like adding (+), subtracting (-), multiplying (*), and dividing (/). But it also has some neat tricks for strings, like joining them together using the + operator.
Let’s see a couple of examples:
| Operation | Example Code | Result |
|---|---|---|
| Addition | 5 + 3 |
8 |
| String Concatenation | "Hello" + " World" |
"Hello World" |
| Multiplication | "Hi" * 3 |
"HiHiHi" |
Utilizing the Print Statement and Comments
How do you actually see what your code is doing? That’s where the print() function comes in. It’s your direct line to the console, showing you output, variable values, or just messages. It’s super handy for debugging or just letting the user know what’s happening.
And then there are comments. These are notes you leave in your code for yourself or others to read. Python ignores them when it runs the code. They’re great for explaining tricky bits or just reminding yourself why you did something a certain way. You can use a single hash (#) for a one-line comment, or triple quotes (""" or ''') for multi-line comments or docstrings. Good commenting makes your code much easier to understand later on. You can find more about these basics on the Python tutorial.
Remember, getting these basics down solid is key to building anything more complex. Don’t rush it; make sure you’re comfortable before moving on.
Controlling Program Flow in Python
Alright, so you’ve got the basics down, and now it’s time to make your Python programs actually do things based on different situations. This is where control flow comes in. Think of it like giving your code a brain so it can make decisions and repeat tasks without you having to babysit it.
Implementing Conditional Statements
This is all about making choices. Python uses if, elif (which is short for ‘else if’), and else to handle these decisions. You tell Python, "If this is true, do that. Otherwise, if this other thing is true, do this instead. And if none of those are true, then do this last thing."
Here’s a quick look:
ifstatement: Checks a condition. If it’s true, the code block under it runs.elifstatement: If theifcondition was false, Python checks theelifcondition. You can have multipleelifs.elsestatement: If all the precedingifandelifconditions were false, the code block underelseruns.
age = 17

if age >= 18:
    print("You can vote.")
elif age >= 16:
    print("You can get a learner's permit.")
else:
    print("You're too young for most things.")
Utilizing Logical Operators
Sometimes, one condition isn’t enough. You might need to check if two things are true, or if at least one of them is true. That’s where logical operators come in handy. They let you combine conditions.
and: Both conditions must be true.(temperature > 20) and (temperature < 30)means the temperature has to be greater than 20 AND less than 30.or: At least one of the conditions must be true.(is_raining) or (is_snowing)means if it’s raining OR snowing (or both), something happens.not: Reverses the truth of a condition.not (is_weekend)means if it’s NOT a weekend.
hour = 14
weekend = False

if hour >= 9 and hour <= 17 and not weekend:
    print("It's a workday.")
Mastering For and While Loops
Loops are super useful for repeating actions. Python has two main types:
forloop: This is great when you know how many times you want to repeat something, or when you want to go through each item in a list, string, or other sequence. It’s like saying, "For every item in this collection, do this."whileloop: This loop keeps running as long as a certain condition stays true. It’s like saying, "Keep doing this while this condition is met." You have to be careful withwhileloops to make sure they eventually stop, or you’ll get an infinite loop!
You can also use break to exit a loop early, even if the condition is still true, or continue to skip the rest of the current loop iteration and move to the next one. These give you even more control over how your loops behave.
Building with Functions and Modules
Functions are like little machines you can build in Python. You give them some stuff (inputs), they do a job, and sometimes they give you something back (output). This makes your code way easier to manage because you can reuse these machines instead of writing the same instructions over and over. It’s a big step up from just writing code line by line.
Defining and Calling Python Functions
To make a function, you use the def keyword, followed by the function’s name, some parentheses (), and a colon :. Whatever code belongs to the function needs to be indented underneath. Calling a function is as simple as typing its name followed by parentheses, and if it needs inputs, you put them inside the parentheses.
# This function just says hello
def say_hello():
    print("Hello there!")

# Now we call it to make it run
say_hello()
Working with Parameters and Return Values
Functions can be more useful if they can accept information. These are called parameters, and you list them inside the parentheses when you define the function. When you call the function, you provide the actual values, called arguments. Some functions also give you back a result using the return keyword. This is how you get information out of a function.
# A function that adds two numbers and gives back the total
def add_numbers(num1, num2):
    total = num1 + num2
    return total

# Calling the function and storing the result
result = add_numbers(5, 7)
print(f"The sum is: {result}")
Functions can also have default values for their parameters. If you don’t provide an argument for a parameter with a default, Python just uses the default. This is handy for making functions more flexible. You can see an example of this in the introduction to Python programming.
Organizing Code with Modules
When your programs get bigger, you’ll want to organize your functions into separate files called modules. This keeps things tidy. You can then import these modules into other Python files to use the functions you’ve already written. It’s like having a toolbox of your own custom functions ready to go.
Let’s say you have a file named my_math_tools.py with this content:
# my_math_tools.py
def square(number):
    return number * number
Then, in another file, you can use it like this:
# main_program.py
import my_math_tools

squared_value = my_math_tools.square(9)
print(f"9 squared is: {squared_value}")
This way, you can build up a library of useful code that you can easily share across different projects.
Essential Ubuntu Command-Line Skills for Developers
Alright, so you’re getting into Ubuntu and Python, which is a pretty solid combo. But to really make things happen, you gotta get comfortable with the terminal. It’s not as scary as it looks, honestly. Think of it as a direct line to your computer’s brain.
Navigating the Ubuntu File System
First things first, you need to know where you are and how to move around. The cd command is your best friend here. cd Documents will take you into your Documents folder. cd .. takes you up one level. It’s like walking through folders, but with words. You’ll also use pwd to see your current location, which is handy when you get lost. Knowing your current directory is half the battle.
Managing Files and Directories
Once you can move, you need to manage stuff. ls shows you what’s in the current folder. ls -l gives you more details, like permissions and sizes. To make a new folder, it’s mkdir new_folder_name. Copying files is cp source_file destination. Moving or renaming is mv old_name new_name. Pretty straightforward, right? You can also use rm to delete files, but be careful with that one – there’s no undo button!
Utilizing Text Processing Commands
This is where things get really powerful. Need to find something specific in a big file? grep is your go-to. For example, grep "error" logfile.txt will show you all lines in logfile.txt that contain the word "error". You can also use cat to display file contents, and less to view them page by page, which is great for large files. If you want to execute a Python script on Ubuntu, the primary method is to use the python3 your_script.py command in the terminal. It is strongly recommended to utilize a virtual environment (venv) for managing dependencies and ensuring script isolation. This is a good place to start practicing these commands.
Advanced Ubuntu Techniques for Python Projects
Managing Processes and Permissions
When you’re running Python scripts, especially those that do a lot of work or run for a long time, you’ll want to know how to keep an eye on them. Ubuntu’s command line gives you tools for this. The ps command is your friend here; it shows you what processes are currently running. You can use ps aux | grep python to see all processes related to Python. If a process is misbehaving, you might need to stop it. The kill command is how you do that. You’ll need the process ID (PID), which you can get from ps. For example, kill 12345 will send a termination signal to the process with PID 12345. Sometimes, you need more control. Understanding file permissions is also key for running Python scripts, especially if they need to interact with system resources or other users’ files. You can change permissions using chmod. For instance, chmod +x your_script.py makes your Python script executable, meaning you can run it directly like ./your_script.py.
Searching and Archiving Files
As your Python projects grow, you’ll likely have many files and directories. Finding specific files can become a chore without the right tools. Ubuntu’s find command is really useful for this. You can search for files by name, type, or even modification time. For example, to find all .py files in your current directory and its subdirectories, you’d type find . -name "*.py". If you need to back up your project or share it, archiving is the way to go. The tar command is commonly used for this. To create a compressed archive of your project folder, you might use tar -czvf my_project_backup.tar.gz my_project_folder/. The c means create, z means gzip compression, v means verbose (show files as they’re added), and f specifies the filename. To extract an archive, you’d use tar -xzvf my_project_backup.tar.gz.
Scripting for Automation
Repetitive tasks are a drag, and that’s where scripting comes in handy for automating your Python development workflow on Ubuntu. You can write shell scripts (using Bash, for example) that execute multiple commands in sequence, including running your Python scripts. Imagine you have a script that needs to fetch data, process it with Python, and then upload the results. You can put all these steps into a single .sh file. Here’s a simple example:
#!/bin/bash

# Update package lists
sudo apt-get update

# Run a Python data fetching script
python3 fetch_data.py

# Process the data with another Python script
python3 process_data.py

# Archive the results
tar -czvf results_$(date +%Y-%m-%d).tar.gz processed_data/

echo "Automation complete!"
To make this script runnable, you’d first save it (e.g., as run_project.sh) and then give it execute permissions: chmod +x run_project.sh. Then, you can just run it with ./run_project.sh. This kind of automation saves a lot of time and reduces the chance of manual errors.
Expanding Your Python Toolkit
So, you’ve got Python installed and you’re writing some code. That’s great! But to really get things done efficiently, you’ll want to know about a few more tools. Think of these as the upgrades that make your coding life way easier.
Installing and Managing Packages with Pip
Python has this amazing ecosystem of pre-written code, called packages, that you can use in your own projects. Need to do some fancy math? There’s a package for that. Want to build a website? Yep, packages for that too. The tool you use to get these packages is called pip. It’s like the app store for Python. You’ll use it all the time.
To install a package, you just open your terminal and type:
pip install package-name
Replace package-name with whatever you need, like numpy for number crunching or requests for fetching web pages. Pip handles downloading and installing it for you. You can also check which packages you have installed with pip list.
Creating Virtual Environments
Now, imagine you’re working on two different projects. Project A needs version 1.0 of a certain package, but Project B needs version 2.0. If you install them globally, things can get messy really fast. This is where virtual environments come in. They’re like little isolated Python setups for each project.
Here’s how you might create one:
- This creates a folder named
myprojectenv(you can call it whatever you like) that holds your isolated Python installation. - Activate the environment:
source myprojectenv/bin/activate
* On Windows: bash
myprojectenv\Scripts\activate
“`
Once activated, your terminal prompt will usually show the environment’s name, like (myprojectenv). Now, any pip install commands you run will only affect this specific environment.
- Deactivate when done:
Just typedeactivatein the terminal.
Using virtual environments keeps your projects clean and prevents package conflicts. It’s a really good habit to get into.
Introduction to Popular Python Libraries
Python’s real power comes from its vast collection of libraries. These are collections of pre-written code that do specific jobs, saving you tons of time. Here are a few you’ll likely encounter:
- NumPy: If you’re doing any kind of numerical computing, like working with arrays or matrices, NumPy is your best friend. It’s super fast for mathematical operations.
- Pandas: This library is fantastic for data manipulation and analysis. Think of it like super-powered spreadsheets in Python. It makes cleaning, transforming, and analyzing data much more manageable.
- Requests: Need to interact with websites or APIs? The
requestslibrary makes sending HTTP requests incredibly simple. It’s how you’d fetch data from the internet. - Flask/Django: These are web frameworks. If you want to build web applications, Flask is a lightweight option, while Django is a more full-featured framework that includes a lot out of the box.
Getting familiar with these libraries will open up a whole new world of what you can do with Python. You’ll find yourself reaching for them constantly as you build more complex projects.
Wrapping Up Your Ubuntu and Python Journey
So, we’ve covered a lot of ground, from getting Ubuntu set up and feeling comfortable with its command line to writing your first Python scripts and understanding its core features. It might seem like a lot at first, but remember, every expert started somewhere. Keep practicing these skills, try building small projects, and don’t be afraid to look things up when you get stuck – that’s how everyone learns. Ubuntu gives you a solid base, and Python opens up a world of possibilities. Keep exploring, keep coding, and you’ll be surprised at what you can create.
Frequently Asked Questions
What is Ubuntu and why is it good for programming?
Ubuntu is a free computer system, like Windows or macOS, but it’s built by a community. It’s great for programmers because it’s very flexible and has lots of tools already built-in that help you code. Plus, it’s known for being stable and reliable, which is super important when you’re working on projects.
Why should I learn Python?
Python is like a friendly language for computers. It’s easy to read and write, which means you can learn it faster. It’s also used for almost everything, like making websites, analyzing data, or even creating smart computer programs. Lots of people use it, so there are tons of helpful guides and people to ask if you get stuck.
How do I install Python on Ubuntu?
Usually, Ubuntu already has Python installed. You can check by opening the ‘Terminal’ and typing `python3 –version`. If it’s not there, or you want a newer version, you can easily install it using the terminal with commands like `sudo apt update` and `sudo apt install python3`.
What’s the best way to write Python code on Ubuntu?
While you can write code in a simple notepad, using a special program called an ‘IDE’ (Integrated Development Environment) makes coding much easier. Popular choices include PyCharm, which is like a super-powered coding assistant, or VSCode, which is a versatile editor. These tools help you find mistakes, write code faster, and keep your projects organized.
What is ‘pip’ and why do I need it?
Think of ‘pip’ as a helpful assistant for Python. It lets you easily download and install extra tools or ‘packages’ that other people have made. These packages can do all sorts of amazing things, like help you with math, create websites, or work with data. You install pip using a command in the terminal, usually `sudo apt install python3-pip`.
What are ‘virtual environments’ in Python?
A virtual environment is like a separate little workspace for each of your Python projects. This is really useful because different projects might need different versions of the same package. By using a virtual environment, you keep the packages for one project from messing up the packages for another project. It helps keep things tidy and prevents conflicts.

