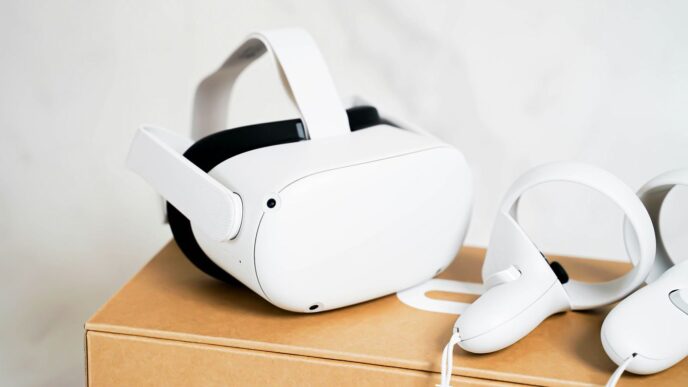
So, you’ve got the Meta Quest 3 and you’re wondering how to connect it to your PC to play all those Steam VR games? It’s not as complicated as it might seem. Think of it like giving your Quest 3 a power-up from your computer. We’ll walk through how to get your headset talking to Steam VR, whether you want to plug it in with a cable or go wireless. It really opens up a whole new world of VR experiences beyond what the headset can do on its own.
Key Takeaways
- Connecting your Quest 3 to a PC lets you play a huge library of Steam VR games with better graphics and performance.
- You can connect using a USB-C cable (Oculus Link) or wirelessly via Wi-Fi (Air Link).
- Make sure you have a good quality USB-C cable that supports data transfer for a wired connection.
- For Air Link, a strong 5GHz Wi-Fi network is really important for a smooth experience.
- Keep your graphics drivers and the Oculus PC app updated to avoid problems and get the best performance.
Unlocking PC VR Capabilities with Your Quest 3
So, you’ve got the Meta Quest 3, and it’s pretty cool on its own, right? But what if I told you it can do even more? By hooking it up to your computer, you’re basically giving it a supercharger. It’s not just about playing games; it’s about making everything look and feel way better.
Benefits of Connecting Meta Quest 3 to Your PC
Connecting your Quest 3 to a PC really opens things up. Think of your PC as the brain and your headset as the eyes and ears. Your computer has a lot more power than the headset does on its own, which means you can run more demanding stuff. This makes a big difference in how games look and how smoothly they run. Plus, you get access to a whole different set of games that aren’t available for the standalone Quest 3.
Access an Expanded Library of PC VR Titles
This is probably the biggest draw for most people. The Quest 3 has a good selection of games you can buy and play directly on the headset. But when you connect it to your PC, you suddenly get access to the massive SteamVR library, plus other PC VR platforms. We’re talking about games that have way more detailed graphics, more complex worlds, and often, more involved gameplay. It’s like going from a really nice tablet to a full-blown gaming desktop – the difference is noticeable.
Elevate Visuals and Frame Rates
This is where things get really interesting. Your PC’s graphics card can push out much higher resolutions and more detailed textures than the Quest 3 can manage by itself. This means sharper images, more realistic lighting, and generally a much prettier virtual world. Beyond just looks, your PC can also maintain higher frame rates. What does that mean for you? Smoother motion, less eye strain, and a more comfortable experience, especially during fast-paced games. It’s the difference between a slightly choppy movie and a crystal-clear, buttery-smooth broadcast.
Preparing for a Seamless Connection

So, you’ve got your Meta Quest 3 and you’re ready to hook it up to your PC for some serious virtual reality action. Before you start plugging things in, let’s make sure you’ve got everything you need. It’s not super complicated, but a little prep work goes a long way to avoid headaches later.
Essential Hardware Requirements
First off, your PC needs to be up to snuff. VR, especially PC VR, needs some power. You’ll want a decent graphics card, a good amount of RAM, and a processor that can keep up. Don’t worry, you don’t need the absolute top-of-the-line gear, but skimping here means you’ll likely run into choppy performance.
Here’s a quick rundown of what’s generally recommended:
- Processor: Intel Core i5-4590 / AMD Ryzen 5 1500X or greater.
- Memory: 8 GB+ RAM.
- Video Output: DisplayPort 1.2 or newer.
- USB Ports: At least one USB 3.0 port.
It’s always a good idea to check the specific requirements for the games or applications you plan to run, as some can be quite demanding. You can find more details on Oculus compatibility.
Downloading and Installing the Oculus PC App
This is a big one. To get your Quest 3 talking to your PC, you’ll need the Oculus PC software. Head over to the official Meta website and download the installer. It’s a pretty straightforward process – just follow the on-screen prompts. This app is what manages the connection, lets you launch PC VR games, and generally keeps everything organized.
Make sure you install it on a drive with plenty of space, as it can take up a fair bit of room, especially if you plan on downloading a lot of VR titles. Once it’s installed, you’ll need to sign in with your Meta account.
Understanding USB-C Cable Compatibility
If you’re planning on using a wired connection, the cable is super important. While your Quest 3 likely came with a USB-C charging cable, not all USB-C cables are created equal. For PC VR, you need a cable that can handle high-speed data transfer, not just power. If the cable you have only supports charging, you’re going to have a bad time.
Many people opt for a dedicated USB-C cable designed for VR, like the official Oculus Link cable. These are built to provide a reliable connection with good data speeds. If you’re using a different cable, check its specifications to make sure it’s rated for USB 3.0 or higher and supports data transfer. A good cable means fewer connection dropouts and a smoother experience overall.
Establishing a Wired Connection via Oculus Link
So, you’ve got your Quest 3 and you’re ready to tap into the power of your PC for some serious VR action. The most straightforward way to do this is with a good old-fashioned cable connection, known as Oculus Link. It’s pretty simple, really.
First things first, you need the right cable. While your Quest 3 might have come with a USB-C cable for charging, not all of them are built for the kind of data transfer needed for VR. You’ll want a USB-C cable that specifically supports high-speed data transfer. Many people opt for the official Oculus Link Cable because it’s designed for this exact purpose, but other reputable USB 3.0 or higher rated cables can work too. Just make sure it’s long enough to give you some freedom to move around your play space.
Next up, you need the Oculus PC app. You can grab this directly from the Meta website. Install it, and this software is what actually manages the connection between your headset and your computer. It’s the bridge that lets your Quest 3 talk to your PC and run those demanding PC VR games.
Once you have the app installed and your cable is ready, it’s time to connect. Plug one end of your USB-C cable into your Quest 3 and the other end into a USB 3.0 port on your PC. You’ll know it’s working when you put on your headset. A prompt should pop up asking if you want to enable Oculus Link. Just hit ‘Allow’ or ‘Enable,’ and boom – you’ll see a new home environment inside your headset. This is the Oculus PC environment, and from here, you can launch Steam VR or any other PC VR software. It’s a pretty solid way to get into PC VR, especially if you’re not worried about Wi-Fi interference or want the most stable connection possible. You can find more details on setting up the link on the official Oculus support page.
Here’s a quick rundown of the steps:
- Get a compatible USB-C cable: Make sure it supports data transfer.
- Download and install the Oculus PC app: This is non-negotiable.
- Connect your Quest 3 to your PC: Use a USB 3.0 port.
- Enable Oculus Link in the headset: Look for the prompt when you put it on.
- Start exploring PC VR: Launch Steam VR or other PC VR applications from the new Oculus home screen.
Leveraging the Wireless Meta Quest Air Link
So, you’ve got your Quest 3, and you’re thinking about ditching the cables. That’s where Meta Quest Air Link comes in. It lets you play PC VR games wirelessly, which is pretty neat. The biggest thing you need for this to work well is a solid Wi-Fi setup. Seriously, if your internet is spotty, this isn’t going to be a fun time.
First off, let’s talk about that Wi-Fi. You really want your Quest 3 and your PC to be on the same network, and ideally, that network should be 5GHz. Think of it like a highway for your VR data; a wider, faster highway means less traffic and smoother gameplay. If you’re using an older router or one that’s just not cutting it, you might need to look into upgrading. Also, try to keep other devices from hogging bandwidth when you’re about to jump into a VR session. No one wants their game to freeze because someone else is streaming a movie in 4K.
To get Air Link going, you’ll need to do a couple of things. On your Quest 3, you’ll head into the settings, look for ‘Experimental Features,’ and flip the switch for Air Link. Then, you’ll need to do something similar on your PC. Open up the Oculus PC app, go to Settings, then Beta, and enable Air Link there. Once both are activated, your headset should be able to see your PC. You just select it, and boom, you’re paired up wirelessly. It’s a pretty straightforward process once you know where to look, and you can find more details on how to connect your Meta Quest 3 to a PC using Air Link.
Here’s a quick rundown of what you need to get Air Link up and running:
- Strong Wi-Fi Network: As mentioned, a 5GHz network is best. Make sure your router is reasonably close to your play area.
- Updated Software: Both your Quest 3 headset and the Oculus PC app need to be on the latest versions. Check for updates regularly.
- PC Compatibility: Your computer still needs to meet the requirements for running PC VR games. Air Link doesn’t magically make a weak PC powerful.
It’s a great way to get that PC VR experience without being tethered, but remember, the quality of your connection really depends on your home network. If you get it right, it feels like magic.
Optimizing Your Virtual Reality Experience
So, you’ve got your Quest 3 hooked up to your PC, which is awesome. But just getting it connected is only half the battle, right? To really get the most out of it, you gotta tweak a few things. It’s like tuning up a car – you want it running smooth.
Updating Graphics Card Drivers for Peak Performance
First off, your graphics card drivers. These are super important. Think of them as the instructions your computer gives to your graphics card. If they’re old, your computer might not be telling the card what to do efficiently, especially for VR. You want the latest ones. Go to the website for whoever made your graphics card – usually NVIDIA or AMD – and look for the driver download section. Find your specific card model and download the newest driver. It’s usually a pretty straightforward install, just follow the prompts. Keeping these drivers current is probably the single biggest thing you can do to make VR games run better.
Managing Network Bandwidth for Stable Play
If you’re using the wireless Air Link feature, your Wi-Fi is doing a lot of heavy lifting. It’s sending all that video data from your PC to your headset. If your internet is busy with other stuff, like someone else streaming movies or downloading big files, your VR connection can get choppy. Try to clear up your network when you’re playing. Turn off other devices that are using a lot of internet, or at least pause their downloads. Having your PC connected to your Wi-Fi router with an Ethernet cable, if possible, also helps a lot. It’s a more stable connection than Wi-Fi alone.
Adjusting Comfort and Visual Settings
Once everything is running, you’ll want to make sure it feels good. Inside the Oculus PC app and within the headset itself, there are settings you can play with.
- IPD Adjustment: This is how far apart the lenses are. If it’s not right for your eyes, things can look blurry or cause eye strain. Most headsets have a physical slider or a software setting for this. Look through the lenses and adjust until the image is sharp and comfortable.
- Refresh Rate: This is how many times per second the image updates. Higher is generally smoother, but it needs more power from your PC. You might need to find a balance here.
- Resolution (Render Resolution): You can often tell the Oculus software to render the game at a higher resolution than your headset’s native display and then scale it down. This can make things look sharper, but again, it uses more PC power. Start with the default and see if you can push it up a bit without losing performance.
- Guardian Boundary: Make sure your play space boundary is set up correctly. You don’t want to be bumping into furniture while you’re immersed in a game. You can set this up automatically by looking around your room, or manually draw it out with your controllers. Just double-check it’s clear of any obstacles.
Troubleshooting Common Connection Issues
So, you’ve followed all the steps, but your Quest 3 is still acting up when you try to connect it to your PC for SteamVR. Don’t sweat it, this happens more often than you’d think. Let’s try to sort out some of the usual suspects.
Resolving Connection Errors
First off, double-check that USB-C cable. Not all of them are created equal, and you really need one that can handle data transfer, not just charging. The official Oculus Link cable is usually a safe bet, but if you’re using a third-party one, make sure it explicitly states it supports data. A loose connection is also a common culprit; give both ends a firm push to make sure they’re seated properly. If you’re still getting errors, try a different USB port on your PC, preferably a USB 3.0 or higher. Sometimes, a simple restart of both your headset and your PC can clear up temporary glitches that are blocking the connection. If you’re trying to connect via Air Link and it’s just not finding your PC, make sure both devices are on the same Wi-Fi network and that your router is broadcasting on a 5GHz band for the best performance. You might also need to re-pair the devices if the connection seems stuck.
Addressing Software Glitches
Software can be a bit finicky sometimes. Make sure you have the latest version of the Oculus PC app installed. Meta frequently pushes out updates that fix bugs and improve compatibility. You can check for updates within the Oculus app itself. If you’re having trouble with SteamVR specifically, sometimes verifying the integrity of the SteamVR files through Steam can help. Right-click on SteamVR in your Steam library, go to Properties, then Local Files, and select ‘Verify integrity of game files.’ If problems persist, a clean reinstall of the Oculus PC app might be necessary. Remember to uninstall it completely, restart your PC, and then download and install the latest version from the official Meta website. This can often clear out corrupted files that might be causing issues. A user might find that clicking on SteamVR in their Quest 3 headset displays a "Playing" window but doesn’t actually let them access their Steam games, which often points to a software handshake problem that a reinstall can fix. Check your PC’s Specifications.
Improving Performance and Reducing Lag
Lag and stuttering can really ruin the VR experience. A big factor here is your PC’s hardware. Ensure your graphics card drivers are up to date; outdated drivers are a frequent cause of poor performance. You can usually download the latest drivers directly from NVIDIA or AMD’s websites. For Air Link, your Wi-Fi network is key. If your internet is congested with other devices streaming or downloading, it can impact your VR performance. Try to minimize other network activity while you’re playing. Also, consider your PC’s overall performance. Close any unnecessary background applications that might be hogging your CPU or GPU resources. Adjusting the graphics settings within SteamVR or the Oculus app can also make a big difference. Lowering settings like resolution or anti-aliasing might give you a smoother frame rate, even if the visuals aren’t quite as sharp. Experimenting with these settings is often the best way to find a balance between visual quality and smooth gameplay.
Wrapping Up Your Quest 3 PC VR Setup
So there you have it. Connecting your Quest 3 to your PC, whether wired or wireless, really opens up a whole new world of games and experiences. It might seem like a few steps at first, but once you get it set up, you’ll be glad you did. You get access to way more games, and often they look and run a lot better than the standalone versions. It’s a pretty big upgrade for your VR setup, and totally worth the effort if you want to get the most out of your headset.
Frequently Asked Questions
What’s the big deal about connecting my Quest 3 to a PC?
Connecting your Quest 3 to a PC lets you play way more games! Think of it like unlocking a super-powered version of your headset. You can play games that need a strong computer, and they’ll often look and run even better than on the Quest 3 alone.
Do I really need a special cable to connect?
You can use a USB-C cable, but it needs to be one that’s good at sending data fast. The official Oculus Link cable is a safe bet, but other high-quality USB-C cables that support USB 3.0 or higher should work too. Just make sure it’s not only for charging!
Is playing wirelessly (Air Link) as good as using a cable?
When Air Link works well, it’s awesome because you have no wires! But, it really depends on how strong and fast your home Wi-Fi is. For the smoothest experience with no interruptions, a good USB-C cable is usually more reliable.
My game is looking choppy. What can I do?
Make sure your computer’s graphics card drivers are up-to-date. Also, if you’re using Wi-Fi for Air Link, try to have fewer other devices using the internet at the same time. Sometimes, just restarting your headset and computer can help too.
What if the Oculus app on my PC isn’t working right?
First, check if the Oculus app is updated to the newest version. If that doesn’t fix it, try closing the app completely and opening it again. As a last resort, you might need to uninstall and then reinstall the Oculus PC app.
Can I play games from Steam on my Quest 3 this way?
Absolutely! Once your Quest 3 is connected to your PC (either wired or wirelessly), you can use the Oculus PC app to launch SteamVR. This opens up a massive library of games available on Steam for you to enjoy in VR.