
So, you want to see a 3d printing machine working video, huh? It’s pretty cool stuff, watching something go from a digital file to a real object right before your eyes. Whether you’re just curious or thinking about getting your own printer, understanding how these machines actually do their thing is key. This guide breaks down the whole process, from the basics of how they build things layer by layer to what you need to do to get a print started and keep your machine running smoothly. We’ll cover everything you need to know to get a good grasp on this technology.
Key Takeaways
- 3D printing builds objects by adding material layer by layer, a process called additive manufacturing.
- You start with a digital 3D model, slice it into layers, and then send the instructions to the 3D printer.
- Choosing the right 3D printer and filament type is important for successful prints.
- Setting up your printer correctly, especially leveling the print bed, is vital for a good first layer.
- Monitoring the printing process and performing basic maintenance will help you get better results and keep your machine working.
Understanding the 3D Printing Machine Working Video Process
So, you’ve got a 3D printer, or you’re thinking about getting one, and you want to see how it actually works. It’s pretty neat, honestly. Instead of carving away material like you might with wood or metal, 3D printing builds things up, layer by tiny layer. This is called additive manufacturing, and it’s a big deal because it means less waste and the ability to make some really wild shapes that just weren’t possible before.
The Fundamentals of Additive Manufacturing
At its core, additive manufacturing is all about adding material only where it’s needed. Think of it like building with LEGOs, but on a much, much smaller scale and with a lot more precision. This method is changing how we make things, from little trinkets to parts for actual machines. It’s a departure from older methods that often involved cutting or molding, which could be wasteful and limiting.
From Digital Design to Physical Object
Everything starts with a digital blueprint, usually a 3D model created on a computer using CAD (Computer-Aided Design) software. This digital file is then processed by special software, often called a ‘slicer’. The slicer breaks down the 3D model into hundreds or thousands of thin, horizontal layers. It’s like slicing a loaf of bread, but digitally. This slicing process also figures out exactly where the printer needs to put material for each layer and generates the instructions the printer will follow.
Key Stages in the 3D Printing Procedure
Watching a 3D printer in action involves a few distinct steps:
- Design Preparation: This is where the digital 3D model is created or obtained. It’s then loaded into slicing software.
- Slicing and Settings: The slicer converts the model into layers and allows you to adjust print settings like speed, layer height, and material type. You then save this as a printable file (like an STL or G-code).
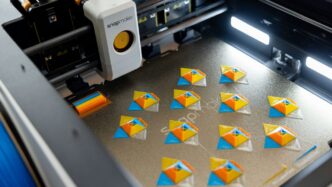
- Printing: The printer reads the file and begins building the object layer by layer. This might involve melting plastic filament, curing liquid resin with light, or fusing powder.
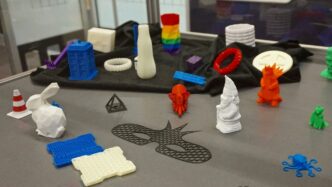
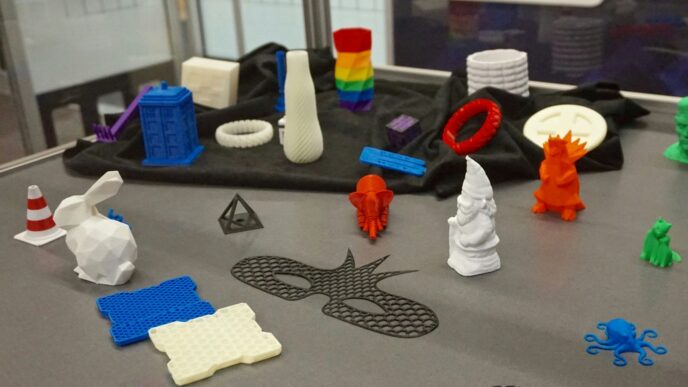
- Post-Processing: Once the print is finished, the object is removed from the printer. It might need some cleaning, support structures removed, or other finishing touches to be ready for use.
Selecting Your 3D Printing Machine and Materials
Alright, so you’ve got the idea of what 3D printing is all about, and maybe you’ve even seen a machine whirring away. But before you can start making your own cool stuff, you need to pick the right gear. It’s not just about grabbing the first printer you see, you know? You’ve got to think about what you want to make and what materials will work best for that.
Choosing the Right 3D Printer for Your Needs
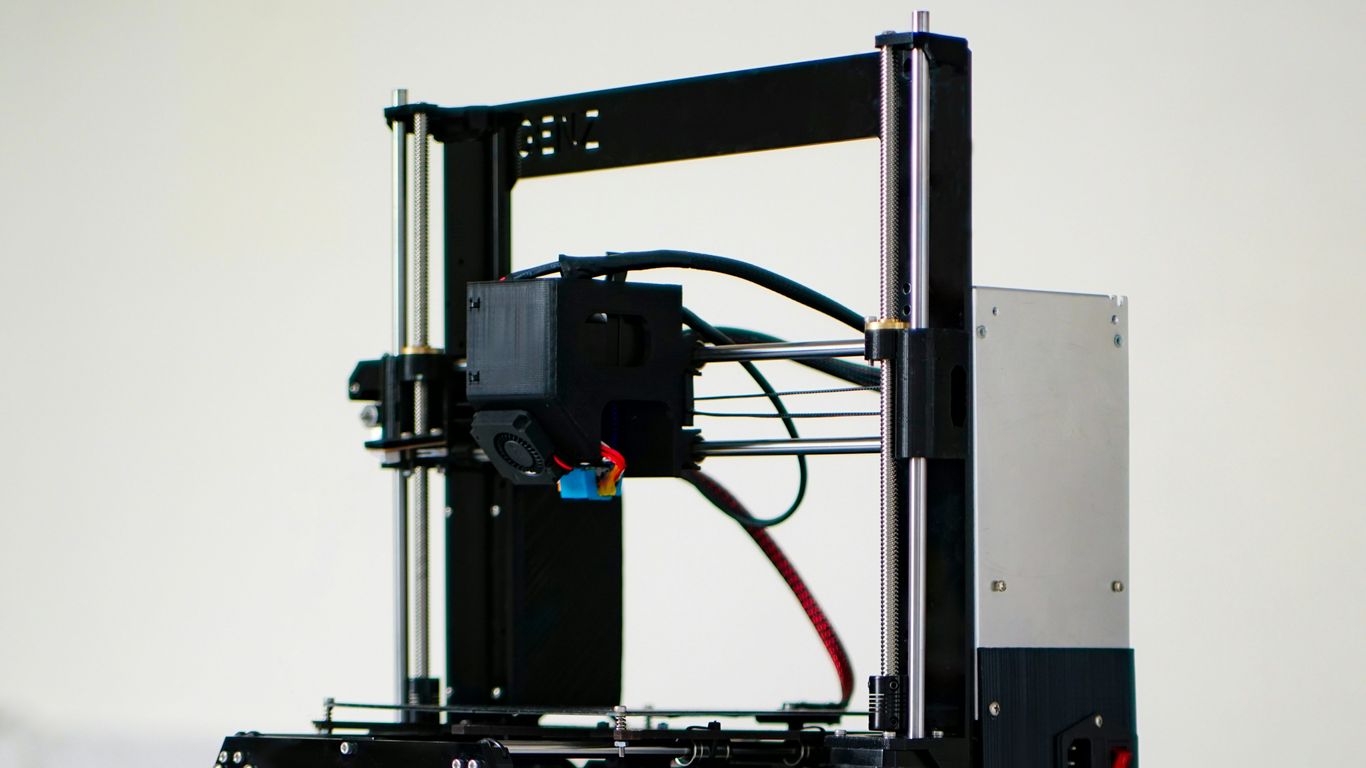
When you’re just starting out, it can feel a bit overwhelming with all the different printers out there. For most beginners, especially hobbyists, a printer that uses FDM (Fused Deposition Modeling) technology is usually the way to go. These machines are generally more affordable and easier to get the hang of. They work by melting plastic filament and laying it down layer by layer. Think of it like a very precise hot glue gun.
Some printers are better for small, detailed models, while others can handle larger projects. You’ll want to consider things like the build volume (how big of an object you can print), the resolution (how fine the details can be), and how easy it is to set up and use. If you’re looking to print functional parts that need to be strong, you might need a more advanced machine, but for most people starting out, a solid FDM printer is a great place to begin.
Exploring Common 3D Printing Filaments
Once you’ve got a printer in mind, you need to think about what it prints with. This is usually called filament, and it’s basically plastic string wound onto a spool. The type of filament you use makes a big difference in the final product.
Here’s a quick rundown of some popular ones:
- PLA (Polylactic Acid): This is the go-to for beginners. It’s easy to print with, doesn’t smell too bad, and comes in tons of colors. It’s great for decorative items and prototypes, but it can get soft if it gets too hot.
- PETG (Polyethylene Terephthalate Glycol): A bit tougher than PLA, PETG is more durable and can handle some heat. It’s good for parts that need to be a bit stronger or used outdoors.
- ABS (Acrylonitrile Butadiene Styrene): This is the stuff LEGOs are made of. It’s strong and can withstand higher temperatures, but it can be trickier to print with because it tends to warp, and it gives off fumes you’ll want to ventilate.
- TPU (Thermoplastic Polyurethane): If you need something flexible, like a phone case or a rubbery part, TPU is your material. It’s like printing with a flexible rubber band.
Material Properties and Their Applications
So, why all the fuss about different materials? Because they do different jobs. You wouldn’t use the same material to print a toy car as you would to print a bracket that holds something heavy.
Let’s break down what you might look for:
- Strength and Durability: If your print needs to hold weight or withstand stress, you’ll want materials like PETG, ABS, or even stronger engineering plastics if your printer can handle them. These are good for functional parts, tools, or components that might get bumped around.
- Temperature Resistance: Some projects might be used in warmer environments. PLA starts to soften around 40°C (104°F), so if your project will be in the sun or near a heat source, you’ll need something like ABS or ASA (which is like ABS but better outdoors).
- Flexibility: For parts that need to bend or absorb impact, like gaskets, seals, or phone cases, TPU is the clear winner. It’s got that rubbery quality that makes it perfect for these jobs.
- Ease of Printing: As a beginner, you’ll probably want to start with PLA. It’s the most forgiving and requires less fiddling with printer settings. As you get more comfortable, you can experiment with other materials that might offer better properties but require more attention to detail during printing.
Choosing the right combination of printer and material is key to getting the results you want. It’s all about matching the tool to the task.
Setting Up Your 3D Printing Machine
Alright, so you’ve got your shiny new 3D printer, and it’s time to get it ready to rumble. This part can feel a little intimidating, especially if you’re new to this whole 3D printing thing, but honestly, it’s mostly about following some straightforward steps. Getting the setup right is super important for good prints down the road.
Assembling and Securing Your Printer
First things first, you’ll need to put your printer together. Most printers come partially assembled, but there’s usually a bit more to do. Unpack everything carefully and check the manual. You’ll want to make sure all the parts are there and nothing looks damaged. Once you start putting it together, pay attention to how stable everything feels. Loose parts can lead to wobbly prints, and nobody wants that. Tighten up all the screws and bolts as you go. It’s a good idea to give the whole frame a gentle shake to see if it’s solid.
Connecting Your 3D Printer to a Computer
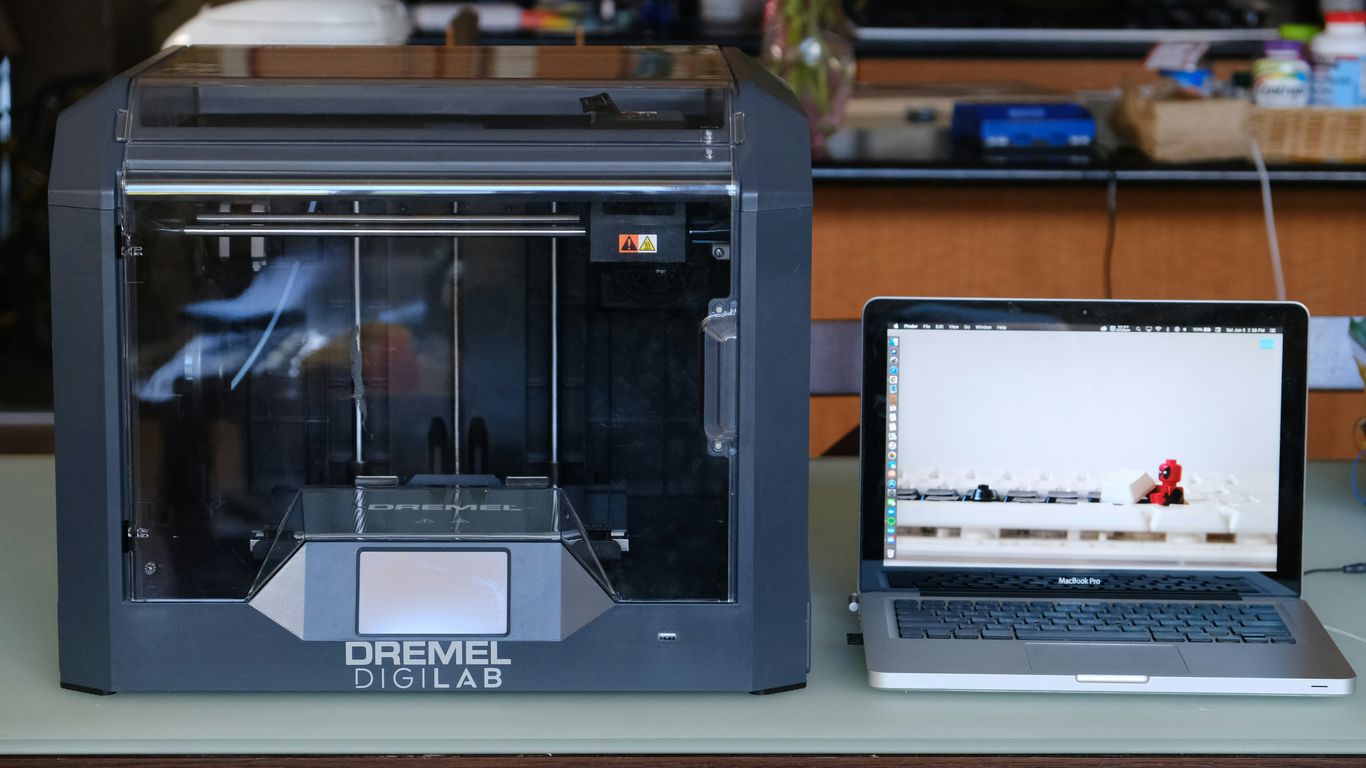
Now, how do you talk to your printer? Usually, it’s via a USB cable. You plug one end into the printer and the other into your computer. Most of the time, your computer will figure it out and install the necessary drivers automatically. If it doesn’t, don’t panic; you might need to download them from the manufacturer’s website. Some newer printers also have Wi-Fi capabilities, which is pretty neat. This lets you send files and even monitor prints remotely, which can be a lifesaver if you’re not right next to the printer. Software like Creality Cloud can help manage this whole process, making it easier to send your designs over.
Mastering Auto-Leveling Techniques
This is a big one, especially for beginners. The print bed needs to be perfectly level with the nozzle for that first layer to stick properly. Many modern printers come with auto-leveling features, which are a godsend. Here’s generally how it works:
- Install the Kit: If your printer doesn’t have it built-in, you might need to install an auto-leveling sensor, like a CR Touch or BL-Touch. Follow the instructions that come with it.
- Preheat: Always preheat your nozzle and bed before you start leveling. The metal expands when it’s hot, so you want to measure the gap under actual printing conditions.
- Run the Auto-Level: You’ll typically find an option in your printer’s menu to start the auto-leveling process. The sensor will probe different points on the bed, measuring the distance to the nozzle.
- Save and Test: The printer saves this data, creating a virtual map of your bed. After it’s done, it’s always a good idea to run a small test print, like a single-layer square, to see how well that first layer goes down. You can find great resources on how to use a 3D printer effectively online.
Preparing Your Design for Printing
Alright, so you’ve got your 3D model ready, or maybe you’ve found one online. That’s awesome! But before you hit that ‘print’ button, there are a few more steps to get your digital creation ready for the real world. It’s not just about having the file; it’s about making sure the printer knows exactly what to do with it.
Creating or Acquiring 3D Models
First off, you need a 3D model. You can either design one yourself using software like Tinkercad (super beginner-friendly) or Blender (more advanced), or you can download pre-made models from websites like Thingiverse or MyMiniFactory. Just remember to check the licensing if you plan to use a downloaded model for anything other than personal use. Sometimes, designs need a bit of tweaking to be printable, like making sure walls aren’t too thin or that there are no weird, unprintable shapes.
Slicing Designs into Printable Layers
This is where the magic happens, sort of. Your 3D printer doesn’t understand a 3D model file directly. It needs instructions, layer by layer. That’s what a "slicer" program does. Software like Cura or PrusaSlicer takes your 3D model (usually an STL or 3MF file) and cuts it into hundreds or thousands of thin horizontal layers. It then generates the G-code, which is basically a set of commands telling the printer exactly where to move, how fast, and how much plastic to extrude for each layer. Think of it as translating a blueprint into step-by-step instructions for a robot.
Configuring Print Settings for Optimal Results
This is probably the most involved part, and it can make or break your print. The slicer software has a ton of settings, but here are the big ones to pay attention to:
- Layer Height: This is how thick each layer is. Thinner layers (like 0.1mm) mean more detail and a smoother finish, but it takes much longer to print. Thicker layers (like 0.3mm) print faster but might show the layer lines more.
- Infill: This is the internal structure of your print. You don’t need it to be solid plastic all the way through. Infill is usually a pattern of lines or grids inside the object. A higher percentage (like 50-100%) makes the object stronger but uses more filament and takes longer. For most things, 15-25% is plenty.
- Supports: If your model has parts that stick out over empty space (overhangs or bridges), the printer can’t just print on air. It needs temporary "support" structures to hold those parts up while printing. These are usually designed to be broken off easily after the print is done. You can often orient your model on the print bed to minimize the need for supports.
- Bed Adhesion: This helps the print stick to the build plate. Options include a "brim" (a single layer flat area around the base of your print) or a "raft" (a thicker base that the print sits on). This is super helpful for preventing prints from coming loose and warping.
Getting these settings right takes a bit of practice, but it’s totally worth it for good-looking prints. You’ll usually start with default profiles for your material and printer, and then tweak them as you go.
Initiating and Monitoring the Printing Process
Alright, so you’ve got your design ready, your printer’s all set up, and you’re itching to hit that ‘print’ button. But hold on a sec, there are a couple of really important things to nail down before you do. Getting the first layer right is kind of a big deal, honestly. If that doesn’t stick properly, the whole print can go sideways, and you’ll end up with a spaghetti monster instead of your intended object.
Ensuring a Perfect First Layer
This is where the magic, or the mess, begins. You want that initial layer to be smooth, even, and well-adhered to the print bed. Here’s a quick rundown of what helps:
- Bed Leveling: Whether it’s manual or automatic, make sure your bed is perfectly level. Even a slight tilt can cause problems.
- Bed Surface: Using the right surface for your material matters. Some filaments stick better to textured surfaces, while others do fine on glass or even painter’s tape.
- Temperatures: Get your nozzle and bed temperatures dialed in. Too hot or too cold, and you’ll have adhesion issues or the filament won’t flow right.
- Flow Rate: This is about how much plastic the printer pushes out. Too much, and it oozes; too little, and you get gaps. A quick test print can help you fine-tune this.
Real-Time Monitoring and Adjustments
Once that first layer is down and looking good, you can start the main print. Now, don’t just walk away and forget about it! It’s a good idea to keep an eye on things, especially for longer prints. Printers are getting smarter, and some even have cameras so you can watch from your phone. This is super handy for catching problems early, like if the filament gets tangled or the print starts to warp. You can often make small adjustments on the fly, like tweaking the speed or temperature, if something looks a bit off. It’s like giving your printer a little nudge in the right direction. You can manage your printer remotely using apps like the Snapmaker App.
Understanding 3D Printing Speed Settings
Speed is tempting, right? Who wants to wait longer than they have to? But cranking up the speed too much can really mess with print quality. It’s a balancing act. You’ve got to think about:
- Acceleration: This is how quickly the print head speeds up and slows down. Higher acceleration can speed things up, but it also adds vibrations.
- Volumetric Flow Rate: This is basically how much plastic your hot end can melt and push out per second. If you try to push too much too fast, it won’t melt properly, leading to weak prints.
- Cooling: Good cooling is vital, especially when printing fast. It helps solidify the plastic quickly so it doesn’t sag or deform.
Finding that sweet spot between speed and quality often involves a bit of trial and error. Start with the recommended settings for your material and printer, and then make small adjustments as you get more comfortable. It’s not always about going as fast as possible; it’s about going as fast as you can without sacrificing the final result.
Post-Printing Procedures and Maintenance
So, your print is finally done! That’s awesome. But wait, the job isn’t quite finished yet. There are a few important steps to take after the printer stops whirring to get your creation ready and keep your machine in good shape. It’s not just about hitting ‘print’ and walking away; there’s a bit more to it.
Removing and Finishing Your Printed Object
First things first, you’ve got to get your object off the print bed. Sometimes it pops right off, and other times it’s stuck on there like glue. A little patience and a scraper tool usually do the trick. Be careful not to damage the print bed or your new object. Once it’s free, you’ll likely need to remove any support structures. These are printed to hold up overhangs during the print, but they can leave little nubs or marks. You can usually snap or cut these off with pliers or a craft knife. For a really smooth finish, especially with materials like PLA or PETG, you might need to do some sanding. Start with a coarser grit sandpaper and move to finer grits to get rid of layer lines and imperfections. For tougher materials like ABS, you might even consider vapor smoothing, but that’s a more advanced technique.
Essential 3D Printer Maintenance Tips
Keeping your 3D printer happy means it’ll keep printing great stuff for you. Think of it like taking care of a car; regular check-ups make a big difference. Here are some key things to do:
- Clean the Nozzle and Hot End: Filament gunk can build up and cause clogs. Give the nozzle a good clean regularly. If it looks worn out, it might be time to swap it for a new one.
- Calibrate the Print Bed: A level bed is super important for prints to stick properly. Whether you have auto-leveling or do it manually, check it often, especially if you move the printer.
- Inspect Moving Parts: Look at the belts, wheels, and rods. Are they clean? Are they tight enough, but not too tight? A little lubrication on the rods can help things move smoothly.
- Check Filament Storage: Make sure your filament is stored somewhere dry. Wet filament can cause all sorts of print problems.
Troubleshooting Common Printing Issues
Even with the best setup, things can go wrong. It’s part of the learning curve. Don’t get too discouraged if you encounter problems; most are fixable.
- Warping: If the corners of your print start lifting off the bed, it’s likely warping. This often happens with materials like ABS due to temperature changes. Try a heated bed, an enclosure, or using a brim in your slicer settings.
- Layer Shifting: If your print looks like it’s been pushed sideways mid-print, that’s layer shifting. This can be caused by loose belts, a motor overheating, or the print head hitting a snagged part of the print.
- Under-extrusion/Over-extrusion: If your lines are thin and gappy (under-extrusion) or thick and messy (over-extrusion), it’s an issue with how much filament is coming out. This could be a clogged nozzle, incorrect temperature settings, or problems with the extruder gears.
Dealing with these issues might take a bit of trial and error, but figuring them out is really satisfying. Plus, you learn a ton about how your printer works in the process.
Wrapping Up Your 3D Printing Journey
So, you’ve seen how these machines bring digital ideas into the real world, layer by layer. It might seem a bit technical at first, with all the talk of G-code and filament types, but honestly, it’s pretty cool once you get the hang of it. Whether you’re looking to make custom parts for a project or just want to print some fun trinkets, this guide should give you a good starting point. Don’t be afraid to experiment, and remember that practice makes perfect. Happy printing!