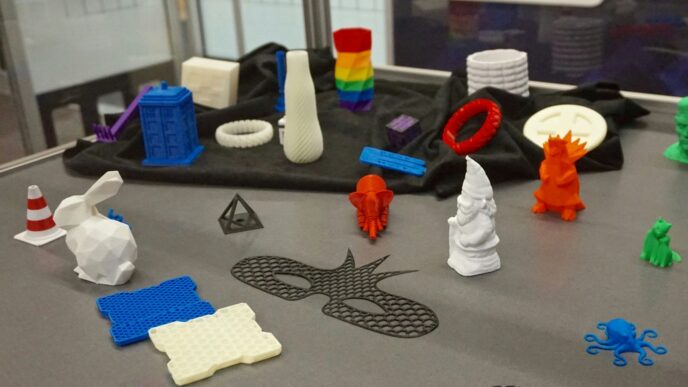
So, you’ve finished printing your latest creation. Awesome! But before you show it off, there’s a bit of cleanup to do. Think of it like prepping a canvas before painting. Getting rid of those little leftover bits from supports and smoothing out any rough edges can make a huge difference. It’s not the most exciting part, but it’s what takes your print from ‘okay’ to ‘wow’. We’ll go over the tools and tricks to get your prints looking super clean and ready for whatever comes next, whether that’s painting or just admiring your handiwork.
Key Takeaways
- After printing, cleaning up support material and rough spots is a necessary step for a polished look.
- Tools like flush cutters, pliers, and a hobby knife or a dedicated 3d printing deburring tool are useful for removing supports and nubs.
- Sanding with progressively finer grits, starting with lower numbers and moving to higher ones, helps smooth out layer lines and tool marks.
- Wet sanding, where sandpaper is used with water, can produce an even smoother finish by washing away dust.
- Applying a filler primer and then sanding it can fill in small imperfections and make FDM prints look much closer to injection-molded parts.
Essential Tools For Post-Processing FDM Prints
So, your FDM printer just finished spitting out that design you’ve been working on. It looks pretty good, right? But before you can really show it off, there’s a bit of cleanup to do. Think of it like prepping a canvas before you paint – you gotta get rid of the rough bits. This stage is all about making your print look its best, and having the right gear makes a huge difference. Getting these initial steps right sets the stage for a truly flawless finish.
Initial Support Removal Techniques
Supports are necessary for printing overhangs, but they leave behind nubs and rough patches. The goal here is to get them off cleanly without damaging the actual print. It takes a bit of patience, but it’s totally doable.
- Start by hand: Often, larger support structures can be gently twisted or broken off with your fingers. Don’t force it too much, though.
- Flush cutters are your friend: For smaller, more stubborn supports, a good pair of flush cutters is perfect. Snip them as close to the model as you can without cutting into the print itself.
- Pliers for grip: Sometimes, you just need a bit more grip. Small needle-nose pliers can help you get a hold of those tricky bits and pull them away.
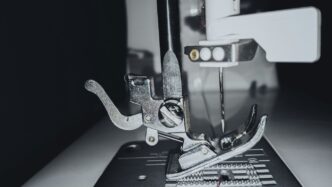
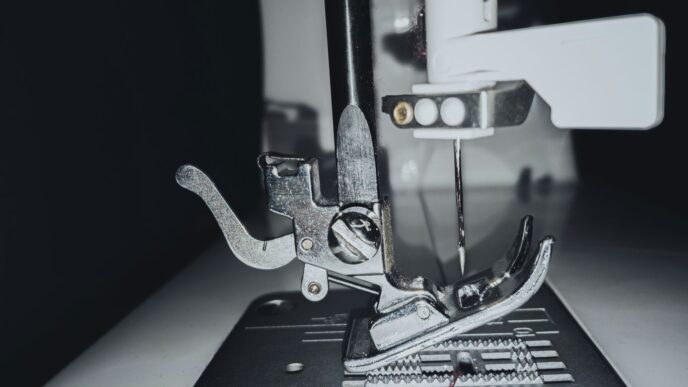
The Role of a Deburring Tool
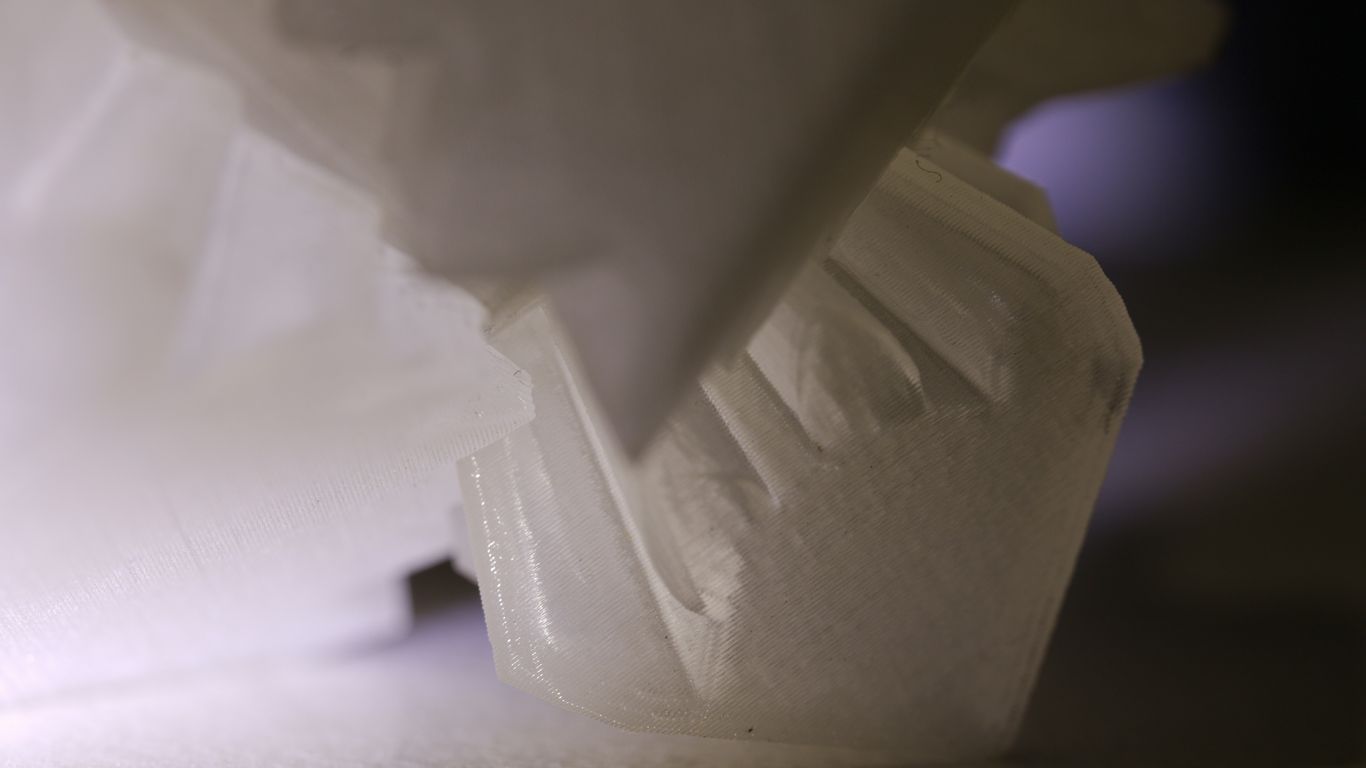
After you’ve removed the bulk of the supports, you’ll likely have small nubs or rough edges left behind. This is where a deburring tool really shines. Unlike a hobby knife, which can sometimes dig in too much or slip, a deburring tool is designed to shave away material smoothly. It’s got a sharp, angled blade that you can use to gently scrape away those little imperfections, leaving a much cleaner surface. It’s not about cutting, but about a controlled shaving action.
Refining Edges With Files and Knives
Once the main supports are gone and the rougher bits have been addressed with a deburring tool, you might still have some areas that need a bit more attention. This is where files and knives come back into play, but with a more delicate touch.
- Needle files: These small, often metal files come in various shapes (round, flat, triangular). They’re great for getting into tight corners or smoothing out small ridges that a deburring tool might miss.
- Hobby knife (carefully!): For very fine trimming or shaving down a slightly proud edge, a sharp hobby knife can be used. Always cut away from yourself and use light pressure. It’s easy to slip, so be mindful.
- Sanding sticks: These are like small pieces of sandpaper attached to a stick. They are fantastic for smoothing edges and small surfaces without removing too much material.
Achieving A Smooth Surface Finish
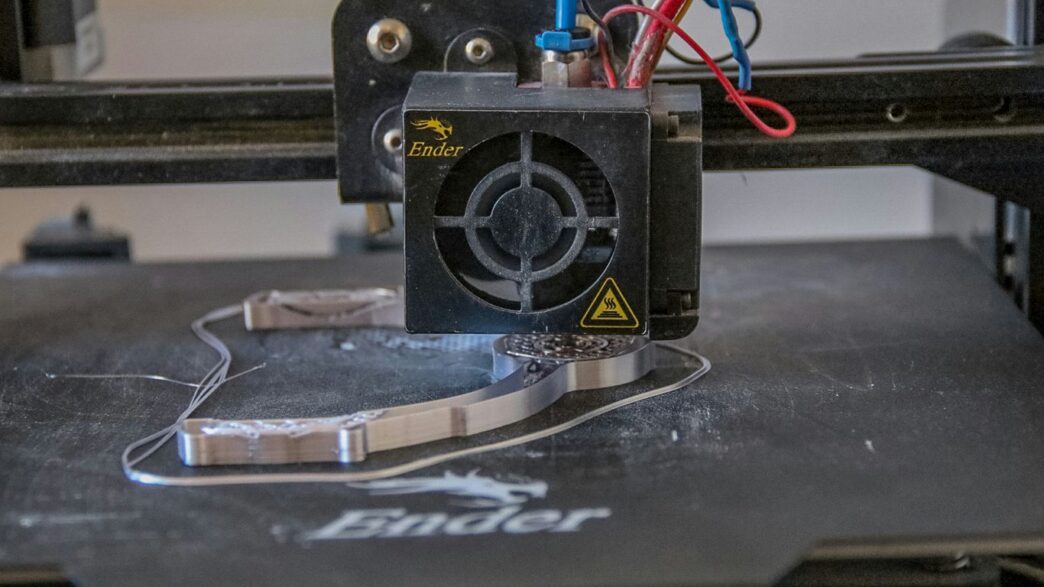
So, you’ve got your print off the build plate, and maybe you’ve even wrestled the supports off. Now what? If you’re aiming for that really slick, professional look, you can’t just stop there. Those visible layer lines from FDM printing can really make a print look, well, 3D printed. We need to get rid of them.
The Power of Sanding Grits
Sanding is your best friend here. It’s a bit of work, sure, but the payoff is huge. You’ll need a range of sandpaper, and the numbers on them tell you how coarse or fine they are. Lower numbers mean rougher paper, higher numbers mean finer. Think of it like this:
- Start Coarse: Grab something like 220-grit sandpaper. Use this to knock down the most obvious layer lines and any marks left by supports. Keep your strokes in a circular motion; you don’t want to create flat spots on curved surfaces.
- Step Up: Once the big stuff is gone, move to a finer grit, maybe 400. This paper cleans up the scratches left by the coarser grit. Keep going, moving up through grits like 800, 1000, and even 2000 if you’re aiming for a super smooth, almost polished feel.
Implementing Wet Sanding for Superior Results
Want to take your sanding to the next level? Try wet sanding. It sounds simple, and it is: just dip your sandpaper in water before and while you’re sanding. The water acts like a lubricant. It helps wash away the dust and stops the sandpaper from getting clogged up so quickly. This method really helps you get that incredibly smooth surface that makes a big difference.
Filler Primer: The Ultimate Layer Line Solution
Here’s a trick that can make your FDM prints look almost like they came from an injection molding machine. It’s called filler primer. You can find this stuff at most hardware or auto parts stores. It’s basically a spray paint that’s designed to fill in tiny gaps and imperfections, like those pesky layer lines.
- Apply: Give your sanded model a light, even coat of filler primer. Don’t go too heavy.
- Dry: Let it dry completely. Patience is key here.
- Sand Again: Once it’s dry, take some fine-grit sandpaper (400 grit or higher) and lightly sand the primed surface. You’ll be amazed at how the layer lines just seem to disappear. If some lines are still showing, a second coat and another sanding session will usually do the trick. This step is a game-changer for FDM prints.
Advanced Finishing Techniques
The Art of Wet Sanding
So, you’ve tackled the basic cleanup and maybe even done some initial sanding. Now, let’s talk about taking that surface finish to the next level. Wet sanding is where it’s at. It sounds simple, and honestly, it is, but the results are pretty dramatic. You just grab some fine-grit sandpaper – think 400 grit and up – and dip it in water. Keep the sandpaper wet as you work. The water acts like a lubricant, which does two cool things. First, it helps wash away all that dust you’re creating, so your sandpaper doesn’t get all clogged up and useless after two minutes. Second, it just makes the sanding process smoother, leading to a much nicer finish on your print. This technique is a big reason why some 3D prints look almost like they came out of a factory mold.
Leveraging Filler Primer for Injection-Molded Quality
Alright, let’s talk about filler primer. This stuff is a game-changer, seriously. If you’ve got those stubborn layer lines that sanding just can’t quite get rid of, or tiny little nicks and imperfections, filler primer is your best friend. It’s basically a sprayable primer that’s designed to fill in those small flaws. You can find it at most hardware stores or even places that sell auto body supplies.
Here’s the drill:
- Apply a light, even coat over your sanded print. Don’t go too heavy, or you’ll get drips.
- Let it dry completely. Patience is key here.
- Once it’s dry, take some fine-grit sandpaper (like 400 grit or higher) and lightly sand the primed surface. You’ll see those layer lines just disappear under the primer. For really noticeable lines, you might need a second coat and another round of sanding. It’s a bit of work, but it can make your FDM prints look incredibly smooth, almost like they were made using injection molding.
Professional Priming for Paint Adhesion
Once you’ve got that super smooth surface, it’s time to think about paint. You never want to paint directly onto raw plastic, no matter how nice it looks. A good primer is non-negotiable. It creates a uniform surface that paint can really grab onto. This means your colors will look truer and more vibrant, and you won’t have the underlying plastic color messing things up. For most projects, a simple matte grey or white acrylic hobby primer works great. You can get these in spray cans, which are usually the easiest way to get an even coat. Just remember the golden rule of spray painting: lots of light coats are way better than one thick, drippy one. It takes a bit more time, but the final result is worth it.
The 3D Printing Deburring Tool: A Closer Look
So, you’ve just pulled a fresh print off your build plate. It looks pretty good, right? But if you look closely, you might see some little rough spots, especially where supports used to be. That’s where a dedicated deburring tool really shines. While hobby knives can do the job, a proper deburring tool is designed specifically for this task, making it easier and safer.
Why a Dedicated Deburring Tool is Crucial
Think of it like this: you wouldn’t use a butter knife to carve a detailed sculpture, would you? A deburring tool is built for precision cleanup. Its angled, often rotating blade can get into tight spots and shave away those tiny imperfections left behind after support removal. This simple tool can make a huge difference in how professional your finished prints look. It’s not just about removing material; it’s about doing it cleanly and without damaging the main part of your print. For FDM prints, especially those with lots of small support nubs, this tool is a lifesaver. It helps you achieve that smooth, clean edge that’s hard to get with just cutters or your fingers. You can find some great options available online.
Comparing Deburring Tools to Hobby Knives
I’ve definitely used my fair share of hobby knives for 3D prints. They work, sure, but they have their downsides. The blade is usually straight, and you have to be really careful not to slip and cut yourself or gouge the print. It takes a lot of control. A deburring tool, on the other hand, often has a swivel head. This means the blade can follow the curves of your print without you having to constantly adjust your angle. It’s much more forgiving. Plus, the blades are typically designed to shave material away rather than cut, which can lead to a smoother finish with less risk of tearing the plastic. It’s a different feel, and for many, a much better one.
Precision and Control with a 3D Printing Deburring Tool
When you’re aiming for that flawless finish, precision matters. A deburring tool gives you a level of control that’s hard to match. You can gently scrape away those little bits of plastic without digging into the model. It’s great for cleaning up:
- Support contact points
- Small blobs or zits
- Rough edges on rafts or brims
- Anywhere a support structure left a little mark
It’s the kind of tool that lets you refine details without a lot of fuss. You can get into corners and around curves with relative ease, making the whole post-processing stage feel less like a chore and more like a craft. It really helps prepare your prints for the next steps, whether that’s sanding, painting, or just putting them straight on display.
Beyond Basic Cleanup: Enhancing Print Quality
So, you’ve wrestled the supports off your FDM print, and things are looking… okay. But ‘okay’ isn’t what we’re aiming for, right? We want prints that look like they came straight out of a mold, not a hobbyist’s workshop. This is where we move past just getting the plastic off and start making the print actually look good.
The Importance of a Comprehensive Tool Kit
Sure, you can get by with just flush cutters and maybe a craft knife. But if you’re serious about making your prints shine, you need a few more bits and bobs. Having the right tools makes the whole process less of a chore and more about refining your work. It’s like a chef having good knives – it just makes everything easier and the results better.
- Flush Cutters: For getting close to the model and snipping away support material without leaving big marks.
- Hobby Knife/Deburring Tool: Perfect for shaving off those tiny nubs or cleaning up rough edges left by supports.
- Needle Files: A set of these small files can get into tight spots and smooth out areas that sandpaper can’t reach easily.
- Sandpaper (various grits): You’ll need a range, from coarser grits to start smoothing to super-fine ones for a polished finish.
- Heat Gun (optional, use with care): Sometimes, a quick blast of heat can help smooth out small filament wisps or stress marks.
Tools for Removing Stubborn Supports
Sometimes, supports just don’t want to let go. They cling on like they’re part of the model itself. This is where patience and the right tools really pay off. Yanking too hard can leave gouges or even break delicate parts of your print.
- Pliers: Needle-nose pliers are great for gripping and twisting off larger support structures. They give you a bit more leverage than just your fingers.
- Deburring Tool: This is your best friend for cleaning up the little bumps and rough spots where supports used to be. The angled blade lets you shave away excess material cleanly.
- Small Screwdriver or Pick: For carefully prying away small, stubborn bits of support material from tight corners or recessed areas.
Smoothing Imperfections with Rotary Tools
For those really tough spots or when you need to do some shaping, a rotary tool can be a lifesaver. Think Dremel, but maybe a less expensive version if you’re just starting out. These tools, when used with the right attachments, can quickly remove material and smooth surfaces, but they require a gentle touch.
- Sanding Drums: These are cylindrical attachments that spin, allowing you to sand down larger areas or smooth out rough patches. Start with a coarser grit and work your way up.
- Grinding Stones: Useful for removing larger imperfections or reshaping small areas. Be careful not to remove too much material.
- Wire Brushes: Can be used for cleaning up stringing or light surface imperfections, but they can also scratch the plastic if you’re not careful.
Remember, with rotary tools, it’s better to go slow and steady. You can always take more material off, but you can’t put it back on. Using these tools effectively means your prints will go from just ‘printed’ to ‘finished’.
Integrating the 3D Printing Deburring Tool into Your Workflow
So, your print is done. Awesome! But before you can really show it off, there’s a bit of cleanup to do. This is where that handy deburring tool really shines. It’s not just about making things look pretty; it’s about making your prints functional and ready for whatever comes next, whether that’s painting, assembly, or just looking good on a shelf. Think of it as the final polish that turns a good print into a great one.
Step-by-Step Support Removal
Getting rid of those support structures can sometimes feel like a puzzle. Here’s a straightforward way to tackle it, making sure you don’t accidentally damage your print:
- Let it Cool: Always let your print cool down completely. Sometimes, the slight shrinking as it cools helps the supports detach more easily. Patience pays off here.
- Big Chunks First: Start with the larger, more accessible support pieces. Often, you can just snap these off by hand or with a gentle twist. This clears the way and gives you more room to work.
- Snip and Trim: For supports that are more attached or in tight spots, use flush cutters. Carefully snip them as close to the model as you can without cutting into the print itself. This is where you start to see a cleaner finish.
- Deburr the Nubs: This is the deburring tool’s main gig. Any little nubs or rough spots left behind after snipping can be carefully shaved away. The goal is to get these contact points perfectly flush with the model’s surface.
- Heat for Wisps (Optional): If you have those annoying, thin wisps of filament left, a quick, gentle pass with a heat gun can soften them enough to be wiped away with a cloth. Just be super careful not to overheat and warp your actual print.
Addressing Nubs and Rough Spots
Even after removing the main supports, you’ll often find small imperfections. These are the little nubs where supports met the model, or maybe some rough patches from the printing process itself. Your deburring tool is perfect for this. It allows you to carefully scrape or shave away these imperfections. Unlike a hobby knife, which can sometimes slip and gouge the print, a deburring tool has a specific angle and blade designed for controlled material removal. It’s all about precision, making those transition areas smooth and almost invisible. This attention to detail is what separates a decent print from something that looks professionally made, and it’s a key part of industrial manufacturing with 3D printing.
Preparing Prints for Painting and Assembly
Once all the supports are gone and the nubs are smoothed out, your print is almost ready. But to get a truly flawless finish, especially if you plan to paint or assemble multiple parts, a little more work goes a long way. Think about sanding down any remaining rough areas with fine-grit sandpaper. If you’re painting, a light primer coat can reveal any tiny imperfections you might have missed and provides a good surface for paint to stick to. For assembly, ensuring all mating surfaces are clean and smooth means parts will fit together snugly without forcing. This careful post-processing makes a huge difference in the final look and feel of your 3D printed objects.
Wrapping It Up
So, there you have it. Getting those FDM prints looking super smooth really just comes down to a few key steps. It’s not some big secret; it’s mostly about patience and using the right tools, like a good deburring tool and some sandpaper. Taking the time to clean up those support nubs and then working through the grits can make a massive difference. Don’t forget about filler primer either – that stuff is a game-changer for hiding those pesky layer lines. With a little effort, you can get your prints looking so good, they’ll almost seem like they came straight from a factory. Happy printing!