Thinking about switching up your hairstyle but want something that looks and feels natural? Microlinks hair extensions might be just what you need. They’re a game-changer for anyone looking to add volume or length without the heaviness of traditional extensions. In this guide, we’ll break down everything you need to know, so you can decide if microlinks are the right choice for you.
Key Takeaways
- Microlinks are small, lightweight hair extensions attached using tiny beads, blending seamlessly with natural hair.
- They offer versatility in styling, allowing you to curl, straighten, or wear your hair up without revealing the extensions.
- Proper installation by a professional is crucial to avoid damage and ensure a natural appearance.
- Regular maintenance, including washing and bead adjustments, is essential for keeping microlinks looking their best.
- Choosing the right color and texture is key to achieving a flawless, natural look with microlinks.
What Are Microlinks Hair Extensions?
Understanding the Basics of Microlinks
Microlinks, also called microbeads or cold fusion extensions, are a method of adding length and volume to your natural hair using tiny silicone or metal beads. Unlike other extension methods, microlinks require no glue, heat, or braiding, making them a safer and more natural-looking option. These beads are used to attach small strands of extension hair to sections of your real hair, creating a seamless blend. The result? A fuller, longer hairstyle that can move and feel like your own.
Types of Microlinks Available
There are two main types of microlink extensions:
- I-Tip Hair Extensions: Individual strands of hair are attached to your natural hair using microbeads. This method is more time-consuming but allows for greater customization.
- Beaded Weft Extensions: These involve attaching a weft of hair (a long strip of hair) using microbeads. They are quicker to install compared to I-tips and are often more budget-friendly.
Here’s a quick comparison:
| Feature | I-Tip Extensions | Beaded Weft Extensions |
|---|---|---|
| Installation Time | Longer | Shorter |
| Cost | Higher | Lower |
| Customization | High | Moderate |
| Hair Type Suitability | All | Best for thicker hair |
How Microlinks Differ from Other Extensions
Microlinks stand out from other extension methods for a few key reasons:
- No Adhesives or Heat: Unlike tape-ins or keratin extensions, microlinks don’t require glue or heat for installation, reducing potential damage to your natural hair.
- Reusability: The extensions can often be reused after removal, making them a more sustainable choice.
- Blending with Natural Hair: Because there’s no bulky base or visible adhesive, microlinks blend seamlessly with your hair, especially when installed professionally.
If you’re looking for a lightweight, natural-feeling option to enhance your hair, microlinks might be the perfect fit.
Benefits of Choosing Microlinks Hair Extensions
Achieving a Natural Look and Feel
Microlinks are all about blending in. These tiny beads are designed to match your hair color, making them practically invisible. The result? A seamless, natural look that feels like your own hair. Unlike other extensions that can sometimes look bulky or obvious, microlinks give you that "I woke up like this" vibe. Plus, they move naturally with your hair, so no one will suspect a thing.
Versatility in Styling Options
When it comes to styling, microlinks are a game changer. Want to curl, straighten, or even braid your hair? Go for it! Microlinks let you switch up your look as often as you like without restrictions. Whether you’re going for a sleek ponytail, beachy waves, or a fancy updo, these extensions have got you covered. And because they blend so well, you won’t have to worry about them showing, no matter the style.
Lightweight and Comfortable to Wear
Let’s be real—some extensions can feel like you’re carrying extra weight on your head all day. Not with microlinks. These extensions are super lightweight, so you’ll barely notice they’re there. They’re also breathable, allowing your scalp to feel comfortable and your natural hair to stay healthy. If you’ve ever dealt with the itchiness or heaviness of other extensions, microlinks are a refreshing alternative. And because there’s no glue or heavy stitching involved, your scalp gets to breathe easy.
The Microlinks Installation Process
Step-by-Step Guide to Installation
Installing microlinks is a detailed process that requires patience and precision. Here’s how it typically works:
- Prepare the hair: The stylist starts by sectioning the natural hair into manageable rows, leaving out the hairline and edges to ensure a seamless look, especially for high hairstyles like ponytails.
- Threading the microlinks: Using a hair threader, a small silicone bead (the microlink) is slid onto a thin strand of natural hair.
- Adding the extension: A strand of extension hair is placed alongside the natural hair, and the bead is crimped securely using a special tool, locking the extension in place.
- Repeat the process: This is done row by row until the desired fullness is achieved. Depending on the look, 100 to 250 microlink strands may be needed.
- Blend and style: Once all the extensions are attached, the stylist blends the extensions with the natural hair for a flawless finish.
Tools and Techniques Used
Microlinks require specific tools and a skilled hand. Here’s what’s typically involved:
- Microlinks: Small silicone beads that secure the extensions.
- Hair threader: A tool used to pull a strand of hair through the microlink.
- Pliers: Special pliers are used to clamp the microlink securely in place.
- Sectioning clips and combs: These help in organizing the hair for precise application.
A professional stylist ensures the extensions are evenly distributed for a natural look, avoiding too much strain on any section of hair.
Importance of Professional Installation
While it may be tempting to try a DIY approach, microlinks are not a do-it-yourself project. A professional stylist ensures proper placement, preventing damage to your natural hair. They also know how to distribute the extensions evenly, avoiding unnecessary strain that could lead to breakage. Plus, a pro can help you choose the right type, color, and texture of extensions to match your natural hair perfectly. Investing in professional installation not only gives you better results but also helps maintain the health of your hair.
Caring for Your Microlinks Hair Extensions

Daily Maintenance Tips
Taking care of microlinks daily isn’t rocket science, but it does require a little effort. Here’s what you need to do:
- Detangle every day: Use a wide-tooth comb or a gentle detangling brush to prevent knots. Always start from the ends and work your way up.
- Wrap it up at night: Before bed, wrap your hair with a satin scarf or sleep on a silk pillowcase. This keeps the extensions from tangling or drying out.
- Avoid overloading products: Stick to lightweight, alcohol-free styling products to keep your microlinks from slipping or looking greasy.
Washing and Conditioning Guidelines
Washing your microlinks isn’t the same as washing your natural hair. Here are some tips:
- Use a sulfate-free shampoo to protect both your natural hair and the extensions. Massage your scalp gently, avoiding rough scrubbing near the microlinks.
- Apply conditioner from the mid-lengths to the ends, steering clear of the roots where the microlinks are attached. A leave-in conditioner can also help keep your hair soft.
- Rinse thoroughly and gently pat dry with a towel. Avoid twisting or wringing your hair.
For styling, always use a heat protectant before applying any hot tools. This prevents damage to both your extensions and natural hair.
When to Schedule Adjustments
Microlinks need professional care to stay in top shape. Regular maintenance is key to keeping your extensions looking flawless.
- Visit your stylist every 6-8 weeks. This allows them to reposition the microlinks as your natural hair grows.
- Don’t wait too long! Letting the extensions grow out too far can lead to tangling or unnecessary strain on your natural hair.
- Plan for removal and reinstallation every 2-3 months to give your hair a break and ensure everything stays healthy.
Taking the time to maintain your microlinks properly not only extends their lifespan but also keeps your natural hair in great condition. With these tips, you’ll enjoy your extensions without any hassle.
Common Mistakes to Avoid with Microlinks
Overloading Extensions on Natural Hair
When it comes to microlinks, less is often more. Installing too many extensions can put unnecessary stress on your natural hair, leading to breakage or even hair loss. Your stylist should know the right balance to maintain a natural look without overburdening your strands. Trust their judgment and avoid the temptation to add "just one more" for extra volume.
Skipping Regular Maintenance
Microlinks might feel like a "set it and forget it" solution, but they’re not. As your natural hair grows, the extensions can start to slip. If left unadjusted, this can cause tangling or uneven weight distribution. Schedule a touch-up with your stylist every 6-8 weeks to keep everything secure and looking flawless.
Using Excessive Heat Without Protection
Heat styling can be a microlink killer if you’re not careful. Applying high heat without a protectant spray can damage both the extensions and your natural hair. Make it a habit to use a heat protectant every single time you pick up a curling iron or flat iron. Better safe than sorry, right?
By avoiding these common pitfalls, you’ll extend the life of your microlinks and keep your hair looking its best. Remember, proper care and maintenance go a long way in ensuring your microlinks are worth the investment.
How to Choose the Right Microlinks for Your Hair

Matching Microlinks to Your Hair Type
Picking the right microlinks starts with understanding your hair type. If your hair is fine, smaller microlinks are usually the best choice since they’re less noticeable and won’t weigh your hair down. On the other hand, if you have thicker hair, larger microlinks can provide better support and blend more naturally. Think of it like finding the right size shoe—comfort and fit are everything.
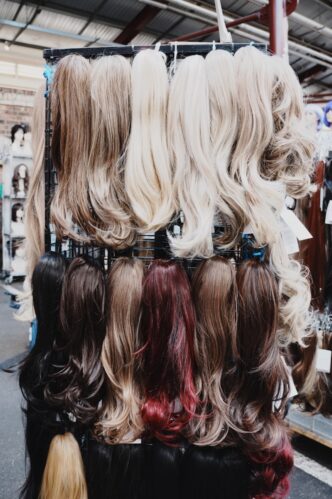
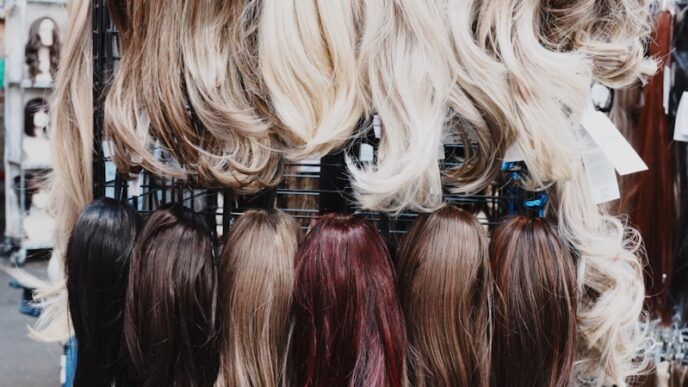
Selecting the Right Color and Material
The color of your microlinks should blend seamlessly with your natural hair. Most microlinks come in a variety of shades, so take the time to match as closely as possible. If you want a unique look, some options even include ombre or highlighted styles. As for materials, microlinks are typically made from copper, aluminum, or silicone. Copper is durable, aluminum is lightweight, and silicone is gentle on your hair. Choose based on your hair’s needs and your personal comfort preferences.
Consulting a Professional Stylist
This step is non-negotiable. A professional stylist can evaluate your hair’s texture, condition, and style goals, helping you pick the perfect microlinks. They’ll also ensure the installation process is done correctly, which is crucial for both the look and health of your hair. If you’re unsure where to start, consider discussing your options with a stylist who has experience working with microlinks. They’ll guide you in making the best choice for your unique hair needs.
Microlinks Hair Extensions: Pros and Cons
Advantages of Microlinks Extensions
- Natural Appearance: Microlinks blend seamlessly with your natural hair, thanks to their tiny, discreet beads. This creates a look that’s almost impossible to distinguish from your real hair.
- Lightweight and Comfortable: The beads are made from lightweight materials like silicone or aluminum, making them gentle on your scalp and easy to wear for extended periods.
- Versatile Styling: Microlinks allow you to style your hair however you like—curl it, straighten it, or even put it up in a ponytail. They’re flexible enough to adapt to most hairstyles.
- Damage-Free Installation: Since microlinks don’t use glue or heat during the application process, they’re less likely to harm your natural hair or irritate sensitive scalps.
- Long-Lasting: With proper care, microlinks can last up to 8 weeks, making them a durable choice compared to other hair extension methods.
Potential Drawbacks to Consider
- Time-Consuming Installation: Attaching microlinks involves placing each bead individually, which can take several hours depending on the amount of hair being installed.
- Maintenance Requirements: Regular upkeep is essential. As your natural hair grows, the beads need to be adjusted to maintain their position and prevent tangling.
- Visibility in Certain Styles: If not installed properly or if the hairline isn’t left out, the beads might be visible in high ponytails or updos.
- Higher Cost: Microlinks tend to be more expensive than other types of extensions, both in terms of installation and maintenance.
Who Should Avoid Microlinks
Microlinks might not be ideal for everyone. If your natural hair is extremely fine or fragile, the weight of the extensions could cause breakage. Additionally, if you’re not willing to commit to regular maintenance appointments, this method might not be the best fit for your lifestyle.
Wrapping It Up
So, that’s the scoop on microlinks! They’re a game-changer if you’re looking to add length, volume, or just a little extra flair to your hair. Sure, they take some effort to maintain, and you’ll need a pro to install them, but the results? Totally worth it. Whether you’re going for a subtle boost or a dramatic transformation, microlinks can help you get there. Just remember to take care of them and give your natural hair some love too. Now, go ahead and rock that new look with confidence—you’ve got this!