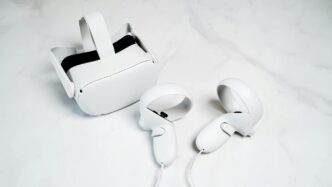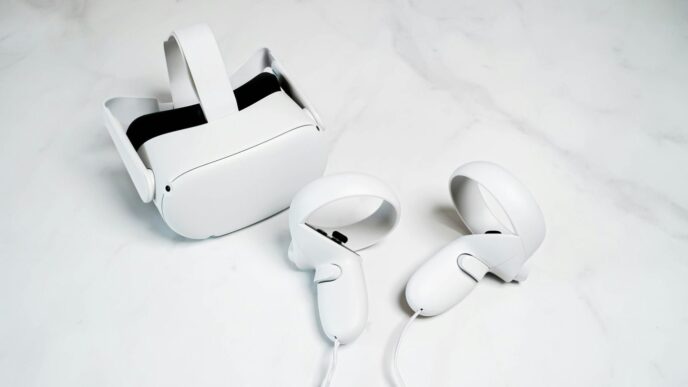

So, you’re getting into VR, huh? It’s pretty cool, but sometimes things can look a bit fuzzy or just not quite right. A lot of that has to do with how the headset lines up with your eyes. It’s not just about the fancy screens inside; it’s also about how your own eyes work with the tech. We’re going to break down what makes VR look clear and why sometimes it doesn’t. It’s mostly about getting the fit just right, and that starts with understanding a key setting.
Key Takeaways
- What is IPD in VR? It’s the distance between the centers of your pupils, and getting it right in your headset is super important for clear visuals.
- Getting your headset’s IPD setting correct means the lenses line up with your eyes properly, reducing strain and making the picture sharper.
- Display tech like LCD versus OLED can change how colors look and how clear text is, affecting the overall visual experience.
- The field of view (FOV) matters; a wider view feels more immersive but needs more pixels to stay sharp, creating a balancing act for headset makers.
- Making sure your headset fits well, along with adjusting the IPD, is the best way to get the clearest picture and have a comfortable VR session.
Understanding Interpupillary Distance (IPD)
So, what exactly is IPD in the context of virtual reality? Simply put, it’s the distance between the centers of your pupils. Think of it like this: your eyes aren’t perfectly aligned in the middle of your head; they have their own spacing. VR headsets need to account for this to show you a clear, comfortable picture.
What is IPD in VR?
IPD, or interpupillary distance, is a measurement that tells us how far apart your pupils are. This number is unique to each person. For example, some people might have an IPD of 60mm, while others could be closer to 70mm. Getting this measurement right in a VR headset is super important because the lenses inside the headset need to line up with your eyes correctly. If they don’t, you’re going to have a bad time visually.
The Importance of IPD for Visual Clarity
When the headset’s lenses are aligned with your pupils, the image you see appears as a single, sharp picture. This is because each eye is getting a slightly different perspective, just like in real life, and your brain combines these into a 3D image. When the IPD setting is wrong, you might see double images, blurry visuals, or even experience eye strain. It’s like trying to look through binoculars that aren’t adjusted for your eyes – things just look off. Getting the IPD dialed in is a big step towards a clear VR experience.
How IPD Affects Immersion and Comfort
Beyond just clarity, the correct IPD setting really makes a difference in how immersed and comfortable you feel. If the lenses are misaligned, your eyes have to work harder to try and focus, which can lead to fatigue and headaches after a while. This discomfort can pull you right out of the virtual world. On the other hand, when the IPD is set correctly, the virtual environment feels more natural and believable. It helps maintain that sense of presence, making it easier to forget you’re wearing a headset at all. For those who wear glasses, finding a headset that accommodates them, like some HTC VIVE models, can be a game-changer, especially if they also feature automatic IPD adjustment. This makes the whole experience much more accessible and enjoyable for a wider range of users.
Display Technologies and Their Impact on Clarity
When you’re looking at VR headsets, the display tech inside makes a huge difference in how clear everything looks. It’s not just about cramming more pixels in; it’s a whole balancing act.
Resolution Versus Field of View Trade-offs
Think of it like a camera lens. A wider field of view (FOV) lets you see more of the virtual world at once, which is great for feeling like you’re really there. But, to keep that wide view sharp, you need a lot more pixels. If you try to push the FOV too wide without enough pixels, things start to look blurry, especially around the edges. Developers have to make tough choices here. Do they go for a super sharp image with a narrower view, or a more expansive view that might be a bit softer? It’s a constant push and pull, and it often means the graphics card has to work harder, which can sometimes lead to lower frame rates, making the experience feel less smooth.
LCD Versus OLED Panel Differences
So, you’ve got LCD and OLED screens, and they each have their pros and cons for VR. OLED panels are known for their amazing contrast ratios and true blacks. This means dark scenes in games or movies look really deep and rich, which adds a lot to the immersion. They also have super-fast pixel response times, usually under a millisecond. This is a big deal in VR because it means less motion blur when you whip your head around. LCDs, on the other hand, tend to be brighter and can sometimes offer higher pixel density for the price. However, their black levels aren’t as good, and they can have a slightly slower response time, which might show up as a bit of ghosting in fast action. For a lot of people, the trade-off comes down to whether you prioritize deep blacks and smooth motion (OLED) or brightness and potentially sharper text (LCD).
Subpixel Layouts and Color Fringing
This is a bit more technical, but it really matters for text and fine details. Some VR displays use an RGB (Red, Green, Blue) subpixel layout, where each pixel is made up of these three distinct color dots. Others use different arrangements, like a pentile matrix. The way these subpixels are arranged can affect how colors are displayed, especially around sharp edges or text. A good RGB layout can reduce something called ‘color fringing,’ where you might see faint red or blue outlines around objects. This makes text much easier to read and details much crisper. It’s one of those things you might not notice consciously, but it definitely impacts the overall visual clarity and how comfortable your eyes feel after a while. If you’re spending hours in VR, especially for work or reading, this detail can be a game-changer. Future headsets are looking at even more advanced display tech, like holographic lenses, which promise to further improve clarity and reduce these kinds of visual artifacts.
Advanced Optics for Sharper VR Experiences
Minimizing Lens Distortion and Aberrations
So, you’ve got your VR headset, and the picture looks… okay. But maybe you’re noticing things look a bit warped around the edges, or colors seem to bleed into each other. That’s often down to lens distortion and chromatic aberration. Think of it like looking through a cheap pair of binoculars – things get fuzzy or weirdly colored the further you look from the center. Good VR optics work hard to fix this. They use special lens shapes, often called aspherical lenses, which are designed to bend light more evenly. This means the image stays sharp and clear pretty much everywhere you look, not just in the dead center. They also use multiple lens elements, like layers in a cake, to cancel out those annoying color fringes that happen when different colors of light don’t focus at the exact same spot. Getting these right makes a huge difference in how real and comfortable the virtual world feels.
Optimizing Field of View for Immersion
Field of View, or FOV, is basically how much of the virtual world you can see at once. If it’s too narrow, it feels like you’re looking through a pair of ski goggles or a tiny window, which really breaks the feeling of being in the virtual space. It can even make you feel a bit motion sick because your brain knows you should be seeing more. The goal with advanced optics is to push that FOV wider, closer to what you see in real life. This makes the experience much more immersive. Imagine playing a game where you can actually see your surroundings without turning your whole head – that’s the power of a wide FOV. It tricks your brain into believing you’re really there. Some headsets are getting really good at this, making the virtual world feel much more natural and less like you’re just looking at a screen strapped to your face.
The Role of Prescription Lenses in VR
Now, this is a big one, especially if you wear glasses in the real world. Trying to cram your glasses inside a VR headset is usually uncomfortable, and they can even scratch the headset’s lenses. Plus, if your glasses aren’t perfectly positioned, your vision in VR won’t be clear. That’s where custom prescription lenses for VR headsets come in. These are like custom inserts that clip or fit directly into your headset, made specifically for your eyes. They correct your vision precisely, meaning you don’t need your glasses anymore. This not only makes the image crystal clear but also way more comfortable for longer VR sessions. Many of these also come with helpful coatings, like ones that cut down glare or filter out blue light, which can help reduce eye strain. It’s a game-changer for anyone who needs vision correction to enjoy VR properly.
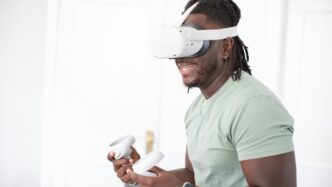
Achieving Optimal Visuals Through Headset Adjustment
So, you’ve got your VR headset, and you’re ready to jump in. But before you do, let’s talk about making sure everything looks as good as it can. It’s not just about the fancy screens inside; how you adjust the headset itself makes a huge difference. Getting this right means less eye strain and a much more believable virtual world.
Setting the Correct Interpupillary Distance
This is probably the most important adjustment you’ll make. Interpupillary distance, or IPD, is basically the distance between the centers of your pupils. VR headsets have lenses, and if those lenses aren’t lined up with your eyes correctly, things get blurry, or you might even see double. It’s like looking through binoculars that aren’t set for your eyes – just not comfortable.
Most modern headsets have a physical slider or a digital setting to change the IPD. You’ll usually see a number, often in millimeters, that you adjust until the image looks sharp and feels natural. Some headsets, like the Meta Quest 3S, let you adjust the lens distance digitally. It’s worth spending a few minutes to get this dialed in perfectly. A good IPD setting can reduce eye strain significantly, making those longer VR sessions much more pleasant.
Ensuring Proper Headset Fit and Alignment
Beyond just the IPD, how the headset sits on your head matters a lot. If it’s too loose, it can shift around, throwing off that perfect lens alignment we just talked about. If it’s too tight, well, that’s just uncomfortable, and you won’t want to wear it for long.
Here are a few things to check:
- Strap Tension: Make sure the straps are snug enough to keep the headset stable, but not so tight that they cause pressure points on your face or head. You want it to feel secure, not like a vice.
- Weight Distribution: Try to get the headset to balance evenly. Some headsets have top straps or adjustable rear cradles that help with this. A well-balanced headset feels lighter and is more comfortable for extended use.
- Eye Relief: This is how far the lenses are from your eyes. Some headsets let you adjust this. If you wear glasses, you might need more eye relief. Getting this right can also help prevent your glasses from scratching the headset lenses.
Testing Visual Clarity After Adjustments
Once you’ve fiddled with the IPD and made sure the headset fits well, you need to test it out. Don’t just assume it’s perfect. Load up a game or an app and really pay attention to how things look.
- Sharpness: Look at text, distant objects, and fine details. Is everything clear, or is there a noticeable blur, especially around the edges?
- Eye Strain: Does it feel comfortable to look around? If your eyes feel tired or strained after just a few minutes, something might still be off with the IPD or the headset’s position.
- Double Vision/Ghosting: Are there any weird overlapping images or faint outlines around objects? This is a clear sign that the IPD or headset alignment needs more tweaking.
It might take a few tries to get everything just right, but the payoff is a much clearer, more immersive, and comfortable VR experience. It’s really about finding that sweet spot where the virtual world feels as real as possible.
Factors Influencing VR Visual Quality
So, you’ve got your headset dialed in, IPD set just right, and you’re ready to jump into a virtual world. But wait, there are still a few things that can mess with how good everything looks. It’s not just about the fancy lenses or the super-high resolution; other bits and pieces play a big role too.
Refresh Rate and Motion Sickness
This is a big one. Think about it like watching a flipbook. If you flip the pages too slowly, you get a jerky, choppy image. In VR, if the refresh rate – how many times the image updates per second – is too low, your brain can get pretty confused. This often leads to that awful feeling of motion sickness, or ‘VR sickness’ as some call it. Most modern headsets aim for at least 90Hz, and many go up to 120Hz or even higher. A higher refresh rate means smoother motion, which is key to keeping your stomach settled and your eyes happy. Anything below 60Hz is usually a no-go for a decent VR experience.
Pixel Density and Screen-Door Effect
Ever looked really, really close at a screen and seen the tiny lines between the pixels? That’s kind of what the ‘screen-door effect’ is in VR. It’s when the pixels are spaced out enough that you can actually see the gaps, making the image look like you’re peering through a screen door. It really breaks the immersion. To fight this, manufacturers pack more pixels into the display, which is called increasing pixel density. Higher pixel density means a sharper, clearer image where those gaps are much harder, or impossible, to see. For a good experience, aiming for displays with over 1500 PPI (pixels per inch) is a solid bet.
Controller Design and Tracking Methods
Okay, this might seem a bit out of left field when we’re talking about visual quality, but stick with me. How your controllers track your hands and how they feel in your grip actually impacts how you perceive the virtual world. If your virtual hands are lagging behind your real ones, or if the controllers feel clunky and inaccurate, it pulls you right out of the experience. This disconnect can make the visuals feel less believable, even if the display itself is top-notch. Good tracking means your actions in VR feel natural and immediate, which helps sell the illusion and makes the visual experience feel more cohesive and convincing.
Future Trends in VR Display Technology
So, what’s next for VR displays? It feels like we’re on the cusp of some pretty big changes, moving beyond just slapping smartphone screens into headsets. The focus is really shifting towards making things sharper, more comfortable, and just plain better to look at.
Emerging Micro-OLED Technology
One of the most talked-about advancements is micro-OLED. Think super high pixel densities, like over 2000 PPI. This means visuals could get incredibly crisp, almost like looking at the real world. Plus, these tiny OLED panels are supposed to use less power, which is always a good thing for battery-powered headsets. It’s still pretty new, but it promises a big jump in clarity.
The Evolution of VR Optics
Beyond the screens themselves, the lenses are getting a serious upgrade. We’re seeing a move away from older lens types that could cause distortion. New designs are aiming to be thinner and lighter, which will make headsets way more comfortable for longer sessions. Some are even looking at adaptive lenses that can change focus, kind of like your own eyes do. This could really help with eye strain and make the virtual world feel more natural. Imagine lenses that adjust automatically as you look at things near or far – that’s the goal.
Hardware Transitions and Optimization
We’re also seeing a shift towards hardware specifically built for VR, not just repurposed parts. This includes custom chips and display panels designed from the ground up for virtual reality. This kind of optimization means things like eye-tracking can work better. When eye-tracking is more accurate, we can use techniques like foveated rendering. Basically, the headset figures out where you’re looking and puts all the graphical power there, while the edges of your vision get a bit less detail. This can significantly reduce the strain on your computer’s graphics card, allowing for higher frame rates or better graphics overall. It’s a smart way to get more performance without needing a super-powered PC for every VR experience.
Here’s a quick look at how some of these trends might impact performance:
| Technology | Potential Benefit |
|---|---|
| Micro-OLED | Higher pixel density, better power efficiency |
| Adaptive Lenses | Reduced eye strain, more natural focus |
| Foveated Rendering | Improved performance, higher visual fidelity in focus |
| Lighter Optics | Increased headset comfort for extended use |
Wrapping Up Your Visual Journey
So, we’ve looked at a lot of stuff about how VR headsets show us virtual worlds. Getting the picture clear really comes down to a few key things, like how many pixels are packed into the screen and how the lenses work with your eyes. Making sure the headset fits right, especially with that IPD setting, makes a big difference in how long you can comfortably stay in VR. As the tech gets better, we’re seeing sharper screens and wider views, which is pretty exciting. But for now, understanding these basics helps you pick the right gear and get the most out of your virtual adventures. It’s all about making that digital world feel as real and comfortable as possible.
Frequently Asked Questions
What exactly is IPD and why does it matter for VR?
IPD stands for Interpupillary Distance. It’s the space between the centers of your pupils. In VR, matching the headset’s lens distance to your IPD is super important. It makes the image clear and comfy for your eyes, stopping things from looking blurry or causing headaches.
How does the type of screen, like LCD or OLED, affect VR clarity?
OLED screens usually give you really deep blacks and bright colors, making dark scenes look amazing. LCD screens can be brighter and sometimes have sharper text because of how their tiny dots (pixels) are arranged. Both have pros and cons for how clear and smooth the VR world looks.
What’s the deal with resolution and field of view in VR?
Resolution is how many pixels are on the screen, making the picture sharp. Field of view (FOV) is how much you can see, like your natural vision. A wider FOV makes VR more immersive, but it needs more pixels to stay clear. It’s a balancing act for headset makers!
Can adjusting the VR headset really make a big difference?
Absolutely! Properly adjusting the headset, especially getting the IPD right and making sure it fits snugly, is key. It ensures the lenses line up perfectly with your eyes, which is crucial for a clear, comfortable, and truly immersive VR experience.
What is the ‘screen-door effect’ and how can I avoid it?
The screen-door effect happens when you can see the tiny gaps between pixels, like looking through a screen door. Higher pixel density (more pixels packed into the screen) helps reduce this. Choosing headsets with very sharp displays, often above 1500 PPI, makes a big difference.
Are there new screen technologies coming that will make VR even clearer?
Yes! New tech like micro-OLED is on the way, promising even higher pixel densities than what we have now. This means VR worlds will look even sharper and more detailed. Plus, advances in lens design are helping to reduce distortions and improve the overall visual experience.