
Ever wondered how those cool 3D models and prototypes are made? There’s a bunch of ways, and one of them is called Laminated Object Manufacturing, or LOM for short. It’s a pretty neat process that’s been around for a while, and it’s got its own special way of doing things. We’re going to break down the laminated object manufacturing working principle, looking at what it is, how it works, and why people use it, even with its quirks.
Key Takeaways
- Laminated Object Manufacturing (LOM) is a 3D printing method that builds objects by layering and cutting sheets of material.
- The process involves bonding layers together with adhesive and then cutting out the shape of each layer, often using a laser or blade.
- LOM was first developed by Helisys Inc. in 1991 and is known for being a fast and relatively inexpensive way to create prototypes.
- While versatile with materials like paper, plastic, and metal, LOM has limitations in creating complex shapes with undercuts and can have accuracy issues.
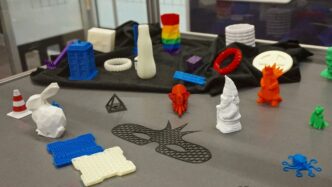
- It’s commonly used for rapid prototyping, scale models, and visual aids due to its speed and cost-effectiveness, though the final products often need finishing.
Understanding The Laminated Object Manufacturing Working Principle
Laminated Object Manufacturing, or LOM, is a pretty neat way to build 3D objects, kind of like a super-powered craft project. Instead of melting plastic or using powders, LOM works by stacking and cutting sheets of material. Think of it like building with really precise layers of paper, plastic, or even thin metal. The core idea is to bond layers of sheet material together and then cut away the excess to reveal the final shape. It’s a process that combines additive and subtractive manufacturing, which is kind of interesting.
Core Concept Of Laminated Object Manufacturing
At its heart, LOM is about creating a solid object from flat sheets. These sheets are usually coated with an adhesive. A heated roller passes over them, activating the glue, and then they’re pressed onto the layer below. This builds up a solid block of material. Once you have this block, a cutting tool, often a laser or a blade, carves out the shape of your object, layer by layer. It’s a bit like sculpting, but starting from a stack of glued-together paper. This method was first developed by Helisys Inc. back in 1991, and it’s been around for a while now.
The Layer-By-Layer Build Process
The process starts with a digital design, like a CAD file. This design is sliced into thin, two-dimensional layers. Then, the LOM machine gets to work:
- Material Deposition: A sheet of material, like paper, is fed onto the build platform.
- Adhesive Activation: A roller heats up and spreads an adhesive evenly across the sheet.
- Layer Bonding: The adhesive-coated sheet is pressed onto the previous layer, bonding them together.
- Cutting: A laser or blade precisely cuts the outline of the object for that specific layer. Often, excess material is also cross-hatched to make it easier to remove later.
- Platform Adjustment: The build platform moves down slightly, and the process repeats for the next layer.
This cycle continues until the entire object is built up. The result is a block with the object embedded inside, surrounded by the excess material.
Material Fusion And Cutting Techniques
How the layers stick together and how the shape is formed are the key technical bits. Fusion happens through the adhesive coating on the sheets. When heated by the roller, this adhesive melts and bonds the new layer to the one beneath it. This creates a solid laminate. For cutting, LOM machines typically use one of two methods:
- Laser Cutting: A high-powered laser precisely cuts through the material. This is great for intricate details and can handle various materials, though it can be slower for thicker sheets.
- Blade Cutting: A mechanical knife or blade is used. This is often faster for materials like paper and can be more cost-effective, but might not offer the same level of detail as a laser.
After the cutting is done, the excess material, which acts as support during the build, is removed. This is usually done manually or with simple tools, revealing the final 3D part. This makes LOM a really interesting option for rapid prototyping.
Key Components And Materials In LOM
So, what exactly makes Laminated Object Manufacturing tick? It’s a mix of specific parts and the stuff they work with. Think of it like building with really fancy, high-tech paper or plastic sheets.
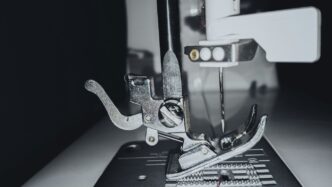
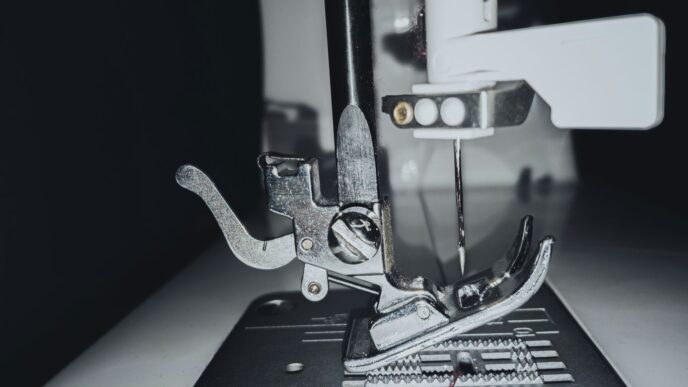
Essential Machine Parts
The LOM machine itself has a few main players that get the job done. You’ve got your material feed system, which is usually a big roll of the sheet material. Then there’s the bonding mechanism – this could be a heated roller or an adhesive applicator that sticks the layers together. The real star of the show is the cutting system, typically a laser or a knife, that precisely carves out each layer’s shape. Finally, there’s the build platform where everything comes together, and a way to move the material around.
Commonly Used Sheet Materials
This is where LOM really shows its flexibility. The most common material is paper, which is pretty cheap and, when laminated, can actually feel a bit like wood. You can get it in different colors, too, which is neat for visual prototypes. Beyond paper, though, you can also use plastics and even some composite sheets. Metal sheets are possible, but they’re a bit trickier to work with and usually require more specialized machines.
Adhesive And Bonding Agents
To get those layers to stick, you need something to bond them. Often, the sheet materials come pre-coated with a heat-activated adhesive. When the heated roller passes over, it melts the adhesive and fuses the layers. Other systems might use a liquid adhesive that’s applied to the sheet before the next layer is added. The type of adhesive used really depends on the sheet material and the specific LOM machine you’re working with.
The Step-By-Step LOM Workflow
So, how does Laminated Object Manufacturing actually work? It’s a pretty neat process that combines a couple of different ideas to build things up layer by layer. Think of it like making a really detailed sandwich, but with a laser.
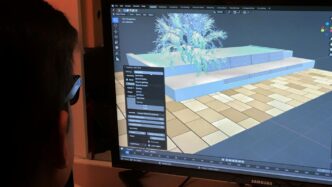
Preparing The CAD Model
First off, you need a digital blueprint. This starts with a Computer-Aided Design (CAD) file. This file is basically a 3D model of whatever you want to create. Before the LOM machine can do its thing, this CAD file needs to be converted into a format the machine understands, usually something like an STL or 3DS file. This conversion breaks down the 3D model into a series of thin, 2D slices, which are essentially the layers the machine will build. It’s a bit like slicing a loaf of bread before you bake it, but digitally.
Layer Deposition And Bonding
Once the digital slicing is done, the actual building begins. The LOM machine pulls a continuous sheet of material – often paper, but it can be plastic or even metal – across the build platform. This material usually has an adhesive coating. A heated roller then passes over this sheet, activating the adhesive and bonding the layer to the platform or the previous layer. This process is repeated, with each new layer being bonded on top of the last. The careful application of adhesive and controlled heating are key to creating strong, unified layers. This additive part builds up a solid block of material that contains your desired object within it.
Subtractive Shaping And Waste Removal
Now comes the part where the machine carves away the excess. After a layer is bonded, a computer-controlled laser or blade precisely cuts the outline of that layer. It doesn’t just cut out the object shape; it also cuts the surrounding waste material in a crosshatch pattern. This makes it easier to remove later. Once all the layers are deposited and cut, the final step is to extract your object from the surrounding block of waste material. This is often done manually, revealing the finished prototype. It’s a bit like excavating a sculpture from a block of stone, but with paper and lasers. This method is a great way to get rapid prototypes for design testing [01f3].
Here’s a quick rundown of the main steps:
- CAD Model Conversion: Transforming your 3D design into machine-readable 2D slices.
- Layer Bonding: Applying adhesive and using heat to fuse successive material sheets.
- Outline Cutting: Precisely cutting the shape of each layer with a laser or blade.
- Waste Material Scoring: Creating a crosshatch pattern in excess material for easier removal.
- Object Extraction: Manually separating the finished part from the surrounding waste block.
Historical Development Of LOM Technology
Laminated Object Manufacturing, or LOM as it’s often called, didn’t just pop up overnight. Its story really kicks off in 1991 when a company named Helisys introduced the world to this unique way of making things. They figured out how to fuse sheets of material together and then use a laser guided by a computer to cut out the shapes. It was a pretty neat idea for the time, especially for making prototypes quickly.
Origins With Helisys Inc.
Helisys was the pioneer here. They developed the initial LOM process, which involved bonding layers of material and then using a laser to precisely cut each layer. This method allowed for the creation of 3D objects from flat sheets, layer by painstaking layer. Think of it like building a 3D puzzle, but instead of pre-made pieces, you’re cutting the pieces out of stacked material as you go.
Evolution And Innovations
Fast forward to 2003, and we see a significant evolution thanks to the MacCormack brothers. They took the LOM concept and gave it a bit of a makeover. Their big move was using everyday office paper and standard inkjet printers to add color and detail before the cutting happened. This approach, sometimes called Selective Deposition Lamination (SDL), meant they could print designs onto the paper sheets. Then, they’d selectively apply adhesive only where it was needed for the design, and a cutting tool would shape the object. This made it easier to separate the final part from the leftover material. Their company, Mcor Technologies, really pushed this forward, even adding CMYK color printing to make the prototypes more vibrant and useful for marketing or just showing off designs.
Modern Adaptations And Successors
While Helisys might not be around anymore, the ideas behind LOM certainly lived on. The MacCormack brothers’ work with Mcor Technologies is a prime example of how the technology adapted. They focused on making LOM more accessible and visually appealing, especially for things like marketing props and visual prototypes. The ability to print in color directly onto the material layers was a game-changer for certain applications. Although LOM isn’t as common as some other 3D printing methods today, its core principles of layering and subtractive shaping have influenced other manufacturing techniques. It showed that combining additive (layering) and subtractive (cutting) processes could be a really effective way to create objects, especially when speed and cost were major factors.
Advantages Of Laminated Object Manufacturing
So, what makes Laminated Object Manufacturing (LOM) a worthwhile option for certain projects? Well, there are a few things that really stand out. For starters, it’s pretty good when it comes to speed and keeping costs down. This is especially true if you’re using common materials like paper, which are way cheaper than some of the fancy stuff other 3D printing methods use. You can get a physical model or prototype pretty quickly, which is great when you just need to see how something looks or fits without waiting ages.
Speed And Cost-Effectiveness
One of the biggest draws of LOM is how fast you can get a physical object compared to traditional manufacturing. You’re not waiting for molds or complex tooling. Just load your design, and the machine starts building. This speed, combined with the low cost of materials like paper or plastic sheets, makes it a really attractive choice for rapid prototyping. You can churn out multiple design iterations without breaking the bank. It’s a practical way to test out ideas early in the design process. For more on this, you can check out LOM’s capabilities.
Material Versatility
While paper is a common go-to, LOM isn’t strictly limited to just that. You can work with a range of sheet materials, including plastics and even some composites. This means you can pick a material that best suits the needs of your prototype, whether it’s for visual representation or some basic functional testing. The ability to bond these layers together securely also means the resulting objects have decent structural integrity.
Environmental Considerations
When you think about manufacturing, waste is often a big concern. LOM, particularly when using paper, can be a bit more environmentally friendly than some other methods. Paper is a renewable resource, and the waste material generated during the cutting process is often easier to recycle or dispose of compared to the plastic powders or resins used elsewhere. It’s not perfect, of course, but it’s a step in the right direction for companies trying to be more mindful of their footprint.
Limitations And Challenges In LOM
While Laminated Object Manufacturing (LOM) has its perks, it’s not exactly a perfect fit for every single project. You’ve got to be aware of what it can’t do so you don’t end up with a headache later.
Geometric Complexity Constraints
One of the main things to keep in mind is that LOM isn’t the best choice if you need super intricate or complex shapes, especially on the inside of your model. Because it’s a subtractive process after the layers are bonded, getting into tight internal spaces to cut away excess material can be really tough. Think about trying to carve out a detailed sculpture from a solid block of wood – it’s kind of like that, but with layers. This means undercuts and complex internal structures are a real challenge. It’s much better suited for simpler, more solid geometries.
Dimensional Accuracy And Surface Finish
Compared to some other 3D printing methods out there, LOM can sometimes fall a bit short when it comes to super precise measurements and a perfectly smooth surface. The layer-by-layer nature, even with cutting, can leave behind visible lines or seams. Depending on the material and how carefully it’s cut, you might get a rougher finish than you’d want for certain applications. This means you might need extra post-processing steps to get it looking just right, which adds time and effort.
Material Strength And Moisture Sensitivity
Another point to consider is the materials themselves. While LOM can use a variety of sheets, paper is a common and cheap option. However, paper parts, unless they’re treated, can be a bit delicate. They also have a tendency to soak up moisture from the air, which can warp them or weaken them over time. This makes them less ideal for functional parts that need to be really robust or used in damp environments. If you need something super strong or resistant to the elements, you’ll need to look at more specialized (and often more expensive) sheet materials or consider a different manufacturing process altogether.
Applications For LOM Prototypes
So, what exactly do people use LOM for? Well, it’s mostly about getting a feel for a design quickly and without breaking the bank. Think of it as a way to make a physical version of your idea so you can actually hold it and see if it works.
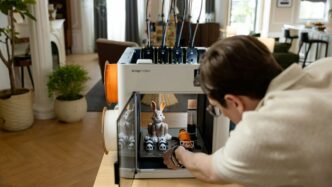
Rapid Prototyping For Design Testing
This is probably the biggest use for LOM. When you’ve got a new product idea, you don’t want to spend a fortune making a bunch of them only to find out they don’t quite work right. LOM lets you create a visual prototype, often out of paper or plastic sheets, pretty fast. This lets designers and engineers test out the form, fit, and general look of a product before committing to more expensive manufacturing methods. It’s like having a rough draft you can actually touch. You can see if the shape feels right in your hand, if different parts would fit together, or just if it looks good on a shelf. Because the materials are usually pretty cheap, you can make several versions to try out different tweaks to the design. It’s not usually for testing how strong something is, but for checking out the basic concept.
Creation Of Scale Models
LOM is also pretty handy for making scale models. Whether it’s for architectural mock-ups, engineering demonstrations, or even just for educational purposes, LOM can build up these models layer by layer. Because it can handle relatively large objects and the materials are inexpensive, it’s a good choice for creating detailed, but not necessarily functional, representations of larger structures or machines. You can get a good sense of the overall proportions and layout this way.
Promotional Items And Marketing Props
This is where things can get a bit more colorful. With some LOM machines, you can actually print colors onto the material before it’s laminated. This means you can create eye-catching promotional items or props for marketing campaigns. Imagine a company wanting to hand out small, branded models of their product at a trade show. LOM can make these relatively cheaply and quickly. They might not be super durable, but for a short-term marketing push, they can do the job and make a visual impact. It’s a way to get a physical representation of a brand or product out there without a huge investment.
Wrapping Up LOM
So, that’s the lowdown on Laminated Object Manufacturing. It’s a pretty neat way to get a physical model quickly, especially if you’re just trying to see how something looks or fits. While it might not be the go-to for super detailed or final parts, it definitely has its place for rapid prototyping. Think of it as a fast and budget-friendly option for getting your ideas off the computer screen and into your hands. It’s been around for a while and still offers a solid way to create visual prototypes without breaking the bank.