So, you’ve got a Meta Quest 3 and a PC, and you’re wondering how to get those awesome PC VR games onto your headset. It’s not as complicated as it might sound. Basically, you’re going to use a feature called Steam Link, which lets your Quest 3 act like a VR screen for your computer. It’s a great way to play games that are too demanding for the Quest to handle on its own. We’ll walk through getting everything set up so you can jump into your favorite Steam titles in VR.
Key Takeaways
- To use Steam Link with your Meta Quest 3, you first need to enable Developer Mode on the headset through the Meta Quest mobile app.
- A reliable, high-quality USB-C cable is important for connecting your Quest 3 to your PC for the most stable Steam Link experience.
- Once connected, you’ll launch Oculus Link within the headset and then pair your Quest 3 with SteamVR running on your PC.
- Make sure your PC meets the minimum system requirements for SteamVR; a better graphics card and more RAM will lead to smoother gameplay.
- After setup, you can launch SteamVR games from within your headset and adjust in-game settings for the best performance and visual quality.
Preparing Your Meta Quest 3 For PC VR
Alright, so you’ve got your shiny new Meta Quest 3 and you’re itching to dive into PC VR games. That’s awesome! But before we can get to the fun stuff, there are a couple of things we need to sort out on the headset itself. Think of it like prepping your car before a long road trip – gotta make sure everything’s in order.
Enabling Developer Mode on Your Quest 3
First things first, we need to flip a switch, so to speak, on your Quest 3. This is called enabling Developer Mode. It’s not something you need for everyday standalone use, but it’s absolutely necessary if you want to connect your headset to a PC for things like Steam Link. It basically tells the headset, "Hey, we might be doing some more advanced stuff here."
Here’s how you do it:
- On your Quest 3, go to Settings. You can usually find this in the main menu.
- Scroll down and select ‘System’.
- Then, find and select ‘Developer Mode’.
- Toggle the switch to ‘On’.
Your headset might need a quick restart after you do this, so don’t be surprised if it powers down and back up. Once Developer Mode is enabled, your Quest 3 is ready for PC VR linking. This step is pretty straightforward, but it’s a big one for getting your setup ready for things like the Oculus PC app and SteamVR.
Understanding the Importance of Developer Mode
So, why bother with Developer Mode? Well, it’s the key that unlocks certain functionalities. Without it, your Quest 3 is pretty much locked down to its standalone capabilities. Enabling it allows your headset to communicate more openly with your PC, which is exactly what we need for a stable connection and for running PC VR applications. It’s like opening a special port that lets the data flow between your headset and your computer. This is also how you’d install custom apps or test new features if you were a developer, but for us, it’s all about getting ready for that sweet, sweet PC VR action. It’s a small step that makes a huge difference in what your Quest 3 can do. You can find more details on the initial setup process in this Meta Quest 3 setup guide.
Establishing A Wired Connection For Steam Link
So, here’s where things start getting interesting. Setting up a wired connection between your Meta Quest 3 and your PC changes the whole vibe of VR gaming—no more worrying about lag or your Wi-Fi dropping out in the middle of a session. Let’s break down what you need and what you can expect.
Connecting Your Meta Quest 3 to Your PC
A direct cable connection fixes most of the annoying issues people run into with PCVR. Here’s how you actually plug it all together:
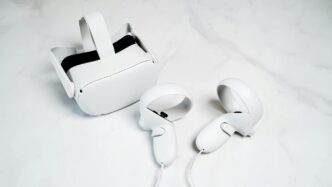
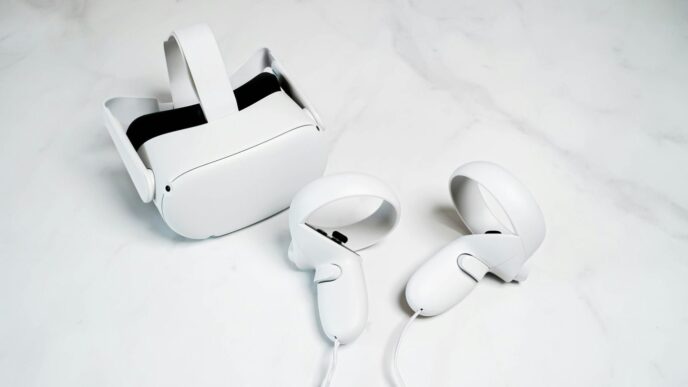
- Find your best USB-C cable—ideally, you want a long, high-quality one (at least 3 meters isn’t overdoing it). Look for something that’s USB 3.0 or newer for top data speeds.
- Plug one end into your Meta Quest 3.
- Plug the other end into a USB 3.0 port on your PC (avoid front-panel ports or USB hubs if you can—they sometimes cause headaches).
- You’ll probably see a pop-up in your headset asking if you want to allow access to data. Say yes, and confirm enabling Oculus Link if prompted.
The Role of a Quality USB-C Cable
Not all cables are made equal, and with VR, that really matters. Using a flimsy or short cable? You might experience:
- Choppy or delayed visuals
- Frequent disconnections
- Degraded audio
When picking a cable:
| Feature | Why It Matters |
|---|---|
| Data transfer (USB 3.0+) | Reduces lag and stuttering |
| Length (at least 3m) | Gives you freedom to move |
| Durability | Fewer plug/unplug headaches |
| Charging support | Keeps your headset powered |
Pro tip: Some people swear by specific brands designed for VR—spending a bit more up front might save you a ton of frustration down the line.
Bottom line: if things aren’t smooth, always check your cable before looking for bigger problems. The right hardware doesn’t just make things work—it makes everything a lot more fun.
Launching And Configuring Steam Link
Alright, so you’ve got your Quest 3 all set up and connected to your PC. Now comes the fun part: actually getting Steam Link running so you can play those PC VR games. It sounds a bit technical, but honestly, it’s pretty straightforward once you know the steps.
Initiating Oculus Link Within Your Headset
First things first, you need to get the Oculus Link software running on your Quest 3. If you haven’t already, put on your headset. You should see a prompt asking if you want to "Allow access to data" – go ahead and accept that. Then, you’ll need to find and launch the Oculus Link application. It’s usually right there on your main dashboard or in your app library. Once Oculus Link is active, your headset will essentially become a display for your PC. You’ll see your regular Windows desktop appear inside the headset. This is the gateway to all your PC VR goodness.
Pairing Your Quest 3 with SteamVR on PC
With Oculus Link running and your desktop visible in VR, it’s time to get SteamVR involved. Open up Steam on your PC as you normally would. Then, launch the SteamVR application. If you don’t have it installed yet, you’ll need to download it from the Steam store – it’s free. Once SteamVR starts up on your PC, it should automatically detect your Quest 3 that’s connected via Oculus Link. You might see a few prompts inside your headset, just follow them. Usually, it’s just a matter of confirming the connection. After a moment, you should see the SteamVR home environment load up inside your headset. This means your Quest 3 is now successfully paired and ready to go. From here, you can access your Steam library and launch any VR-compatible game directly.
Optimizing Your PC For SteamVR Performance
So, you’ve got your Quest 3 all set up and ready to go, but is your computer actually going to keep up? This is where we talk about making sure your PC isn’t the bottleneck holding back your virtual reality adventures. Think of it like trying to run a marathon with a broken shoelace – it’s just not going to be a good time. Getting your PC ready is just as important as setting up the headset itself.
Meeting Minimum and Recommended System Requirements
SteamVR, and by extension, playing PC VR games on your Quest 3, needs a decent amount of power. If your PC is struggling to run basic applications, it’s definitely not going to handle the demands of virtual reality. It’s always best to aim for the recommended specs if you can, but at the very least, you’ll want to meet the minimums.
Here’s a general idea of what you’re looking for:
- Operating System: Windows 10 or newer is pretty much standard now.
- Processor: Something like an Intel Core i5-4590 or an AMD FX 8350 is the baseline. Newer is always better, though.
- Memory (RAM): 4 GB is the absolute minimum, but seriously, aim for 8 GB or even 12 GB if possible. VR eats RAM for breakfast.
- Graphics Card (GPU): This is a big one. A NVIDIA GTX 970 or AMD Radeon R9 290 with 4 GB of VRAM is the floor. For a much smoother experience, look at something like a GTX 1060 or RX 480, and more VRAM (6 GB or 8 GB) makes a huge difference.
Understanding Graphics Card and RAM Impact
Your graphics card is doing most of the heavy lifting when it comes to rendering those detailed VR worlds. If your GPU is older or less powerful, you’re going to see lower frame rates, stuttering, and maybe even blurry visuals. More VRAM on your graphics card means it can hold more textures and information, leading to better image quality and smoother performance, especially in games with lots of detail.
RAM, or Random Access Memory, is like your PC’s short-term memory. VR applications and games can use a lot of it to keep track of everything happening in the virtual environment. If you don’t have enough RAM, your PC will start using your hard drive or SSD as virtual memory, which is way slower and causes noticeable slowdowns. So, more RAM generally means your PC can handle more things at once without getting bogged down.
Essential PC Ports for VR Connectivity
Don’t forget about the physical connections! You’ll need the right ports on your PC to connect your Quest 3. While USB-C is the main connection for the link cable, having enough high-speed USB ports is important.
- USB 3.0 or Higher: You’ll want at least one, preferably more, USB 3.0 ports for a stable connection. Some headsets might even recommend USB 3.1 or USB-C ports for optimal performance.
- DisplayPort: While not strictly necessary for Quest 3 via Link, many PC VR headsets benefit from DisplayPort connections for higher refresh rates and resolutions. It’s good to have one available on your graphics card if you ever plan to use other VR hardware.
- HDMI: You’ll still need an HDMI port for your monitor, of course, but for VR, USB and DisplayPort are usually the priority.
Selecting And Enjoying SteamVR Games
Alright, so your Quest 3 is hooked up and talking to your PC. Now for the fun part: actually playing some games! You’ll be browsing your Steam library right there in VR. Think of it like having a giant virtual monitor, but instead of just looking at it, you’re stepping inside.
Launching Your Chosen SteamVR Title
Once you’ve got SteamVR running and your headset paired, you just need to pick a game. You can usually do this from the SteamVR home environment or through the Steam library interface that pops up. Just point and click like you normally would, but with your VR controllers. The game should then load up directly into your headset. It’s pretty neat when it all just works.
Adjusting In-Game Settings for Optimal Experience
Now, not every game is going to run perfectly right out of the box. Your PC might be a beast, or it might be just scraping by. Either way, tweaking settings is key. You’ll want to look for options related to graphics quality, resolution, and frame rate. Lowering these can make a big difference if things are feeling choppy. On the flip side, if your PC is a powerhouse, you might be able to crank things up for better visuals.
Here are a few things to keep an eye on:
- Resolution/Supersampling: This controls how sharp the image looks. Higher is better visually, but it hits your PC hard. Start with the default and adjust up or down.
- Graphics Quality Presets: Most games have ‘Low’, ‘Medium’, ‘High’ settings. If performance is bad, try dropping a level.
- Refresh Rate: Your Quest 3 can run at different speeds (e.g., 72Hz, 90Hz, 120Hz). Matching this to what your PC can handle smoothly is important for avoiding motion sickness.
Don’t be afraid to experiment with these settings; what works best can really depend on the specific game and your PC’s hardware. It might take a little fiddling to get that sweet spot where the game looks good and runs smoothly, but it’s totally worth it for a great VR session.
Troubleshooting Common Steam Link Issues
So, you’ve got Steam Link up and running, but maybe it’s not playing nice. That’s totally normal, honestly. PC VR stuff can be a bit finicky sometimes, and Steam Link is no exception. Don’t sweat it, though; most of the time, these hiccups are fixable.
Addressing Connection Problems
This is probably the most common headache. You hit ‘connect’ in your headset, and… nothing. Or maybe you get a cryptic error code. First things first, double-check that your Quest 3 and your PC are on the same Wi-Fi network. Seriously, this trips people up more than you’d think. If you’re using Wi-Fi, make sure it’s a strong signal. A weak connection is a recipe for dropped frames and connection failures. If you’re still having trouble, try restarting both your headset and your PC. Sometimes a simple reboot is all it takes to clear out whatever digital cobwebs are causing the issue.
If you’re wired, make sure that USB-C cable is plugged in snugly at both ends. A loose connection can cause all sorts of weirdness. Also, try a different USB port on your PC, preferably a USB 3.0 or higher. Some older ports just don’t have the juice for VR.
Resolving Performance Degradation
Okay, so you can connect, but the game looks like a slideshow or has weird visual glitches. This usually points to your PC struggling to keep up. Your system might just not be quite powerful enough for the game you’re trying to play at the settings you’ve chosen.
Here’s a quick rundown of what to check:
- System Requirements: Did you actually check if your PC meets the minimum or recommended specs for SteamVR and the game itself? It sounds obvious, but it’s easy to overlook.
- Graphics Settings: Inside SteamVR and the game, try lowering the resolution or graphics quality. You might have to sacrifice some visual fidelity for a smoother experience. It’s better to play at lower settings than not play at all, right?
- Background Apps: Close down any unnecessary programs running on your PC. Things like web browsers with tons of tabs open, or other game launchers, can hog resources.
- Driver Updates: Make sure your graphics card drivers are up to date. Sometimes, older drivers can cause performance issues or even prevent Steam Link from working correctly. Conversely, sometimes the newest drivers can be buggy, so if you recently updated and started having problems, consider rolling back to a previous stable version.
Updating Drivers and Software
This ties into performance, but it’s worth its own section. Keeping things updated is generally good practice.
- Graphics Drivers: As mentioned, check NVIDIA or AMD’s website for the latest drivers for your specific graphics card.
- SteamVR: Steam usually updates automatically, but it’s worth checking if there’s a pending update for SteamVR itself.
- Quest Software: Make sure your Meta Quest 3’s operating system is also up to date. Sometimes, compatibility issues are ironed out in headset software updates.
If you’ve tried all this and you’re still stuck, don’t be afraid to hit up the Steam Link support pages or community forums. While Meta support might not be able to help with Steam-specific issues, the community often has some clever workarounds.
Wrapping Up Your PC VR Journey
So there you have it. Connecting your Meta Quest 3 to your PC for SteamVR gaming might seem a little involved at first, but once you get through the setup, it’s pretty straightforward. You’ve gone from a standalone headset to a gateway for a whole new world of PC VR games. It really opens up what the Quest 3 can do. Remember to tweak those settings for the best experience, and don’t be afraid to explore different accessories if you want to make things even more comfortable. Happy gaming!
Frequently Asked Questions
What is Developer Mode and why do I need it?
Developer Mode is a special setting on your Meta Quest 3 that you need to turn on. It’s like unlocking a secret level for your headset, allowing it to connect to your PC for things like playing Steam games. Without it, your headset won’t be able to talk to your computer for VR gaming.
What kind of cable should I use to connect my Quest 3 to my PC?
You’ll need a good quality USB-C cable. Think of it like a super-fast highway for information between your headset and your computer. A regular charging cable might not be fast enough, so make sure it’s a USB 3.0 or higher cable that’s designed for data transfer. This cable also keeps your headset charged while you play!
How do I start playing Steam games on my Quest 3?
First, connect your headset to your PC with the USB-C cable. Then, put on your headset and launch the Oculus Link app. Once that’s running, open SteamVR on your PC. Your headset should connect automatically, and then you can pick any Steam game you want to play right from inside VR.
My PC isn’t very powerful. Can I still play SteamVR games?
You can try! Your PC needs to meet certain minimum requirements, especially the graphics card and RAM. If your PC is a bit older, you might need to turn down the game’s graphics settings to make it run smoothly. Sometimes, even older PCs can handle VR if you adjust things just right.
What if my Quest 3 isn’t connecting to my PC?
Don’t worry, this happens! First, double-check that your USB-C cable is plugged in securely at both ends. Try a different USB port on your computer. Also, make sure you’ve enabled Oculus Link in your headset’s settings. Sometimes, simply restarting both your PC and your headset can fix connection problems.
Is there a way to play without a cable?
Yes, there is! It’s called Air Link. If you have a good Wi-Fi setup (especially a 5GHz network), you can connect your Quest 3 to your PC wirelessly. Just go into your headset’s settings, find the ‘Experimental Features,’ and turn on Air Link. It offers more freedom but a wired connection is usually more stable.