Thinking about building your own computer? It might seem like a big job, especially if you’ve never done it before. You might worry it’s too hard, costs too much, or takes too long. But honestly, it doesn’t have to be. This guide is here to walk you through putting together your own custom PC, step by step. We’ll start with figuring out what you need, look at all the different parts, and then guide you through the actual building process. Get ready to create your ultimate custom pc!
Key Takeaways
- Building a custom PC lets you pick exactly what you want, whether it’s for gaming, work, or something else.
- You can often save money by building your own PC compared to buying a pre-built one, and you get better parts.
- Start by figuring out your PC’s main job to help you choose the right parts and stay within your budget.
- Make sure all your chosen parts are compatible with each other, especially the motherboard and CPU.
- Take your time, work in a clean, well-lit area, and handle components carefully to avoid damage.
Understanding Your Custom PC Needs
So, you’re thinking about building your own computer? That’s awesome! It might seem a bit much at first, maybe even a little intimidating, but honestly, it’s totally doable. Building your own PC means you get exactly what you want, and it’s a great way to learn how these machines actually work. Plus, it can sometimes save you a few bucks compared to buying a pre-built one, especially if you’re smart about where you shop for parts. It’s a really satisfying project when it’s all said and done.
Why Build Your Own Custom PC?
There are a few good reasons people go this route. For starters, you get to pick every single part. If you’re a gamer, you’ll want a killer graphics card. If you edit videos, you’ll need a fast processor and lots of memory. You’re not stuck with whatever a big company decided to put in a box. It’s about making something that fits you. Building your own PC offers a deep understanding of how each component functions and allows for complete customization to create a system that perfectly suits your needs. It’s also pretty cool to say, ‘I built this!’
Defining Your PC’s Purpose
Before you even look at parts, you gotta figure out what this PC is actually going to do. Are you mostly going to browse the web and check emails? Maybe do some light office work? Or are you planning on playing the latest games at super high settings, or maybe editing photos and videos? Knowing your main use case is the first step. It helps you decide where to spend your money. For example, a gaming rig needs a strong graphics card, while a machine for writing documents doesn’t need anything fancy there.
Here’s a quick breakdown:
- Basic Use: Web browsing, email, word processing, streaming video.
- Mid-Range Use: Moderate gaming, photo editing, multitasking, general productivity.
- High-End Use: Demanding games, video editing, 3D rendering, virtual machines.
Budgeting for Your Custom PC Build
Okay, let’s talk money. How much do you want to spend? PCs can range from a few hundred dollars to several thousand. It’s good to have a number in mind before you start picking parts. You can save money by choosing components that aren’t top-of-the-line if your needs don’t require it. For instance, you might not need the absolute fastest processor if you’re just doing basic tasks. Think about what you can afford and what you’re willing to pay for performance. You can find some great deals if you shop around for PC components.
Here’s a rough idea of cost ranges:
| Build Type | Price Range | Typical Use Cases |
|---|---|---|
| Low-end | $300 – $600 | Basic tasks, web browsing, light gaming |
| Mid-range | $700 – $1,200 | Moderate gaming, content creation, multitasking |
| High-end | $1,500 – $3,000+ | Demanding games, professional content creation, heavy use |
Remember, these are just estimates, and prices can change!
Selecting the Essential Custom PC Components
Alright, so you’ve decided to build your own PC. That’s awesome! Now comes the fun part: picking out all the bits and pieces that will make your machine tick. It can feel a bit overwhelming at first, with all the different names and specs, but honestly, it’s like picking out parts for a really cool project. You just need to know what each part does and how they all work together.
The Crucial Role of the Motherboard
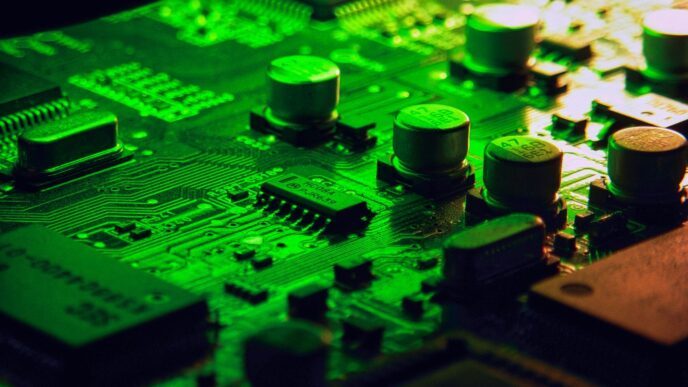
Think of the motherboard as the central nervous system of your PC. It’s this big circuit board that everything else plugs into. You can’t just grab any motherboard, though. It needs to be compatible with your CPU, and it also dictates what kind of RAM you can use and how many drives and expansion cards you can fit in. They come in different sizes, too, like ATX (the standard big one), MicroATX (a bit smaller), and Mini-ITX (really tiny). Most cases can handle a few different sizes, but it’s good to match them up. Picking the right motherboard is a solid first step because it really sets the stage for everything else you’ll buy. You can find a lot of info on motherboard compatibility if you want to get really detailed.
Choosing the Right CPU and Cooler
The CPU, or Central Processing Unit, is basically the brain of your computer. It handles all the calculations and instructions. For gaming or heavy tasks, you’ll want a more powerful CPU, while for everyday stuff like browsing and email, a less powerful one will do just fine. When you pick a CPU, it usually comes with a basic cooler, but if you’re going for a high-performance chip, you might want to get a better cooler. These can be air coolers (like a fan with a heatsink) or liquid coolers. Liquid coolers tend to be quieter and can handle more heat, but they’re also a bit more complex to install.
Graphics Card Considerations for Your Custom PC
If you plan on gaming, video editing, or doing anything with graphics-intensive work, the graphics card (GPU) is probably the most important component to get right. This is what actually creates the images you see on your screen. More powerful GPUs mean smoother gameplay and faster rendering times. However, they also tend to be the most expensive part of a build and can take up a lot of space in your case. Make sure your power supply can handle the demands of a beefy GPU, and that it physically fits inside your chosen case.
Memory and Storage Options
When we talk about memory, we’re usually referring to RAM (Random Access Memory). This is where your computer temporarily stores data it’s actively using. More RAM generally means your computer can handle more tasks at once without slowing down. For most users, 16GB is a good starting point, but gamers and power users might want 32GB or more. Then there’s storage. This is where your operating system, programs, and files live permanently. You’ve got a couple of main options:
- HDDs (Hard Disk Drives): These are older, mechanical drives that offer a lot of storage space for a lower price. They’re slower, though.
- SSDs (Solid State Drives): These are much faster than HDDs because they have no moving parts. They make your computer boot up quicker and programs load faster. There are different types of SSDs, like SATA and NVMe, with NVMe being the speediest.
Most people nowadays opt for a combination: a smaller, fast SSD for the operating system and frequently used programs, and a larger HDD for storing lots of files like photos and videos.
Preparing for Your Custom PC Assembly
Alright, so you’ve picked out all your shiny new parts. That’s awesome! But before we start jamming things together, we need to get our ducks in a row. Think of this like prepping your kitchen before you start cooking a big meal. You wouldn’t just grab ingredients randomly, right? Same idea here.
Gathering Necessary Tools
First off, let’s talk tools. You probably have a screwdriver lying around, but for a PC build, a Phillips head screwdriver is your best friend. Seriously, don’t try to use a flathead; it’s just asking for trouble. It’s also a good idea to grab a small set of magnetic-tipped screwdrivers. Those tiny screws can be a pain, and having a magnetic tip means you won’t be fumbling around trying to pick them up. Some people like to have a pair of needle-nose pliers handy too, just in case. And hey, if you’re really serious about this, consider getting a proper PC tool kit. It’s not just for building PCs, you know; it’s handy for all sorts of little fixes around the house.
Preparing Your Workspace
Now, where are you going to do this? You need a decent amount of space. Trying to build a PC on your lap or a tiny coffee table is just asking for frustration. Find a large, well-lit area. A big table is ideal. Lay down a towel or a soft mat on the surface. This protects your new case from scratches while it’s lying on its side, which it will be for most of the build. Also, try to work on a hard floor, not carpet, if you can. Carpet can build up static electricity, and that’s a big no-no for delicate computer components. If you absolutely have to work on carpet, maybe skip the socks.
Handling Components Safely
This is super important. Static electricity is the silent killer of PC parts. To protect yourself and your components, wear an anti-static wrist strap. Clip one end to your wrist and the other to a metal part of your PC case (once it’s out of the box, of course). This grounds you and prevents any nasty static discharge. When you take parts out of their packaging, do it carefully. Some of these components are surprisingly fragile. Lay everything out neatly on your workspace so you know where everything is. It makes the actual building process so much smoother. Think of it like laying out all your ingredients before you start cooking. You can find some great deals on PC components if you shop around, maybe even a bundle deal that includes several parts, which can be a good way to start your build.
Step-by-Step Custom PC Build Process
Alright, you’ve got all your parts, your workspace is prepped, and you’re ready to start putting it all together. It might seem a little intimidating at first, but honestly, it’s like adult LEGOs. Just take it one step at a time, and you’ll be fine. The key is to stay organized and handle each component with care.
Preparing the PC Case
First things first, you need to get the case ready. Usually, this means taking off the side panels. Keep those screws somewhere safe; you’ll need them later. It’s a good idea to lay the case on its side on a soft surface, like a towel, to avoid scratching the paint. This position makes it easier to access everything inside for the next few steps.
Installing the Central Processing Unit (CPU)
This is a big one. Your CPU is the brain of your computer, so handle it gently. Most CPUs have a little triangle or notch that needs to line up with a corresponding mark on the CPU socket on the motherboard. Don’t force it! If it doesn’t drop in easily, double-check the alignment. Once it’s seated, you’ll usually flip a lever to secure it. If you’re using an aftermarket cooler, now’s the time to install that too, following its specific instructions. Some coolers use brackets that attach to the motherboard before the CPU goes in, while others mount directly after. For air coolers, you’ll typically apply a small amount of thermal paste to the CPU before attaching the heatsink. If you’re going with liquid cooling, you’ll mount the radiator and fans in the case, then attach the water block to the CPU, again with thermal paste.
Mounting the Motherboard
Before you put the motherboard into the case, you’ll want to install the I/O shield. This is that rectangular metal plate that lines up with the ports on the back of the motherboard. It usually snaps into the case from the inside. Then, carefully place the motherboard into the case, lining up the screw holes with the standoffs in the case. The standoffs are little raised bumps that prevent the motherboard from touching the metal case directly, which could cause a short circuit. Screw the motherboard down, but don’t overtighten. Just snug is fine.
Connecting Storage and Power
Now you’ll connect your storage drives, like SSDs or HDDs. These usually mount in specific bays or brackets within the case. You’ll need to connect a SATA data cable from the drive to a SATA port on the motherboard. Then, you’ll connect a SATA power cable from your power supply unit (PSU) to the drive. The PSU also provides power to the motherboard itself via a large 24-pin connector and a smaller 4-pin or 8-pin CPU power connector, usually located near the CPU socket. Make sure all these power connections are firm. It’s also a good time to connect your case’s front panel connectors – things like the power button, USB ports, and audio jacks – to the correct pins on the motherboard. These are often the trickiest part, so consult your motherboard manual carefully. You can find guides on how to properly connect these front panel connectors.
Finalizing Your Custom PC Build
Alright, you’ve got all the parts in place, the motherboard is seated, and the CPU is humming along. Now it’s time to get everything else connected and make sure your new machine actually boots up. This is the moment of truth, so let’s get it done.
Installing the Graphics Card
This is usually a pretty straightforward step. Your graphics card, or GPU, is what handles all the visual output, so it’s a pretty big deal for gaming and creative work. You’ll want to find the longest PCI-Express slot on your motherboard – it’s usually reinforced and often a different color. Gently align the card with the slot and press down firmly until it clicks into place. Don’t force it; if it’s not going in, double-check that it’s aligned correctly. Once it’s seated, secure it to the back of the case with the provided screws. This stops it from sagging over time.
Connecting Peripherals
Now for the stuff you’ll actually interact with. You’ll need to connect your monitor, keyboard, and mouse. The monitor connects to the graphics card’s output ports (HDMI or DisplayPort), not the ones on the motherboard itself, unless you’re not using a dedicated graphics card. Your keyboard and mouse will plug into the USB ports on the back of the case. It’s also a good time to connect your Ethernet cable for internet access, or if you’re going wireless, make sure your Wi-Fi adapter is plugged in. Future PCs are moving towards more wireless connectivity, reducing cable clutter.
Initial Boot and Operating System Installation
With everything connected, it’s time for the first power-on. Before you hit the button, do one last visual check to make sure no wires are loose or touching anything they shouldn’t be. Press the power button. If all goes well, you should see your motherboard’s BIOS or UEFI screen appear on your monitor. This is where you can check if all your components are recognized. From here, you’ll need to boot from your operating system installation media (like a USB drive) to install Windows, Linux, or whatever OS you’ve chosen. Follow the on-screen prompts to complete the installation. Congratulations, you’ve officially built your PC!
You Built It!
So, you’ve gone through all the steps, picked out your parts, and put it all together. Pretty cool, right? It might have seemed like a lot at first, maybe even a little intimidating, but you did it. You’ve got a custom PC that’s exactly what you wanted, built with your own hands. It’s not just a machine; it’s a testament to your effort and a great way to learn more about how computers actually work. Now go fire it up and enjoy what you’ve created!
Frequently Asked Questions
Why should I build my own computer instead of buying one?
Building your own computer lets you pick exactly what parts you want, so it’s perfect for your specific needs, whether that’s gaming, schoolwork, or art. Plus, it can be cheaper than buying a pre-built one, and you get the cool satisfaction of making it yourself! It’s also a great way to learn how computers work.
What’s the first step in building a PC?
The very first step is figuring out what you’ll use your computer for. Are you a gamer who needs a super-fast graphics card, or a student who needs lots of space for notes and research? Knowing this helps you choose the right parts without overspending.
How much money do I need to build a PC?
The cost can change a lot depending on the parts you choose. You can build a basic computer for around $300 to $600, a good mid-range one for $700 to $1,200, or a high-end machine for $1,500 or more. It’s best to set a budget before you start buying parts.
What are the most important parts of a PC?
The main parts are the motherboard (which connects everything), the CPU (the computer’s brain), the graphics card (for visuals, especially in games), memory (RAM for running programs), and storage (like an SSD for keeping your files). Choosing compatible parts is key!
How long does it usually take to build a PC?
For someone new to building, it usually takes about 3 to 4 hours from start to finish, including setting up and installing the software. If you’ve done it before, it might only take an hour or two. Just make sure you have enough time set aside so you don’t have to rush.
What tools do I need to build a PC?
You won’t need many fancy tools! A Phillips head screwdriver is the most important one. It’s also a good idea to have a clean, well-lit workspace and maybe an anti-static wrist strap to protect the computer parts from electricity.

