Building your own computer can be a fun project, but it’s easy to get confused with all the different parts. One of the biggest things to think about is if all those parts will actually work together. This article will help you figure out how to pick out components that play nice with each other, so you can avoid headaches and build a PC that runs smoothly. We’ll cover everything from the main pieces to how to plan for future upgrades, making sure your custom build is a success.
Key Takeaways
- Always check if your CPU and motherboard are a good match.
- Using online tools to check pc part compatibility can save you a lot of trouble.
- Think about how you might want to upgrade your PC later on.
- Make sure your case is big enough for all your parts, especially the graphics card.
- Pick a power supply that can handle everything your PC needs to run.
Understanding Core PC Components
Central Processing Unit Considerations
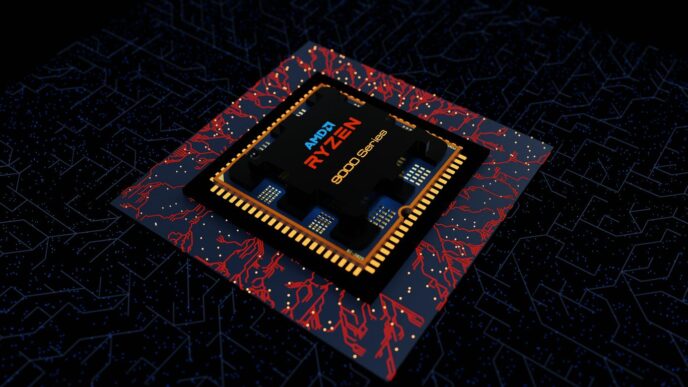
The Central Processing Unit, or CPU, is like the brain of your computer. It handles all the instructions and calculations needed to run programs and games. When picking a CPU, you’ve got two main players: Intel and AMD. Both make good processors, but it’s important to know that an Intel CPU needs an Intel motherboard, and an AMD CPU needs an AMD motherboard. You can’t mix and match! Also, think about core count. More cores generally mean better performance, especially if you’re doing things like video editing or running demanding software.
Graphics Processing Unit Essentials
The Graphics Processing Unit, or GPU, is what makes your games look pretty and your videos play smoothly. It’s responsible for rendering images, animations, and videos. If you’re a gamer, the GPU is one of the most important parts of your build. There are two main companies that make GPUs: NVIDIA and AMD. When choosing a GPU, consider things like the amount of VRAM (video memory), the clock speed, and the type of games you want to play. A high-end GPU can be expensive, but it can make a big difference in your gaming experience. Make sure your graphics card fits inside your case!
Motherboard and RAM Selection
The motherboard is the backbone of your PC. It connects all the other components together. When choosing a motherboard, make sure it’s compatible with your CPU and has enough slots for all your other components. RAM, or Random Access Memory, is what your computer uses to store data that it’s actively using. More RAM generally means better performance, especially if you’re running multiple programs at the same time. When choosing RAM, consider the speed and the amount. Here’s a quick guide:
- 8GB: Basic use, web browsing, light gaming
- 16GB: Good for most gamers and general use
- 32GB: Ideal for video editing, streaming, and heavy multitasking
- 64GB+: For professionals and extreme users
Also, make sure your RAM is compatible with your motherboard. Check the motherboard’s specifications to see what type of RAM it supports. Don’t forget to consider the right storage interface for your needs.
Leveraging Compatibility Checker Tools
Building a PC can be super exciting, but also kinda scary when you think about all the parts needing to play nice together. That’s where compatibility checker tools come in! They’re like your best friend who knows all the secrets to a happy PC build. Let’s get into how to use them.
Choosing a Reliable Compatibility Checker
Okay, so first things first, you gotta pick a good tool. There are a bunch out there, but not all are created equal. Look for one with a big database of parts and that gets updated regularly. You don’t want to be using info from 2010, right? Some popular options include PCPartPicker and BuildMyPC. These sites usually have a huge database of PC components. A good compatibility checker will save you headaches down the road.
Inputting Accurate Product Data
Alright, you’ve got your tool. Now, you need to feed it the right info. This means being super careful when you’re picking out your parts. Double-check model numbers, specs, and all that jazz. If you put in the wrong info, the checker is gonna give you the wrong answer, and nobody wants that. It’s like asking for directions but giving the wrong address – you’re gonna end up somewhere you don’t wanna be. Make sure you’re selecting the exact storage interface you intend to use.
Automated Compatibility Alerts and Suggestions
This is where the magic happens. A good compatibility checker won’t just tell you if something doesn’t work; it’ll also suggest alternatives. So, if you pick a motherboard that’s not compatible with your CPU, it’ll give you a list of motherboards that are compatible. It’s like having a personal shopper for your PC! Plus, some tools have automated alerts that pop up as you’re picking parts, which is super handy. These alerts can help you avoid making mistakes early on, saving you time and money. Think of it as a safety net for your custom PC build.
Optimizing for Future Upgrades
It’s easy to get caught up in building the ultimate PC right now, but what about tomorrow? Thinking ahead is key to avoiding a complete rebuild in a year or two. Let’s look at how to make your build ready for whatever comes next.
Planning for Component Longevity
Some parts just last longer than others. Investing a bit more in high-quality components like the power supply or case can save you money down the road. These parts often outlive other components, so choosing wisely now means you won’t have to replace them as often. Also, consider the warranty periods offered by different manufacturers. A longer warranty can be a good indicator of a product’s expected lifespan and the manufacturer’s confidence in its reliability. Don’t skimp on the stuff that will last.
Ensuring Scalability for New Technologies
Technology moves fast. What’s top-of-the-line today might be mid-range next year. Here’s how to plan for that:
- Motherboard Choice: Pick a motherboard with extra slots (PCIe, M.2) and support for future CPU generations if possible. Even if you don’t need them now, you might later.
- Power Supply: Get a PSU with more wattage than you currently need. This gives you headroom for more power-hungry components in the future, like a better graphics card. Check out PSU brand options.
- Case Size: A larger case gives you more room to add components and better cooling options. It’s easier to work in, too.
Simplifying Part Replacement and Installation
Making upgrades easy is all about planning and a little foresight. Here’s what I do:
- Cable Management: Good cable management isn’t just for looks. It improves airflow and makes it way easier to swap out parts. Spend the extra time to do it right the first time.
- Modular PSU: A modular power supply lets you remove unnecessary cables, reducing clutter and making access to other components easier. This is a lifesaver when you’re adding or removing parts.
- Standardized Parts: Stick to standard sizes and connectors whenever possible. This makes finding replacement parts easier and ensures compatibility with a wider range of components. Consider component longevity when selecting parts.
The Importance of Case and Cooling Compatibility
Selecting the Right PC Case Size
Okay, so picking a PC case might seem like just grabbing a metal box, but it’s way more important than that. The case size impacts everything from airflow to what components you can actually fit inside. Think of it like this: a tiny case with a monster graphics card? Probably not gonna work. There are generally three common sizes:
- Full-Tower: These are the big boys. Tons of room for activities (and components), great for custom loops and future expansion. If you want to showcase your build with all the bells and whistles, this is often the way to go.
- Mid-Tower: A good balance of size and space. Most builds will fit comfortably in a mid-tower, and they don’t take up as much room as a full-tower.
- Small Form Factor (SFF): These are all about saving space. Great for compact builds, but you’ll need to be extra careful about component selection and cooling. Things can get tight!
Mini-tower cases offer better portability but limit scalability and motherboard selection. Always double-check the case’s specifications to ensure it supports your motherboard form factor (ATX, Micro-ATX, Mini-ITX). The right PC case is more than just aesthetics; it’s about functionality and future-proofing.
Matching Cooling Solutions to Components
Cooling is absolutely vital. If your components overheat, you’re looking at performance throttling, instability, or even damage. No one wants that! The CPU cooler’s job is to keep your processor cool by dissipating heat. For most gamers, air cooling is enough. But if you’re overclocking or running a high-end CPU, you might want to consider liquid cooling. Here’s the lowdown:
- Air Cooling: Uses heatsinks and fans to dissipate heat. It’s generally cheaper and simpler than liquid cooling, but can be bulky and noisy.
- Liquid Cooling: Uses a liquid (usually distilled water) to transfer heat away from the components. More efficient than air cooling, but also more expensive and complex. All-In-One (AIO) liquid cooling is pretty standard these days.
- Fan Size: Bigger fans mean more airflow at lower speeds, which translates to less noise. A larger fan means less noise and higher airflow.
Make sure your case has adequate ventilation to support your chosen cooling solution. A case with good airflow will help keep temperatures down and improve overall system stability. Don’t skimp on cooling – it’s an investment in the longevity of your components.
Considering Graphics Card Dimensions
This is a big one. Graphics cards are getting bigger and beefier, and you need to make sure your case can actually accommodate the card you want. Check the maximum GPU length supported by the case and compare it to the dimensions of your graphics card. It’s also worth considering the card’s height and width, especially if you’re using a smaller case or have other components that might get in the way. While not quite the problem it used to be, your graphics card length could be too long for your case. Be wary of your graphic card’s dimensional specs to make sure it’s compatible with your case.
Power Supply Unit Selection for System Stability
Your power supply unit (PSU) is the unsung hero of your PC build. It takes the AC power from your wall and converts it into the DC power that all your components need to run. Skimping on the PSU can lead to system instability, crashes, or even component damage. So, let’s get it right.
Calculating Power Requirements Accurately
First things first, you need to figure out how much power your system will actually draw. This isn’t just about adding up the TDP (Thermal Design Power) of your CPU and GPU. You also need to account for the motherboard, RAM, storage devices, fans, and any other peripherals drawing power from the PSU.
There are a few ways to do this:
- Use an online PSU calculator: Several websites offer PSU calculators where you input your components, and they estimate your power needs. Be sure to add a buffer (20-30%) for headroom and potential upgrades.
- Check component specifications: Look up the power consumption of each component on the manufacturer’s website. Add them up, and again, add a buffer.
- Consider overclocking: If you plan to overclock your CPU or GPU, you’ll need even more power. Overclocking can significantly increase power draw, so factor that into your calculations.
It’s always better to overestimate your power needs than to underestimate them. A PSU running near its maximum capacity will be less efficient and generate more heat, potentially shortening its lifespan.
Choosing a Reputable PSU Brand
Not all PSUs are created equal. Some brands are known for their high-quality components, reliable performance, and excellent customer support, while others… well, not so much. Sticking with a reputable brand is a good way to ensure you’re getting a PSU that will last and provide stable power to your system.
Here are a few brands that are generally well-regarded in the PC building community:
- Corsair
- Seasonic
- EVGA
- be quiet!
- Cooler Master
Do some research, read reviews, and see what other builders are saying about different brands and models. A little bit of due diligence can save you a lot of headaches down the road. Also, consider modular PSUs for easier cable management.
Ensuring Proper Cable Management
Cable management might seem like a purely aesthetic concern, but it actually plays a role in system stability. Messy cables can restrict airflow, leading to higher temperatures and potentially impacting performance. Good cable management also makes it easier to work inside your case and upgrade components in the future.
Here are a few tips for effective cable management:
- Use zip ties or Velcro straps: These will help you bundle and route cables neatly.
- Route cables behind the motherboard tray: Most cases have designated channels for this.
- Use cable extensions or custom cables: If you want a really clean look, consider using cable extensions or custom cables that are the perfect length for your build.
- Plan your cable routing in advance: Before you start connecting everything, take some time to plan how you’re going to route the cables. This will save you time and frustration in the long run.
By taking the time to select the right PSU and manage your cables effectively, you can ensure that your system has a stable and reliable power supply, leading to better performance and a longer lifespan for your components.
Storage Solutions and Their Compatibility

Alright, let’s talk about storage. It’s easy to overlook, but picking the right storage can seriously impact your PC’s performance and future-proofing. I remember when I first built my PC, I cheaped out on the storage, and boy, did I regret it. Slow boot times, games taking forever to load – it was a mess. Don’t make the same mistake I did!
Understanding SSD and HDD Differences
Okay, so you’ve got two main types of storage: SSDs (Solid State Drives) and HDDs (Hard Disk Drives). HDDs are the older tech. They’re cheaper per terabyte, which is great if you need a ton of space for, like, storing every movie and TV show ever made. But they’re also slower because they use spinning disks to read and write data. SSDs, on the other hand, are way faster. They use flash memory, kind of like a giant USB drive, which means near-instant access times. This translates to faster boot times, quicker game loading, and an overall snappier system. The downside? They’re generally more expensive than HDDs, especially for larger capacities. Here’s a quick comparison:
| Feature | HDD | SSD |
|---|---|---|
| Speed | Slower | Much Faster |
| Price | Cheaper per TB | More Expensive per TB |
| Durability | More prone to failure | More durable |
| Noise | Can be noisy | Silent |
| Best For | Bulk storage, archiving | OS, applications, games |
Selecting the Right Storage Interface
Now, let’s talk interfaces. This is where compatibility comes into play. The interface is how your storage device connects to your motherboard. The most common interfaces you’ll encounter are SATA and NVMe. SATA is the older standard, and it’s used by most HDDs and some older SSDs. NVMe is the newer, faster standard, and it’s used by most modern SSDs. NVMe drives connect directly to the PCIe lanes on your motherboard, which allows for much higher bandwidth and lower latency. Make sure your motherboard supports the interface of the storage device you want to use. Most modern motherboards have multiple SATA ports and at least one M.2 slot for NVMe SSDs. If you’re planning a gaming build, consider at least a 1TB NVMe SSD for your operating system and games.
Planning for Future Storage Expansion
Finally, think about future expansion. How much storage do you need now, and how much will you need in a year or two? Games are getting bigger, videos are getting higher resolution, and before you know it, you’ll be running out of space. It’s always a good idea to have some extra capacity. Consider getting a motherboard with enough SATA ports and M.2 slots to accommodate future storage upgrades. You could start with a smaller NVMe SSD for your OS and a larger HDD for bulk storage, and then add another SSD later on when you need more speed. Or, if you can afford it, just go all-in on SSDs from the start. You won’t regret it.
Building Your Custom PC: A Step-by-Step Guide

Gathering All Necessary Components
Okay, so you’ve decided to build your own PC. Awesome! First things first, you gotta get all your parts together. This is like gathering your ingredients before you start baking a cake – you don’t want to be halfway through and realize you’re missing something. Make a list and check it twice! You’ll need a case, motherboard, CPU, GPU, RAM, storage (SSD or HDD), a power supply, and a cooler. Don’t forget thermal paste! It’s easy to overlook, but it’s pretty important. Also, double-check that everything is compatible. There are some great compatibility checker tools out there to help with this.
Following Assembly Best Practices
Alright, parts are here, time to get building! Find a clean, well-lit workspace. Static electricity is your enemy, so grab an anti-static wrist strap. Start with the CPU on the motherboard, then install the RAM. Mount the motherboard in the case, then add your GPU. Connect all the power cables from the PSU. Cable management is key here – a tidy build not only looks better but also improves airflow. Take your time, read the manuals, and don’t force anything. If something doesn’t seem right, double-check your work. It’s like putting together a Lego set, but with more expensive pieces. Remember to consider the gaming computer case you selected and how it will affect the build process.
Post-Build Testing and Troubleshooting
Fingers crossed, it’s time to power on your creation! If all goes well, you should see the BIOS screen. Install your operating system and drivers. Run some stress tests to make sure everything is stable. If something goes wrong, don’t panic. Check all your connections, reseat components, and consult online forums. Troubleshooting is part of the fun (sort of). Building a PC is a great way to upgrade individual components down the line. Here’s a quick checklist to help you out:
- Check all power connections.
- Reseat RAM and GPU.
- Update BIOS if necessary.
- Monitor temperatures.
Putting It All Together
So, building your own PC might seem like a big deal at first. But really, it’s just about picking parts that play nice with each other. If you take your time and check things twice, you’ll end up with a computer that works great and does exactly what you want. It’s a pretty cool feeling when it all turns on for the first time, knowing you built it yourself.
Frequently Asked Questions
Why should I build my own PC instead of buying one already put together?
Building your own computer lets you pick every single part, so it’s exactly what you want and need. You’re not stuck with a pre-made computer that might have things you don’t use or miss out on things you really need. It’s like building your dream car instead of buying one off the lot.
What are the most important parts I need to pick for my PC?
The main parts are the CPU (the computer’s brain), the GPU (for graphics, especially important for games), the motherboard (where everything connects), RAM (for temporary memory), a power supply (to give power to everything), and storage (like a hard drive or SSD to save your files).
What is a compatibility checker and why do I need one?
A compatibility checker is a tool, usually online, that helps you make sure all the computer parts you pick will work together. You put in the parts you want, and it tells you if there are any problems, like if a certain CPU won’t fit on your chosen motherboard.
Is it important to think about future upgrades when building my PC?
Yes! Picking parts that can be easily swapped out later means you can make your computer better over time without buying a whole new one. For example, you might start with less RAM and add more later, or upgrade your graphics card when new, better ones come out.
How does the computer case and cooling affect what parts I can use?
The case needs to be big enough for all your parts, especially your graphics card, which can be quite long. Cooling is super important to keep your computer from getting too hot, which can damage parts. You need to make sure your case has good airflow and space for fans or liquid coolers.
What should I do after I’ve put all the parts together?
When you’re done putting it together, you’ll want to turn it on and make sure everything powers up correctly. Then, you’ll install your operating system (like Windows), and any drivers needed for your parts. After that, you can start using it! If something doesn’t work, you’ll need to do some troubleshooting to figure out what’s wrong.


