
Getting into your Nest gear doesn’t have to feel like a chore. With the right setup, you can breeze through the google nest login process and get straight to controlling your smart home. In this piece, I’ll walk you through what you need, how to sign in on the web or the app, and how to sort out any hiccups along the way.
Key Takeaways
- Check that your Google account is active and your Wi-Fi is up to speed before you start the google nest login steps.
- On a computer, head to the official Nest sign-in page, enter your Google info, and confirm you’ve got the right email and password.
- For mobile access, grab the Google Home app, give it the needed permissions, and log in with your Google account.
- If you can’t remember your password or your account is locked, follow the reset and recovery directions to get back in fast.
- Keep your login safe by turning on two-factor authentication and watching for any odd sign-in activity.
Understanding Google Nest Login Requirements
Before you can start enjoying the convenience of your Google Nest devices, it’s important to make sure you meet all the login requirements. It’s not just about having a Google account; there are a few other things to consider to ensure a smooth and secure experience. Let’s break it down:
Supported Google Accounts
First things first, you’ll need a Google Account. Most Google Accounts work seamlessly with Nest, but it’s worth noting that some older or less common account types might have limited functionality. For example, if you have a Google Apps account (now Google Workspace) through your work or school, there might be some restrictions on which Nest features you can access. It’s usually best to use a personal Google Account for full compatibility. Also, make sure you have strong WPA2/WPA3 encryption for your network.
Compatible Network Settings
Your Wi-Fi network plays a big role in how well your Nest devices work. Nest devices need a stable and reliable internet connection to function properly. Here’s what to keep in mind:
- Wi-Fi Frequency: Most Nest devices support 2.4 GHz Wi-Fi networks. Some newer devices also support 5 GHz. Check your device’s specifications to make sure your network is compatible.
- Network Security: Nest devices work best with WPA2 or WPA3 encryption. Older security protocols like WEP are not recommended and might not be supported.
- Internet Speed: While Nest devices don’t require super-fast internet, a stable connection with decent upload and download speeds is important, especially for video streaming from Nest Cams. Some features, including mobile notifications, require working internet and Wi-Fi.
Device Compatibility Check
Not all Nest devices are created equal, and some might have specific compatibility requirements. Before you dive in, double-check that your devices are fully compatible with the Google Home app and your Google Account. Here are a few things to consider:
- App Version: Make sure you have the latest version of the Google Home app installed on your smartphone or tablet. Older versions might not support newer Nest devices or features.
- Device Firmware: Keep your Nest devices updated with the latest firmware. These updates often include bug fixes, performance improvements, and new features.
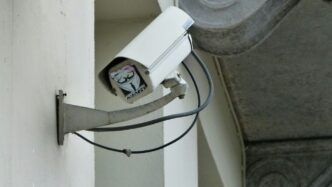
- Specific Requirements: Some Nest devices might have unique requirements. For example, certain Nest Doorbell features might require a Nest Aware subscription. Nest Aware subscription required (sold separately).
Accessing Google Nest Login Page On The Web
Navigating To The Official Sign-In Portal
Okay, so you want to log into your Google Nest account on the web? It’s pretty straightforward. First, you need to find the right page. Don’t just Google "Nest login" and click the first thing you see. Always go to the official Google Nest website. You can usually find it by searching "Google Nest" and making sure the URL starts with store.google.com or nest.google.com. From there, look for a "Sign In" or "Login" button, usually in the top right corner. This will take you to the official sign-in portal. Bookmark this page for easier access next time!
Entering Google Credentials
Once you’re on the login page, it’s time to enter your Google account information. This is the same email and password you use for Gmail, YouTube, and other Google services. Type your email address in the designated field, then click "Next." On the following screen, enter your password. Make sure you’re typing it correctly – passwords are case-sensitive! If you have multiple Google accounts, double-check that you’re using the one associated with your Nest devices. If you’re still having trouble, maybe it’s time to check your Nest Aware subscription.
Verifying Email And Password
After entering your email and password, Google might ask you to verify your identity. This is a security measure to protect your account. You might receive a verification code via text message or email, or you might be prompted to answer a security question. Follow the on-screen instructions to complete the verification process. If you’ve set up two-factor authentication, you’ll need to use your authenticator app or a backup code. This extra step can be annoying, but it’s worth it to keep your Google Nest device secure. If you can’t remember your password, you can always reset it by clicking the "Forgot password?" link on the login page.
Logging Into Google Nest Via The Google Home App
Okay, so you’re ditching the web browser and going straight for the Google Home app to manage your Nest devices? Smart move! It’s often way more convenient, especially if you’re already glued to your phone like the rest of us. Here’s the lowdown on getting logged in through the app.
Downloading And Installing The App
First things first, you gotta have the app. I mean, duh, right? But seriously, make sure you’re grabbing the official Google Home app. There are some dodgy look-alikes out there, and you don’t want to hand over your login info to some random scammer. Head to the App Store (if you’re on iOS) or the Google Play Store (if you’re rocking Android) and search for "Google Home." Look for the one with Google’s logo. Download it, install it, and let’s move on. If you’re having trouble finding it, maybe check out Google Nest Help for direct links.
Granting App Permissions
Alright, the app’s installed. Now comes the fun part: permissions. When you first launch the Google Home app, it’s going to ask for a bunch of permissions. Location, microphone, contacts… it can feel a little invasive, I know. But here’s the deal: the app needs these permissions to actually do anything useful. For example, it needs location to know which Nest devices are nearby and to automate things based on your location (like turning off the thermostat when you leave). It needs microphone access for voice commands. If you’re not comfortable granting certain permissions, you can usually deny them, but just be aware that some features might not work as expected. Here’s a quick rundown:
- Location: Needed for device discovery and location-based automations.
- Microphone: Required for voice commands and interacting with Google Assistant.
- Contacts: Used for calling and messaging through your Nest devices.
Authenticating Your Google Account
This is where the magic happens. Once you’ve got the app installed and the permissions sorted, it’s time to actually log in. The Google Home app uses your Google account to manage all your Nest devices. So, if you’re already logged into your Google account on your phone (which you probably are if you use Gmail or YouTube), the app will likely detect it and ask if you want to use that account. If not, or if you want to use a different account, you’ll need to enter your email address and password. Make sure you’re using the same Google account that you used to set up your Nest devices in the first place. Otherwise, you won’t see them in the app. And if you’ve got two-factor authentication enabled (which you should!), you’ll need to enter the verification code that’s sent to your phone or generated by your authenticator app. Once you’ve done all that, you should be good to go! You’ll see all your Nest devices listed in the app, and you can start controlling them from your phone. Easy peasy.
Troubleshooting Google Nest Login Errors
Okay, so you’re having trouble logging into your Google Nest account? It happens! Don’t worry, we’ll walk through some common issues and how to fix them. It’s usually something simple, and you’ll be back to controlling your smart home in no time.
Resetting Forgotten Passwords
We’ve all been there. You just know you know your password, but it’s just not working. The easiest fix is usually to reset your password. Here’s how:
- Go to the Google account recovery page.
- Enter the email address associated with your Nest account.
- Follow the on-screen prompts to verify your identity. Google will usually send a code to your recovery email or phone number.
- Create a new, strong password. Make sure it’s something you can remember, but also something secure!
Resolving Account Lockouts
Sometimes, if you enter the wrong password too many times, Google will lock your account as a security measure. It’s annoying, but it’s there to protect you. Here’s what to do if you find yourself locked out:
- Wait it out. Usually, the lockout is temporary, lasting anywhere from a few minutes to a few hours. Try again later.
- Use the account recovery options. Google provides ways to prove you’re the account owner, even if you can’t remember your password. This might involve answering security questions or providing a recovery email address.
- Contact Google support. If you’re still locked out after trying the above steps, reach out to Google’s help center for assistance. They can guide you through the process of regaining access to your account. You might want to check out Google Nest Help for more information.
Fixing Network Connectivity Issues
Sometimes, the problem isn’t your password at all, but your internet connection. If your Nest devices can’t connect to the internet, you won’t be able to log in or control them remotely. Here are some things to check:
- Check your Wi-Fi: Make sure your Wi-Fi is working and that your Nest devices are connected to the correct network. Try restarting your router.
- Check the Nest device’s connection: Most Nest devices have an indicator light that shows their connection status. Refer to your device’s manual to understand what the different light colors mean.
- Move the device closer to the router: If the signal strength is weak, try moving the Nest device closer to your Wi-Fi router. Walls and other obstructions can interfere with the signal. You might also want to consider a Wi-Fi extender if you have a large home.
Managing Google Nest Account Preferences
Okay, so you’ve got your Google Nest all set up. Now what? Time to tweak those settings to make it just right for you. It’s not rocket science, but there are a few things you should know to get the most out of your Nest device.
Updating Profile Information
First things first, let’s make sure your profile info is up-to-date. This is pretty straightforward. You’ll want to check your name, email, and maybe even add a profile picture. Keeping this information current helps with account recovery and makes it easier to manage your devices. It’s also a good idea to review your contact information, just in case Google needs to reach you about something important.
Setting Notification Options
Notifications can be a blessing or a curse, right? With Google Nest, you can really dial in what you want to be alerted about. Want to know when your Nest Cam detects motion? Or maybe you only want alerts when your Nest Protect senses smoke or carbon monoxide? You can customize all of that. Here’s a quick rundown of common notification settings:
- Camera Alerts: Motion detection, person detection, sound detection.
- Thermostat Alerts: Temperature changes, energy usage reports.
- Protect Alerts: Smoke, carbon monoxide, low battery.
- General Alerts: System updates, new features.
Linking Additional Nest Devices
Got more than one Nest device? Linking them together is where the real magic happens. You can control everything from a single app, set up routines that involve multiple devices, and generally make your smart home even smarter. For example, you could have your Nest Thermostat automatically adjust the temperature when your Nest Security System is armed. Or, you could have your Nest Aware subscription cover all your devices. It’s all about creating a connected ecosystem that works for you.
Enhancing Google Nest Login Security
Okay, so you’ve got your Google Nest all set up. Now, let’s talk about keeping things secure. It’s easy to overlook security, but with smart home devices, it’s super important. You don’t want just anyone messing with your thermostat or peeking through your camera, right?
Enabling Two-Factor Authentication
Seriously, if you do one thing to secure your Nest account, make it this: turn on two-factor authentication (2FA). It adds an extra layer of protection by requiring a code from your phone, in addition to your password. Think of it like this:
- Go to your Google Account settings.
- Find the "Security" section.
- Turn on 2-Step Verification. Follow the prompts to set it up with your phone.
It might seem like a hassle to enter a code every time, but it’s way better than dealing with a hacked account. You can also use authenticator apps for generating codes, which is pretty convenient. This is a great way to ensure perimeter security.
Monitoring Login Activity
Keep an eye on where and when your account is being accessed. Google keeps a log of all devices that have logged into your account. It’s a good idea to check this every now and then. Here’s how:
- Go to your Google Account activity page.
- Look for "Security events" or "Recent activity".
- Review the list of devices and locations.
If you see something suspicious – like a login from a place you’ve never been – change your password immediately and revoke access for that device. It’s like checking your bank statement for weird transactions.
Revoking Suspicious Sessions
Spotted a weird login? Don’t panic. You can kick that device off your account. Here’s the drill:
- In your Google Account activity, find the suspicious session.
- Click on the session details.
- Select "Sign out" or "Remove access".
This will force the device to log out and require a password to log back in. It’s like changing the locks after someone loses a key. Better safe than sorry, right? Also, make sure you have a strong password. Something that’s not easy to guess. A mix of upper and lowercase letters, numbers, and symbols is the way to go. And don’t use the same password for everything!
Integrating Google Nest Login With Smart Home Services
Connecting Third-Party Voice Assistants
Okay, so you’ve got your Nest devices all set up, and you’re thinking, "How can I make this even easier?" Well, one way is to connect them to your favorite voice assistant, like Google Assistant or even others. This means you can control your thermostat, security system, or lights with just your voice. Pretty cool, right?
- First, make sure your Nest device is compatible with the voice assistant you want to use. Most are, but it’s always good to double-check.
- Next, you’ll usually need to link your Google account (the one you use for Nest) to the voice assistant app. This is usually done through the settings menu of the voice assistant app.
- Finally, follow the instructions provided by the voice assistant to discover and control your Nest devices. It’s usually as simple as saying, "Hey [Voice Assistant Name], turn on the living room lights."
Syncing With Matter And Thread Devices
Matter and Thread are like the new kids on the block when it comes to smart home tech, and they’re all about making things work together more smoothly. Basically, they’re communication protocols that allow different smart home devices from different manufacturers to talk to each other without needing a bunch of complicated setups. Nest devices are increasingly supporting Matter and Thread, which is great news for interoperability.
- Make sure your Nest device supports Matter or Thread. Check the product specifications or the Google Home app for compatibility.
- Update your Nest device’s firmware to the latest version. This ensures it has the most up-to-date support for these protocols.
- Follow the instructions in the Google Home app to pair your Matter or Thread devices with your Nest setup. It’s usually a pretty straightforward process.
Automating Workflows With IFTTT
IFTTT (If This Then That) is a service that lets you create "applets" that automate tasks between different apps and devices. For example, you could create an applet that turns on your Nest thermostat when your phone enters your home’s geofence. Or, you could have your Nest Cam record a clip whenever your smart doorbell detects motion. The possibilities are pretty much endless.
- Create an IFTTT account (if you don’t already have one).
- Connect your Google account to IFTTT. This allows IFTTT to access and control your Nest devices.
- Browse the existing IFTTT applets for Nest, or create your own from scratch. You can customize the triggers and actions to fit your specific needs.
Here’s a quick example of how you might use IFTTT with Nest:
| Trigger | Action |
|---|---|
| Nest Protect detects smoke | Turn on smart lights to alert occupants |
| Nest Cam detects motion | Send a notification to your phone |
## Conclusion
Alright, you made it to the end. Logging in to Google Nest really is just a few taps away. Open the Home app, sign in with your Google account, and boom—you’re in. If your password trips you up, use the reset link and follow the simple steps. Slow connection? Double-check your Wi-Fi or try restarting the router. Once you log in, you can see your cams, tweak the thermostat, and switch lights on or off from one spot. It might feel odd at first, but after a couple tries, it sticks. Next time you want to check in on your home, don’t worry—you’ll be inside in seconds. Now go ahead, give it a whirl, and enjoy a smarter, easier day-to-day home life.
Frequently Asked Questions
How do I sign in to my Google Nest account?
Go to the Nest sign-in page on your browser or open the Google Home app. Tap “Sign in” and enter your Google email and password. Once you hit “Next,” you’re in.
What if I forgot my Nest password?
On the sign-in page, click “Forgot password.” Enter your email, then check your inbox for a reset link. Follow the steps to pick a new password.
Why can’t I log in on the web?
First, make sure you have a steady internet connection. Then clear your browser’s cache or try using a different browser. If that doesn’t work, check that your Google account is active.
How do I log in using the Google Home app?
Download the Google Home app from the App Store or Google Play. Open it, tap “Sign in with Google,” and enter your account details. Grant any permissions it asks for, and you’re set.
Can I add more Nest devices to my account?
Yes. In the Google Home app, tap the “+” icon, choose “Add device,” and follow the steps to link each new Nest device. You can group devices by room for easy control.
How do I make my Nest login more secure?
Turn on two-factor authentication for your Google account. Check your login history in account settings to spot anything odd. If you see a session you don’t recognize, you can sign it out right away.