Building your own PC can seem like a big undertaking, but with the right tools and a little guidance, it’s totally doable. This guide is all about using pcpartpicker to help you put together a great computer, whether you’re on a tight budget or aiming for the stars. We’ll walk through planning, picking parts, and getting it all set up, making the whole process much smoother. Think of pcpartpicker as your best friend for PC building in 2025.
Key Takeaways
- PCPartPicker is your go-to tool for planning a PC build, checking part compatibility, and comparing prices from different stores.
- Understand component compatibility, like CPU sockets and chipsets, to avoid buying parts that won’t work together.
- Consider your budget and performance needs when choosing components, especially graphics cards and storage solutions like SSDs.
- Leverage PCPartPicker’s community features to get feedback on your build and customize starter builds.
- After building, remember to check for memory overclocking options (XMP, EXPO, DOCP) to get the most out of your RAM.
Getting Started with PCPartPicker
So, you’re ready to build your own PC. That’s awesome! It might seem a bit daunting at first, but tools like PCPartPicker make the whole process way more manageable. Think of it as your digital workbench and parts catalog all rolled into one. It helps you figure out what parts you need, if they’ll actually work together, and where to find them without breaking the bank. The key to a successful PC build is good planning, and PCPartPicker is your best friend for that.
Planning Your PC Build
Before you even look at parts, take a moment to think about what you actually want this computer to do. Are you mostly going to browse the web and write documents? Or are you aiming for smooth 1080p gaming, maybe even VR? Your goals will directly influence the kind of components you need and, importantly, how much you’ll spend. It’s easy to get carried away, so having a clear idea of your intended use helps keep your budget in check. Don’t forget to consider where the PC will live – will it be tucked away or on display?
Understanding Component Compatibility
This is where PCPartPicker really shines. You can’t just grab any CPU and motherboard and expect them to work. They need to use the same socket type, and the motherboard needs to support the CPU’s generation. PCPartPicker automatically checks these things for you. It flags any potential issues, like a graphics card being too big for a case or a power supply not having enough wattage. It’s like having a seasoned builder looking over your shoulder, saying, "Hey, that won’t fit" or "You might need a bit more power there."
Setting Your Budget
Building a PC can get expensive fast. It’s super important to set a budget before you start picking parts. PCPartPicker helps with this by showing you the total cost of your selected components as you add them. You can easily see where your money is going and make adjustments. Remember to factor in everything – the operating system, a monitor, keyboard, mouse, and maybe even some speakers. Sometimes, looking at example builds can give you a good baseline for different price ranges, but always tweak them to fit your specific needs and budget.
Navigating PCPartPicker’s Features
PCPartPicker is your best friend when you’re putting together a new computer. It’s not just about picking parts; it’s about making sure they all play nice together and don’t break the bank. This tool really simplifies the whole process, from the initial idea to actually buying stuff.
Utilizing the Part List Builder
This is where the magic starts. You basically add components to your list, and PCPartPicker does the heavy lifting. It checks if your CPU fits your motherboard, if your RAM is compatible, and if your power supply can handle everything. It’s like having a super-smart assistant who knows all the technical details. You can swap parts in and out easily, seeing how changes affect the total price and compatibility. It’s the most direct way to plan your build and avoid costly mistakes.
Price Comparison and Availability
Once you have your list, PCPartPicker scans tons of online retailers to find the best prices. You can see where each part is cheapest, and if it’s actually in stock. This saves you a ton of time bouncing between different store websites. It also shows you shipping costs, so you get a true total price. You can even set it to your country if you’re not in the US, making it useful worldwide.
Checking for Rebates and Discounts
Beyond just the sticker price, PCPartPicker also keeps an eye out for rebates and special discounts. Sometimes, a part might seem a bit pricey, but a mail-in rebate can bring the cost down significantly. It’s worth checking these out, especially if you’re trying to stick to a tight budget. Just remember to factor in the effort of sending in the rebate forms; it’s not always instant savings, but it can add up.
Choosing Your PC Components
Understanding CPU Sockets and Chipsets
So, you’re ready to pick out the brain of your new PC, the CPU. This is a big deal because it dictates a lot about what else you can put in your computer. The first thing you need to know is the CPU socket type. Think of it like a puzzle piece – the CPU has to physically fit into the motherboard’s socket. For 2025, the main players are Intel’s LGA sockets (like LGA 1700) and AMD’s AM sockets (like AM5). You’ll see numbers after these, like LGA1150 or AM5, which tell you which generation of chips the socket is designed for. It’s super important that your CPU’s socket matches your motherboard’s socket. If they don’t match, it just won’t work, plain and simple. The chipset on the motherboard is also key. It’s like the traffic controller for all the data going between the CPU, memory, and other parts. Different chipsets offer different features, like more USB ports, better overclocking support, or more M.2 slots for fast storage. PCPartPicker does a great job of showing you compatible CPUs for a given motherboard, but it’s good to know the basics yourself.
Selecting the Right Motherboard
Choosing a motherboard can feel a bit overwhelming with all the different sizes and features. The size, like ATX, Micro-ATX, or Mini-ITX, determines how many expansion slots and ports it has, and also what size case it will fit into. Smaller boards (Micro-ATX, Mini-ITX) are great for compact builds, but usually have fewer features. For a standard build, ATX is common. When you’re looking at motherboards, pay attention to the CPU socket (like we just talked about!) and the chipset. For AMD builds, you might see boards like the Gigabyte B650 Gaming X AX, which is a solid choice for a powerful AMD gaming rig. For Intel, a board like the Asus Prime B760-Plus D4 could be a good mid-range option. Also, check how many RAM slots it has, how many M.2 slots for SSDs, and what kind of audio and networking capabilities it offers. More M.2 slots mean you can add more super-fast storage later on.
Graphics Card Considerations for Gaming
Alright, let’s talk graphics cards (GPUs). If you’re building a PC for gaming, this is probably the most important component you’ll buy, and often the most expensive. Both AMD and Nvidia make GPUs, and they sell them to other companies like ASUS, MSI, and Gigabyte to put their own cooling and designs on them. When you’re picking one, think about the games you want to play and at what resolution and settings. A card that’s great for playing esports titles at 1080p might struggle with the latest AAA games at 4K. PCPartPicker helps you compare prices and availability, which is really useful because GPU prices can change a lot. Keep an eye out for deals, as sometimes you can find bundles that include games or other bonuses. You’ll want to make sure your power supply can handle the GPU you choose, as they can draw a lot of power. Also, check the physical dimensions to make sure it will fit in your case.
Optimizing Your PC Build
Alright, so you’ve picked out your main parts, but now it’s time to really fine-tune things to get the most bang for your buck and make sure everything plays nice together. This section is all about those little tweaks and choices that can make a big difference in how your PC performs and feels.
Memory Overclocking: XMP, EXPO, and DOCP
So, you bought some fancy fast RAM, right? Well, by default, it’s probably not running at its advertised speed. It’s like buying a sports car but only driving it in first gear. You need to enable something in your motherboard’s BIOS to get that speed. For Intel systems, it’s usually called XMP (Extreme Memory Profile), and for AMD, you’ll see EXPO (AMD Extended Profiles for Overclocking) or sometimes DOCP (Direct Over Clock Profile). Don’t be scared of the BIOS; it’s pretty straightforward. Just find the setting, pick the profile that matches your RAM’s speed, and save. This is one of the easiest ways to get more performance out of your system without spending extra money. For AMD Ryzen builds, aiming for DDR5 6000MHz with CL30 timings is often the sweet spot for performance and stability.
Storage Solutions: SSDs vs. HDDs
When it comes to storing your games, operating system, and all your files, you’ve got two main choices: Solid State Drives (SSDs) and Hard Disk Drives (HDDs). SSDs are way faster. Like, way faster. Your PC will boot up in seconds, games will load quicker, and everything just feels snappier. HDDs are slower but offer a lot more storage space for a lower price. For your main drive, where Windows and your most-played games live, an SSD is pretty much a must-have these days. If you have a massive game library or need to store tons of videos or photos, then adding an HDD for bulk storage makes a lot of sense. You can even mix and match – a fast SSD for your OS and a big HDD for everything else.
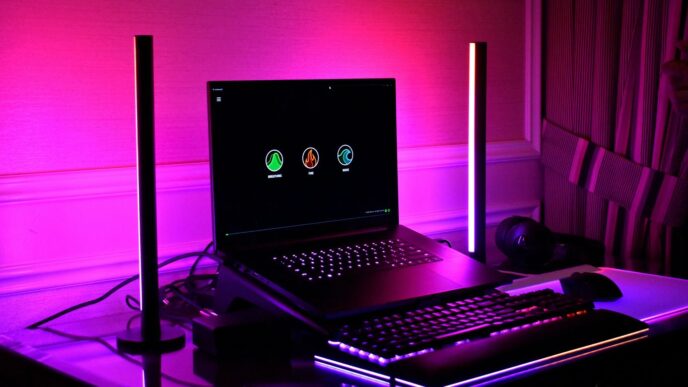
Case Selection and Component Fit
Picking a case isn’t just about looks, though that’s part of it! You need to make sure all your chosen components actually fit inside. PCPartPicker is great for this because it flags potential issues. Check the dimensions of your graphics card against the case’s maximum GPU length, and make sure your CPU cooler (especially if it’s a big air cooler) isn’t too tall for the case. Motherboard size also matters – an ATX motherboard won’t fit in a case designed only for Micro-ATX or Mini-ITX. It’s also worth considering airflow. A case with good ventilation will help keep your components cool, which can prevent performance throttling and extend their lifespan. Some cases come with fans, others don’t, so factor that into your budget if you need more cooling.
Community and Refinement with PCPartPicker
Building a PC can feel like a solo mission, but it doesn’t have to be. PCPartPicker really shines when you tap into its community features. It’s like having a whole crew of PC enthusiasts ready to help you out.
Peer Reviewing Builds Online
Before you hit that ‘buy’ button on all your parts, it’s a smart move to get a second opinion. PCPartPicker has links to subreddits like r/pcmasterrace and r/PCBuilds. Posting your part list there lets experienced builders spot potential issues or suggest better value parts you might have missed. Don’t just blindly trust a pre-made list; get it checked! It’s a great way to catch compatibility quirks or find a deal that slipped past you. Remember, even the best builders can miss something, and fresh eyes are always helpful.
Customizing Starter Builds
PCPartPicker offers some solid starter builds, which are fantastic jumping-off points. But honestly, nobody’s perfect, and sales change daily. Take those starter builds and tweak them. Maybe you want a different case because you saw one you really liked, or perhaps a slightly better CPU fits your budget. You can always ask the community for advice on how to make those starter builds even better for your specific needs. It’s about making the build yours, not just copying someone else’s. You can find some great ideas for different price points on the PCPartPicker site itself.
Seeking Community Advice
Got a question about whether a specific cooler will fit in your chosen case? Wondering if an AMD or Intel CPU is the better pick for your workload? The PCPartPicker community is the place to ask. People are generally happy to share their knowledge. Don’t be afraid to ask about anything, from component fitment to the best way to manage cables. You can even get advice on where to find the best deals or if a mail-in rebate is actually worth the hassle. It’s all about making informed decisions and building a PC you’ll be happy with for a long time. If you’re looking to explore new design possibilities in your projects, you might find tools like FabForm interesting for streamlining complex design processes.
Build Tiers and Recommendations
So, you’ve got your parts picked out, compatibility checked, and budget in mind. Now comes the fun part: figuring out where your build fits in the grand scheme of things. PCPartPicker actually makes this pretty easy by offering suggested build tiers. Think of these as starting points, not rigid rules. You can always tweak them to fit your exact needs and wallet.
Starter Builds for Budget Gaming
These are your entry-level machines, perfect for getting into PC gaming without breaking the bank. The goal here is usually to hit 1080p resolution at a smooth 60 frames per second with medium to high settings in most modern games. You might even be able to push higher frame rates for esports titles if you dial back the graphical fidelity a bit. While aesthetics might take a backseat to pure value in these builds, they’re still perfectly capable machines. Don’t be afraid to ask the community for advice on making these look a bit nicer if that’s important to you, maybe by picking a case you really like.
Mid-Range Builds for Balanced Performance
This is often the sweet spot for many gamers. Mid-range builds aim for a great balance between price and performance. You’re typically looking at solid 1080p performance at high refresh rates (144Hz+) or even dipping into 1440p gaming with good settings. These builds often consider aesthetics more, with components that look good together. They’re also versatile enough for everyday tasks, some light video editing, or photo work. These are the builds that offer the most bang for your buck.
High-End and Ultimate PCMR Builds
Now we’re talking about the big leagues. High-end builds are for those who want to play at 1440p or even 4K resolutions with all the graphical bells and whistles turned on, aiming for high frame rates. These builds don’t necessarily focus on cost-to-benefit; instead, they prioritize top-tier performance and often premium aesthetics. You’ll see the best GPUs, CPUs, and plenty of RAM. The
Post-Build Best Practices
So, you’ve got all your shiny new parts, and you’ve put them together. Awesome! But before you fire it up and expect magic, there are a few things to double-check. It’s like building IKEA furniture; you think you’re done, but then you find an extra screw.
Inspecting Components Upon Arrival
When those boxes finally show up, don’t just rip them open and toss the packaging. Take a moment to look over everything. Check the CPU box for any bent pins – that’s a big one. Look at the motherboard for any obvious damage on the board itself or the socket. For the graphics card, make sure the fans aren’t loose and that the connectors look clean. It’s better to catch a problem now than when you’re halfway through the build and realize a part is DOA (Dead On Arrival). If you’re building a PC on a budget, like a student might, checking these things can save a lot of headaches later on assistance with building a new PC.
Proper Installation Techniques
This is where the "don’t force it" rule really comes into play. When you’re putting the CPU into the motherboard socket, it should just drop in with zero resistance. Seriously, no wiggling, no pushing. If it doesn’t seat easily, something is wrong – check the orientation. Same goes for RAM; the clips on the side should click into place without you needing to use a hammer. When installing the motherboard into the case, line up the standoffs perfectly before screwing it down. For the GPU, make sure it’s fully seated in the PCIe slot and that the retention clip clicks. It’s all about gentle, deliberate movements.
Ensuring System Stability and Performance
Once everything is plugged in and you’ve booted up, there are still a couple of steps. First, get into your BIOS/UEFI. You’ll want to enable XMP (or EXPO/DOCP for AMD systems) for your RAM. Most RAM kits don’t run at their advertised speeds out of the box; they default to a slower speed. Enabling this profile is usually a simple click and tells your system to use the RAM’s full potential. After that, install your operating system and all the necessary drivers, especially for your motherboard chipset and graphics card. Finally, run some stress tests, like Prime95 for the CPU and FurMark for the GPU, to make sure your components are stable under load and aren’t overheating. A quick check of temperatures using software like HWMonitor is a good idea too.
Wrapping Up Your PC Build Journey
So, you’ve made it through the guide. Building your own PC might seem like a lot, but with tools like PCPartPicker, it’s really not as scary as it sounds. Remember to check prices across different stores, and don’t be afraid to ask for help from online communities if you get stuck. Also, don’t forget to enable that memory overclock – it’s a simple step that really makes a difference. Whether you went for a budget starter rig or a high-end dream machine, the skills you’ve learned will serve you well. Now go enjoy your custom-built PC!
Frequently Asked Questions
What exactly is PCPartPicker?
PCPartPicker is a super helpful website that lets you pick out computer parts and makes sure they all work together. It also shows you where to buy them for the best price. Think of it as your personal guide to building a PC!
I don’t live in the US, can I still use PCPartPicker?
You can totally change the country on PCPartPicker! Just look for a link that says ‘PCPartPicker part list’ and then find the option to change your country in the top corner. The site will then show you parts that are available and cheapest in your area.
Is it okay to buy used parts for my PC build?
Yes, you can! Buying used parts can save you a good amount of money. Just remember that older parts might not have a warranty, so it’s a bit of a gamble. It’s up to you if you want to take that chance!
What should I do when my PC parts arrive?
When your parts arrive, it’s smart to check them over carefully. Make sure there’s no damage and that everything you ordered is there. Also, double-check that the labels on the parts match what’s on the box and what you bought online.
Do I need to read the manuals that come with my parts?
When you get your new computer parts, you’ll usually find instruction manuals with them. It’s a good idea to keep these handy, especially the one for your computer case and motherboard. If the manual and a guide disagree, always follow what the manual says.
Do I need to do anything special with my RAM after building the PC?
Yes, absolutely! Most computer memory (RAM) doesn’t run at its fastest speed right out of the box. You’ll want to go into your computer’s settings (usually called the BIOS or UEFI) and turn on a setting like XMP, EXPO, or DOCP. This is a normal step that lets your RAM run at the speed it’s supposed to, making your PC faster.