Building your own PC can be a rewarding experience, especially in 2025 when technology is advancing faster than ever. Whether you’re a gamer, a content creator, or just someone looking for a powerful machine, this guide will help you navigate the process of selecting components, assembling your system, and maintaining it for years to come. Let’s get started on crafting your dream machine!
Key Takeaways
- Choose components based on your specific needs and budget.
- Ensure all parts are compatible to avoid issues during assembly.
- Prioritize cooling solutions for high-performance builds.
- Consider aesthetics to create a visually appealing setup.
- Engage with the community for support and inspiration.
Choosing The Right Components For Your Build
Understanding Your Needs
Okay, so you’re ready to build a PC. Awesome! But before you start throwing money at the shiniest parts, take a breath. What are you actually going to use this thing for? This is the most important question to answer honestly. A gaming rig is way different than a workstation for video editing, and both are different from a basic machine for browsing the web and writing emails.
- Gaming: High-end CPU and GPU are key. Think about the resolution and refresh rate you want to play at. 1080p 60Hz is a lot less demanding than 4K 144Hz. Check out some gaming PC builds for inspiration.
- Workstation: Focus on RAM, storage (especially fast SSDs), and a decent CPU. The GPU is less important unless you’re doing heavy graphics work.
- General Use: Integrated graphics, a modest amount of RAM (8-16GB), and a small SSD will do the trick. Don’t overspend here.
Compatibility Considerations
Alright, you know what you want to do with your PC. Now comes the fun part: making sure everything plays nice together. This is where PCPartPicker becomes your best friend. It checks compatibility between components, which is a lifesaver. Here’s the lowdown:
- CPU and Motherboard: The CPU socket type must match the motherboard socket. Intel CPUs use different sockets than AMD CPUs. Do your research!
- RAM: Make sure the motherboard supports the type and speed of RAM you’re buying (DDR4 vs. DDR5, speed in MHz). Also, pay attention to the number of RAM slots.
- Power Supply: Calculate the wattage your system needs and get a power supply with enough headroom. It’s better to have too much power than not enough. 80+ Bronze certification is a good starting point.
- Case: Make sure all your components fit inside the case! Check the dimensions of the GPU, CPU cooler, and motherboard.
Balancing Performance and Budget
This is the eternal struggle. You want the best performance, but you don’t want to go broke. Here’s how to strike a balance:
- Prioritize: Figure out which components are most important for your use case. For gaming, the GPU is usually the biggest bottleneck. For video editing, the CPU and RAM are crucial.
- Don’t Overspend on Unnecessary Features: RGB lighting is cool, but it doesn’t make your PC faster. A fancy case is nice, but a basic one with good airflow will do the job. Don’t get caught up in the hype.
- Look for Deals: Check for sales and discounts. Component prices fluctuate all the time. Patience can save you a lot of money. Consider buying used components from reputable sources (but be careful!).
- Plan for Upgrades: Think about future upgrades. A good motherboard and power supply can last for several builds. This can save you money in the long run. Consider DIY computer system building parts that are easily upgradable.
Building For Extreme Performance
Selecting High-End CPUs and GPUs
So, you want the fastest PC possible? It all starts with the core components. You’re going to need a top-of-the-line CPU and GPU. Think Intel Core i9 or AMD Ryzen 9 series processors paired with the latest NVIDIA GeForce RTX or AMD Radeon RX graphics cards. Don’t even think about skimping here; this is where you get the biggest performance gains. Also, make sure you have enough RAM. 32GB should be your starting point, and faster RAM speeds (like DDR5-6000 or higher) can give you a noticeable edge. For storage, a fast NVMe SSD is a must. Aim for at least 1TB, but 2TB or more is better, especially if you plan on installing a lot of games or working with large files. These high-end CPUs are the foundation of your build.
Optimizing Cooling Solutions
With great power comes great heat. If you’re pushing your components to their limits, you need serious cooling. Air coolers can work, but for extreme performance, liquid cooling is the way to go. A 240mm or 360mm all-in-one (AIO) liquid cooler will keep your CPU temperatures under control, even when overclocking. Don’t forget about your GPU, either. Some high-end GPUs come with their own liquid cooling solutions, or you can look into aftermarket options. Case airflow is also critical. Make sure your case has plenty of ventilation and that you have enough fans to move air through the system. Positive pressure (more intake fans than exhaust fans) can help keep dust out. Here’s a quick guide:
- CPU: AIO liquid cooler (240mm or 360mm)
- GPU: Liquid-cooled or high-end air cooler
- Case: Good airflow with multiple fans
Future-Proofing Your Build
Building an extreme performance PC is an investment, so you want it to last as long as possible. That means thinking about future upgrades. Choose a motherboard with plenty of expansion slots and support for the latest technologies, like PCIe 5.0. A high-wattage power supply (850W or more) will give you headroom for future GPU upgrades. And don’t forget about the case. A well-built case with good airflow and plenty of room for expansion will serve you well for years to come. Consider these points:
- Motherboard: Look for ample expansion slots.
- PSU: Get a high-wattage power supply for future upgrades.
- Case: Choose a spacious, well-ventilated case.
Crafting A Custom Gaming Experience
Tailoring Your Setup For Gaming
Okay, so you want a gaming PC that’s yours. Not just some off-the-shelf thing. I get it. It’s about more than just frames per second; it’s about creating an experience. Think about the games you play most. Are you a competitive FPS player? Maybe you need a super high refresh rate monitor and a super responsive keyboard. Or are you more into immersive RPGs? Then a curved ultrawide monitor and a comfortable, ergonomic setup might be better. It’s all about what makes you happy. Consider these points:
- Resolution and Refresh Rate: Decide if you’re aiming for 1080p, 1440p, or 4K gaming, and choose a monitor with a corresponding refresh rate (144Hz, 240Hz, etc.).
- Peripherals: Invest in a quality mouse, keyboard, and headset that suit your gaming style. Don’t skimp here; these are your primary interfaces with the game.
- Ergonomics: Make sure your chair and desk are comfortable for long gaming sessions. A good setup can prevent fatigue and improve your performance. Consider a gaming PC build that can handle virtual reality.
Incorporating Aesthetic Elements
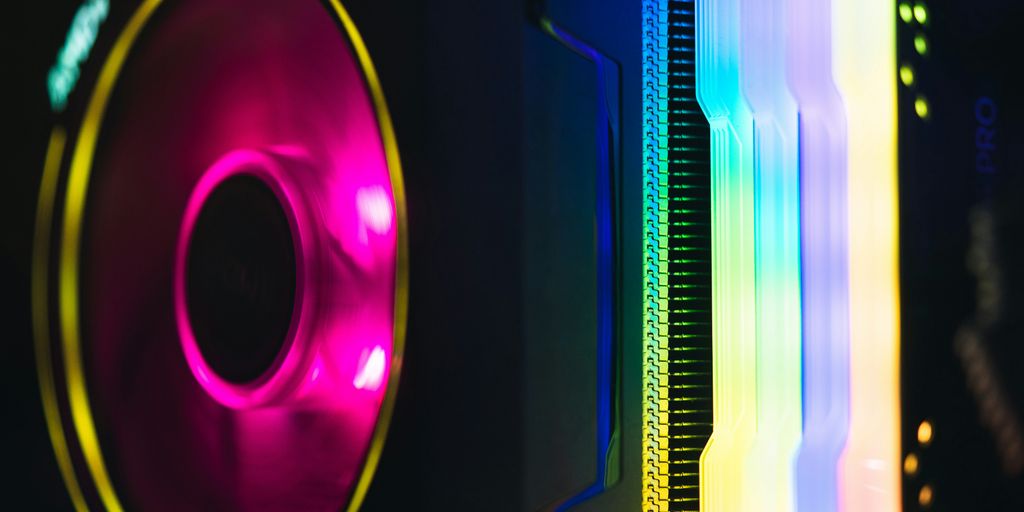
Let’s be real, looks matter. A custom PC is a statement piece. RGB lighting is the obvious choice, but don’t go overboard. Think about a color scheme and stick to it. Cable management is also key. A clean build looks way better and can even improve airflow. Custom water cooling loops are awesome, but they’re also a lot of work. If you’re not comfortable with that, there are plenty of great-looking air coolers and AIOs out there. Here are some ideas:
- RGB Lighting: Choose components with customizable RGB lighting and sync them using software like Corsair iCUE or ASUS Aura Sync.
- Custom Cables: Use cable extensions or custom-sleeved cables to add a pop of color and improve cable management.
- Case Selection: Pick a case that showcases your components and has good airflow. Tempered glass side panels are a must these days.
Maximizing Performance Through Overclocking
Overclocking is basically pushing your components beyond their rated speeds. It can give you a noticeable performance boost, but it also generates more heat and can potentially damage your hardware if you’re not careful. Do your research before you start overclocking, and always monitor your temperatures. There are tons of guides online, and it’s a fun way to squeeze extra performance out of your system. Just remember to take it slow and be patient. Here’s a simple table to get you started:
| Component | Safe Overclocking Range | Monitoring Software |
|---|---|---|
| CPU | 5-10% | HWMonitor |
| GPU | 10-15% | MSI Afterburner |
| RAM | Varies by module | Thaiphoon Burner |
Overclocking can significantly improve your gaming experience, but it’s important to do it safely and responsibly.
Creating A Reliable Streaming Setup
Choosing The Right Hardware
Okay, so you wanna stream? Cool. First things first, you gotta pick the right gear. It’s not just about having the most expensive stuff; it’s about having stuff that works well together. Think of it like a band – a killer guitarist is useless if the drummer can’t keep a beat. For streaming, your CPU is super important. It handles a lot of the encoding work. I’d suggest something with at least 8 cores if you’re serious. The GPU is also important, especially if you’re streaming games. You don’t need the absolute top-of-the-line, but something mid-range or higher will make a big difference. Don’t skimp on RAM either; 16GB is a good starting point, but 32GB gives you more breathing room. And of course, a fast SSD is a must for your operating system and streaming software. Here’s a quick rundown:
- CPU: 8+ cores (Ryzen 7 or Intel i7 or better)
- GPU: NVIDIA GeForce RTX 3060 or AMD Radeon RX 6600 or better
- RAM: 16GB minimum, 32GB recommended
- SSD: 500GB minimum for OS and software
Ensuring Smooth Streaming Performance
Alright, you’ve got the hardware. Now, let’s make sure your stream doesn’t look like a slideshow. Your internet connection is key. You need a decent upload speed. I’d say at least 5 Mbps for 720p streaming, and 10 Mbps or more for 1080p. Test your internet speed using a site like Speedtest.net. Also, mess around with your streaming software settings. OBS Studio is a popular choice, and it’s free. Don’t just crank everything up to the max. Start with lower settings and gradually increase them until you find a sweet spot between quality and performance. Encoding settings are important. x264 is CPU-based, while NVENC (NVIDIA) and AMF (AMD) use your GPU. Experiment to see what works best for your setup. Also, keep an eye on your CPU and GPU usage while streaming. If they’re constantly maxed out, you might need to lower your settings or upgrade your hardware. Consider computer graphics market trends to stay ahead.
Integrating Audio and Visual Equipment
Okay, so you’ve got the PC humming, the stream’s looking smooth, but what about your face and voice? A good webcam and microphone are essential. You don’t need to spend a fortune, but don’t cheap out either. A decent 1080p webcam will do the trick. For audio, a USB microphone is a good option. Condenser mics are popular for their sound quality, but they can pick up background noise. Dynamic mics are less sensitive, which can be good if you have a noisy environment. Also, think about lighting. Good lighting can make a huge difference in how you look on camera. A simple ring light or a couple of softboxes can work wonders. Here’s a basic setup:
- Webcam: 1080p resolution
- Microphone: USB condenser or dynamic mic
- Lighting: Ring light or softboxes
And don’t forget about software! Noise suppression is your friend. NVIDIA Broadcast is great if you have an NVIDIA GPU. Otherwise, OBS Studio has built-in noise suppression filters. Experiment with different settings to find what sounds best. Remember, audio is just as important as video. Nobody wants to watch a stream with bad audio. Prioritize clear audio for a better viewer experience.
Maintaining Your Custom PC
Building your own PC is just the start. Keeping it running smoothly requires some regular attention. Think of it like a car – you can’t just drive it and never change the oil or check the tires. Same deal with your PC. Let’s talk about how to keep your custom build in top shape.
Regular Cleaning and Dust Management
Dust is your PC’s worst enemy. It acts like an insulator, trapping heat and causing components to overheat. Overheating can lead to performance issues, system instability, and even hardware failure. Make it a habit to clean your PC every few months. Here’s how:
- Power Down and Unplug: Always turn off your PC and unplug it from the wall before you start cleaning. Safety first!
- Use Compressed Air: Canned air is your best friend. Use short bursts to blow dust out of fans, heatsinks, and other components. Hold the can upright to prevent liquid propellant from spraying onto your hardware.
- Vacuum Carefully: A vacuum cleaner with a brush attachment can be used to remove dust from larger areas, like the inside of the case. Be careful not to touch any components with the vacuum nozzle, as static electricity can damage them.
- Clean Filters: Many PC cases have dust filters on the front, top, and bottom. Remove these filters and wash them with soap and water. Make sure they’re completely dry before putting them back.
Monitoring System Performance
Keeping an eye on your system’s performance is key to spotting potential problems before they become major headaches. There are several tools you can use to monitor things like CPU temperature, GPU usage, and RAM utilization. I like to use the Windows Resource Monitor, but there are plenty of third-party options out there too. If you notice your CPU temps are consistently high, even when idle, it might be time to reapply thermal paste or upgrade your cooling solution. Similarly, if your GPU usage is maxed out all the time, even when you’re not gaming, it could indicate a driver issue or a failing graphics card.
Upgrading Components Over Time
One of the best things about building your own PC is the ability to upgrade components as needed. As technology advances, you can swap out older parts for newer, more powerful ones. This helps keep your PC relevant and performing at its best. Here’s a general upgrade timeline:
- Every 2-3 Years: Consider upgrading your graphics card. This will give you the biggest performance boost in games.
- Every 3-5 Years: Think about upgrading your CPU and motherboard. This is a more involved process, but it can significantly improve overall system performance.
- As Needed: Upgrade your RAM or storage as needed. If you’re running out of memory or disk space, it’s time to upgrade. Also, consider replacing your DIY computer parts if they are failing.
Here’s a simple table to illustrate upgrade considerations:
| Component | Upgrade Frequency | Reason |
|---|---|---|
| Graphics Card | 2-3 Years | Significant gaming performance boost |
| CPU/Motherboard | 3-5 Years | Improves overall system performance |
| RAM/Storage | As Needed | Addresses memory or space limitations |
Don’t forget to check compatibility before upgrading any components. Make sure the new parts are compatible with your motherboard, power supply, and other existing hardware. And always back up your data before making any major changes to your system.
Engaging With The PC Building Community

Sharing Your Build Online
So, you’ve finally finished your dream PC. Awesome! Now what? Sharing it online is a great way to get feedback, show off your hard work, and maybe even inspire others. Platforms like PCPartPicker, Reddit’s r/pcmasterrace, and various dedicated PC building forums are perfect for this. Don’t just post a picture, though. Include a detailed parts list, explain why you chose those components, and talk about any challenges you faced during the build. People love that stuff. Plus, you might get some helpful tips or suggestions for future upgrades. I remember when I posted my first build; the comments section was a goldmine of information.
Participating In Forums and Events
Forums are still a thing, believe it or not, and they’re super useful for getting help with specific problems or just chatting about PC hardware. Find a forum that fits your interests – maybe one focused on overclocking, or liquid cooling, or even a specific game. Also, keep an eye out for local PC building events or meetups. These are great opportunities to meet other enthusiasts in person, see some cool builds, and maybe even learn a thing or two. I went to one last year and saw a guy with a Lenovo laptop in 2025 that was insane. He had modded it with custom cooling. It was wild.
Learning From Other Builders
Honestly, the best way to improve your PC building skills is to learn from others. Watch YouTube videos, read build logs, and ask questions in forums. Don’t be afraid to experiment and try new things. And don’t get discouraged if you make mistakes – everyone does. The important thing is to learn from them and keep building. I messed up my first custom loop so badly, but now I can do it in my sleep. The PC building community is generally very helpful and supportive, so take advantage of that. There are tons of resources out there, so get involved and start learning!
Budget-Friendly PC Building Tips

Finding Deals on Components
Okay, so you wanna build a PC without emptying your wallet? First things first: patience is key. Component prices fluctuate like crazy, so timing is everything. Keep an eye on deal websites and forums for sales and discounts.
- Check out online retailers like Newegg and Amazon regularly.
- Consider subscribing to newsletters from PC component manufacturers.
- Look for open-box or refurbished components from reputable sellers.
Building For Value Over Price
Don’t just chase the lowest price tag. Think about what you actually need. A super-expensive CPU might sound cool, but if you’re only playing eSports titles, it’s overkill. Prioritize components that give you the most bang for your buck. For example, the Radeon RX 480 is a great value option for VR gaming.
- Research benchmarks to see how different components perform in your favorite games.
- Consider buying slightly older generation components, as they often offer excellent value.
- Don’t overspend on things like RGB lighting or fancy cases if it means sacrificing performance.
DIY vs. Pre-Built Considerations
Building your own PC is almost always cheaper than buying a pre-built one, but it requires time and effort. If you’re not comfortable with the process, a pre-built PC might be a better option, especially if you can find a good deal. Just be sure to compare the specs and prices carefully. Sometimes, you can find pre-builts with surprisingly good components at competitive prices. Building a PC for long-term Esports performance is a great way to save money in the long run.
- Factor in the cost of your time and potential mistakes when deciding between DIY and pre-built.
- Read reviews of pre-built PCs to ensure they have good cooling and cable management.
- Consider the warranty and support offered by pre-built PC manufacturers.
Wrapping It Up: Your PC Building Journey
So, there you have it! Building your own PC in 2025 can be a fun and rewarding experience. Sure, it might feel a bit overwhelming at first, but trust me, once you get into it, you’ll find your groove. Just remember to take your time, do your research, and don’t hesitate to ask for help when you need it. Whether you’re gaming, streaming, or just browsing, a custom-built PC can give you exactly what you want. And hey, when you finally power it on and see it all come together? That feeling is unbeatable. Now, go out there and start crafting your dream machine!
Frequently Asked Questions
What should I consider when picking parts for my PC?
Think about what you will use the computer for, like gaming or schoolwork. Make sure the parts you choose work well together and fit your budget.
Is it better to buy a custom-built PC or a pre-built one?
Custom-built PCs usually have better parts and can be made just how you want them. Pre-built PCs might be easier to get but often have lower quality parts.
How can I keep my PC cool?
Good cooling is important! Make sure your case has enough fans and consider using a liquid cooler if you have powerful parts.
How often should I clean my PC?
It’s a good idea to clean your PC every few months to keep dust from building up. This helps it run better and last longer.
What if I want to upgrade my PC later?
When building your PC, choose parts that are easy to upgrade. This way, you can add new parts in the future without needing a whole new system.
How can I find good deals on PC parts?
Look for sales online, check out discount websites, and compare prices at different stores to find the best deals on the parts you need.

