Building your own PC can seem like a big task, right? Like, where do you even start? Well, this guide is here to help you figure it all out, especially with a super handy website called pcpartpicker. It makes putting together your dream machine way less scary. We’ll go through picking parts, putting them together, and even making sure it looks good. Let’s get this build started!
Key Takeaways
- Use pcpartpicker to check if your chosen computer parts will actually work together before you buy anything.
- Think about what you want your PC to do – like gaming or just browsing – and pick parts that fit that need and your budget.
- When building, it’s smart to test parts outside the case first to catch problems early.
- For gaming, balance your graphics card and processor so one doesn’t slow the other down.
- Don’t forget about the extras like your monitor, keyboard, and mouse; they matter for the whole experience.
Understanding PC Components With PCPartPicker
Essential Components For Your Build
So, you want to build a PC? That’s awesome. It might seem a bit daunting at first, but breaking it down makes it way more manageable. Think of your PC like a body; it needs different parts to do different things. You’ve got the brain, which is the CPU (Central Processing Unit), and the graphics powerhouse, the GPU (Graphics Processing Unit). Then there’s the motherboard, which is like the nervous system, connecting everything. You’ll also need RAM (Random Access Memory) for short-term memory, storage like an SSD or HDD for your files and games, a PSU (Power Supply Unit) to give it all juice, and finally, a case to hold it all together. PCPartPicker is a lifesaver here because it helps you see how these parts fit together and if they’re even compatible in the first place. It’s like having a digital mechanic double-checking your work before you even buy anything.
Balancing CPU and GPU Performance
When you’re picking out a CPU and GPU, it’s a bit like choosing a running team. You don’t want one runner to be super fast and the other to be really slow, right? That’s called a bottleneck, and it means one part is holding the other back. For gaming, you generally want your CPU and GPU to be in a similar performance ballpark. If you get a super powerful GPU but a weak CPU, the CPU won’t be able to feed the GPU information fast enough, and you won’t get the smooth frame rates you’re hoping for. Conversely, a beastly CPU with a weak GPU means the GPU can’t keep up with the CPU’s instructions. PCPartPicker can help you compare different CPU and GPU pairings. A good rule of thumb is to look at reviews and benchmarks for the games you want to play. For example, if you’re aiming for 1080p gaming with a decent refresh rate, you might pair an Intel Core i5 with an NVIDIA RTX 3060 or an AMD equivalent. It’s all about finding that sweet spot where both components work well together.
Choosing The Right Motherboard
The motherboard is pretty important; it’s the main circuit board that all your other components plug into. Think of it as the foundation of your house. There are different sizes, like ATX, Micro-ATX, and Mini-ITX, and these sizes dictate how many expansion slots and features the board can have. You also need to make sure the motherboard’s CPU socket matches the CPU you choose. For instance, an Intel CPU will need an Intel socket, and an AMD CPU will need an AMD socket. PCPartPicker is excellent for this, as it will flag if your chosen CPU isn’t compatible with the motherboard socket. Beyond that, consider the number of RAM slots, M.2 slots for fast SSDs, USB ports, and any specific features you might want, like built-in Wi-Fi or better audio. Some motherboards also have better power delivery systems, which can be important if you plan on overclocking your CPU later on.
Navigating PCPartPicker For Compatibility

So, you’ve picked out your shiny new parts, but how do you know they’ll all play nicely together? That’s where PCPartPicker really shines. It’s like having a super-smart assistant who knows all the ins and outs of PC components.
Spotting Potential Component Conflicts
PCPartPicker automatically checks for most compatibility issues. For example, it’ll flag if you try to put a CPU that doesn’t fit your motherboard socket, or if a graphics card is too big for your chosen case. It’s a lifesaver for avoiding those "oops, this doesn’t fit" moments. You’ll see warnings right on the build page if something’s up. It’s always a good idea to give these warnings a quick read, even if they seem minor.
Ensuring Power Supply Unit Adequacy
Your power supply unit, or PSU, is super important. It needs to provide enough juice for all your components, especially the CPU and graphics card. PCPartPicker has a wattage calculator that estimates your system’s power needs based on the parts you’ve selected. It will warn you if your chosen PSU might be cutting it too close. Generally, it’s better to have a little headroom, so if the calculator says you need 500W, maybe aim for a 550W or 600W PSU to be safe and keep things running cool.
Memory and Storage Interoperability
When it comes to memory (RAM) and storage (like SSDs and HDDs), PCPartPicker helps make sure they’re compatible too. It checks if your motherboard supports the type and speed of RAM you’ve chosen. For storage, it confirms that your motherboard has the right connectors (like SATA or M.2 slots) for your drives. You can find great deals on memory from brands like Crucial, which is a veteran in computer storage. Keeping your system running smoothly also means keeping it clean, so consider using utilities like Disk Cleanup regularly to maintain and enhance your computer’s performance.
Here’s a quick look at common compatibility checks:
- CPU Socket: Does the CPU fit the motherboard’s socket type (e.g., LGA 1700, AM5)?
- RAM Type: Is the RAM DDR4 or DDR5, and does the motherboard support it?
- Case Clearance: Will the graphics card and CPU cooler physically fit inside the case?
- PSU Connectors: Does the PSU have the necessary power connectors for the motherboard and graphics card?
Building Your PC: Practical Steps
Alright, you’ve picked out all your parts using PCPartPicker, and now it’s time for the main event: putting it all together. It might seem a bit daunting, especially if this is your first time, but honestly, it’s like adult LEGOs, just with more tiny screws and a higher chance of static shock if you’re not careful.
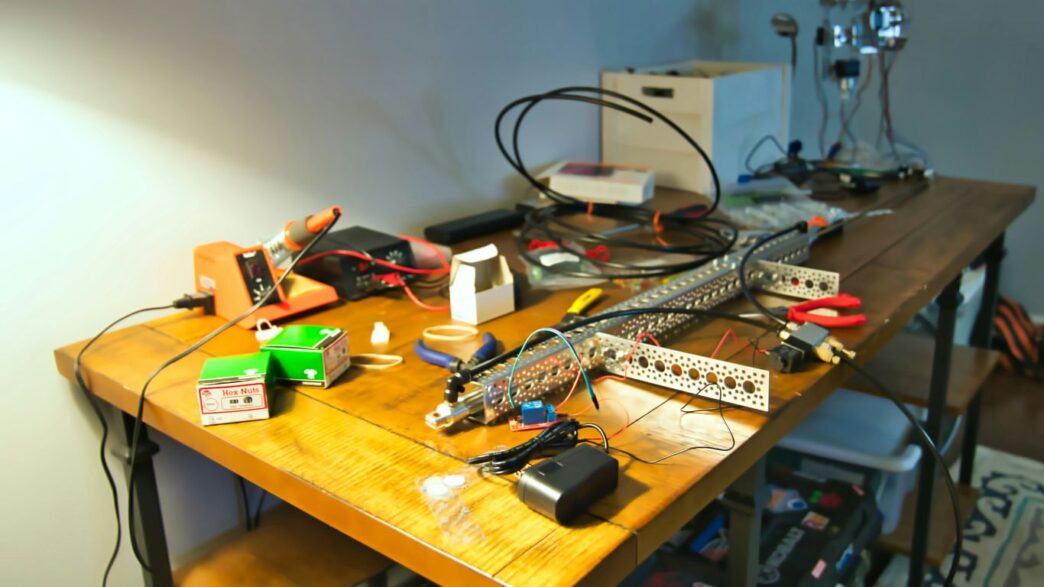
Preparing Your Workspace and Tools
First things first, find a good spot. You’ll want a large, clear table. Seriously, you’re going to have components spread out everywhere, and you don’t want to be digging through paperwork or trying to balance a motherboard on your lap. Avoid building on carpet if you can; static electricity is the silent killer of PC components. If you absolutely have to build on carpet, make sure you’re grounded. A simple anti-static wrist strap connected to a metal part of your case (before any components are in it, of course) is a good idea. As for tools, you really only need a few things:
- Screwdriver: A Phillips head screwdriver, preferably with a magnetic tip. This makes life so much easier when you inevitably drop a screw into a hard-to-reach spot.
- Pliers: Long-nose pliers can be a lifesaver for grabbing those tiny screws or fiddly connectors.
- Lighting: A good lamp or even a headlamp is surprisingly useful. Trying to see inside a dark PC case with just your phone flashlight is a recipe for frustration.
- Zip Ties/Velcro Straps: Not strictly necessary for the build itself, but they’re great for cable management later on.
The Preliminary ‘Test Bench’ Method
This is a step a lot of people skip, but it can save you a massive headache down the line. Before you even think about putting anything into the case, you should do a ‘test bench’ build. This means laying out your motherboard on its anti-static bag or the box it came in, and then installing just the core components: the CPU, CPU cooler, RAM, and graphics card. Connect your power supply and a monitor. If it boots up and you can get into the BIOS, you know the main parts are working correctly. This preliminary check is your best friend for catching DOA (Dead On Arrival) parts or simple installation errors early. If something isn’t working, it’s much easier to troubleshoot and swap parts when everything is out in the open, rather than buried inside the case.
Integrating Components Into The Case
Once your test bench is successful, it’s time to move everything into the actual PC case. This is where the case design really matters. Some cases have better cable management options, easier access to mounting points, and clearer instructions than others. Take your time here. Mount your motherboard first, making sure to install the standoffs correctly – these little screws prevent the motherboard from touching the metal case, which could cause a short circuit. Then, install your storage drives (SSD/HDD), power supply, and finally, the graphics card. Connect all the necessary power cables from the PSU to the motherboard, GPU, and drives. Route your cables as neatly as possible; good cable management not only looks better but also improves airflow within the case, which helps keep your components cool. Don’t forget to plug in your front panel connectors – these are the small, fiddly wires for the power button, reset button, and USB ports. They can be tricky, so refer to your motherboard manual carefully for their placement.
Optimizing Your Build For Gaming
So, you’ve got the core components sorted and they all play nice together thanks to PCPartPicker. Now, let’s talk about making sure your rig actually plays games well. This is where the rubber meets the road, or rather, where your graphics card meets the pixels.
Resolution Versus Refresh Rate Considerations
When you’re picking parts, especially the graphics card and monitor, you’ll hear a lot about resolution and refresh rate. Think of resolution like the size of the canvas – higher resolution (like 1440p or 4K) means more detail, a sharper picture. Refresh rate, measured in Hertz (Hz), is how many times per second the screen updates. A higher refresh rate (like 144Hz) means smoother motion, which is a big deal in fast-paced games. You can’t have everything at max settings; it’s about finding what matters most to you.
- 1080p (Full HD): Still the most common resolution. It’s easier for your PC to run games at high frame rates here.
- 1440p (QHD): A nice step up in detail. Requires a more powerful GPU to maintain high refresh rates.
- 4K (UHD): The sharpest picture, but demands a very powerful (and expensive) GPU. Often means sacrificing frame rates.
For a balanced gaming experience, especially if you’re on a tighter budget, aiming for 1080p with a refresh rate between 60Hz and 144Hz is a solid goal. PCPartPicker can help you see if your chosen components are likely to hit those targets.
Selecting Graphics Cards For Performance
The graphics card, or GPU, is usually the most important component for gaming. It does all the heavy lifting for visuals. When looking at GPUs, you’ll see numbers and letters – like RTX 3060 or RX 6700 XT. Generally, higher numbers mean better performance, but it’s not always that simple. Price is a big factor, and PCPartPicker lets you compare prices across different retailers.
- Nvidia GeForce RTX series: Known for good performance and features like Ray Tracing.
- AMD Radeon RX series: Often offers great value for the performance, especially at certain price points.
Don’t just look at the top-tier cards. A mid-range card can still provide a fantastic gaming experience, especially if you’re playing at 1080p. Check reviews and benchmarks for the specific games you want to play to see how different GPUs perform.
Budget-Friendly Component Alternatives
Building a gaming PC doesn’t have to break the bank. PCPartPicker is brilliant for finding cheaper alternatives that still get the job done. You might not get the absolute best, but you can still get a great experience.
- CPU: Instead of a top-end Intel Core i7 or AMD Ryzen 7, consider an Intel Core i5 or AMD Ryzen 5. They offer excellent performance for gaming without the premium price tag.
- GPU: If a new RTX 4070 is out of reach, look at last generation’s cards or slightly lower-tier current-gen models. Sometimes, a used GPU from a reputable seller can also be a good option, but be cautious.
- Storage: While fast NVMe SSDs are great, a slightly slower SATA SSD can still be a huge upgrade over a traditional hard drive and is often much cheaper per gigabyte. For games that aren’t played as often, a larger, cheaper hard drive might even be worth considering.
Remember, PCPartPicker will flag any compatibility issues, so you can mix and match components with confidence, even when trying to save a few bucks.
Beyond The Core: Peripherals And Aesthetics
So, you’ve got the main guts of your PC sorted. That’s awesome. But what about the stuff you actually interact with, and how it all looks? This is where peripherals and aesthetics come in. It’s not just about raw power; it’s about the experience.
Choosing Monitors For Gaming
Your monitor is your window into the digital world, and for gaming, it’s a big deal. You’ve got two main things to think about: resolution and refresh rate. Resolution, like 1080p or 1440p, is about how sharp the image is. Refresh rate, measured in Hertz (Hz), is about how smooth motion looks. A higher refresh rate, say 144Hz, means the screen updates more times per second, making fast-paced games feel way more fluid. For a balanced gaming experience, aiming for 1080p resolution with a 144Hz refresh rate is a solid sweet spot. Many brands like Asus and BenQ offer good options in this range that won’t break the bank.
Selecting Keyboards And Mice
When you’re picking a keyboard and mouse, think about what you play most. Do you need a ton of programmable buttons for complex games? Or maybe a specific feel from the keys? Mechanical keyboards, with their distinct clicky or tactile feedback, are popular for gaming. Brands like Corsair, Logitech, and Razer are well-known for their gaming peripherals. Some keyboards even have cool retro looks, like the ones from 8BitDo, which can add a unique touch to your setup. For mice, look at the DPI (dots per inch) – a higher DPI generally means more sensitivity, which can be helpful for quick movements. It’s really about what feels comfortable and responsive in your hand.
Case Selection And Internal Aesthetics
Don’t forget the case! It’s not just a box to hold your parts; it’s the visual centerpiece of your build. Many cases come with tempered glass side panels so you can show off your components. You can also get cases with built-in RGB lighting or add your own lighting strips and fans to create a specific look. Cable management is also key here. Tidy cables not only look better but can also help with airflow, keeping your components cool. Planning your cable runs before you put everything in the case can save a lot of headaches later. You can find some great enthusiast-level builds that focus on both performance and visual appeal, like this AMD build optimized for gaming and streaming.
Troubleshooting And Refinement
So, you’ve put it all together, and maybe it’s not quite humming along like you expected. Don’t panic! Most PC builds hit a snag or two. The first thing to check is the absolute basics. Did you plug everything in? Seriously, double-check all the power cables, especially the ones going to the motherboard and graphics card. Sometimes, a loose connection is all it takes.
Common Build Issues And Solutions
It’s pretty common for a PC not to boot up on the first try. If you’re getting no power at all, check the PSU switch on the back and the wall outlet. If you’re getting lights but no display, the RAM might not be seated correctly, or the graphics card could be the culprit. Try reseating both.
- No Power: Ensure the PSU switch is on and the power cord is firmly plugged into both the PSU and the wall. Check the front panel connectors on the motherboard – these tiny pins can be tricky.
- No Display: Reseat the RAM modules. Make sure the graphics card is fully in its slot and any required power cables are connected. Try booting with only one RAM stick.
- Overheating: Monitor your CPU and GPU temperatures using software. Ensure all fans are spinning and that the CPU cooler is properly mounted with thermal paste applied.
Utilizing Online Communities For Help
If you’re stuck, the internet is your best friend. Websites like Reddit have incredibly active communities dedicated to PC building. Subreddits like r/buildapc or r/techsupport are full of people who have likely encountered your exact problem before. Posting a clear description of your issue, along with your PCPartPicker list, can get you a lot of helpful advice. You can also find tons of video guides on YouTube that walk you through common fixes. Don’t be afraid to ask for help; most builders are happy to share their knowledge.
Post-Build System Analysis
Once your PC is up and running, it’s time for a little fine-tuning. You’ll want to install your operating system and all the necessary drivers, especially for your motherboard and graphics card. PCPartPicker can help you find the latest drivers for your components. After that, it’s a good idea to run some stress tests to make sure everything is stable under load. Programs like Prime95 for the CPU and FurMark for the GPU can push your system to its limits. Keep an eye on those temperatures during these tests. This is also a good time to think about cable management if you haven’t already; tidy cables not only look better but can also improve airflow within the case, which is great for keeping things cool. You might also want to look into optimizing your BIOS settings for better performance, but do this carefully and only after you’ve got the basics sorted. Keeping your system running smoothly is an ongoing process, and staying updated with driver releases is a good habit to get into for optimal performance.
Wrapping Up Your Build
So, you’ve gone through the steps, picked out your parts, and maybe even started putting things together. Building your own PC can seem like a lot, especially the first time. But with tools like PCPartPicker, it’s way less scary. It helps you avoid those annoying compatibility problems that can really mess up your day. Remember to take your time, read those manuals, and don’t be afraid to look up guides or ask for help online if you get stuck. It’s a rewarding process, and when you finally boot up your own creation, it feels pretty great. Happy building!
Frequently Asked Questions
What is PCPartPicker and why should I use it?
PCPartPicker is a super helpful website that lets you pick out computer parts for your build. It automatically checks if all your chosen parts will work together, saving you from buying something that won’t fit or function correctly. It’s like having a smart assistant for building your PC!
What are the most important parts for a gaming PC?
For gaming, the two most crucial parts are the CPU (the computer’s brain) and the GPU (the graphics card that makes games look good). You also need enough RAM (memory) for smooth gameplay, and a fast storage drive (like an SSD) so games load quickly.
How do I make sure my parts are compatible?
PCPartPicker is your best friend for this! When you add parts to your list, it will warn you if there are any known issues, like a CPU not fitting a motherboard or a power supply not being strong enough. Always double-check these warnings.
What’s the deal with CPU and GPU balance?
You want your CPU and GPU to be roughly equal in power. If one is much stronger than the other, it can slow down the whole system, like a slow car pulling a fast trailer. Picking parts that are similar in price and performance usually means they’ll work well together.
How much RAM do I need for gaming?
For most modern games, having at least 16GB of RAM is a good starting point. Some people go for 32GB to be extra safe or for more demanding games. It helps your computer run smoothly without slowing down when many programs are open.
What’s the best way to start building my PC?
It’s smart to build your PC outside of the case first, like on a big table. Connect the main parts (CPU, RAM, GPU, storage) to the motherboard, plug in the power supply, and turn it on to see if it boots up. This ‘test bench’ method makes it easier to fix any problems before everything is screwed into the case.