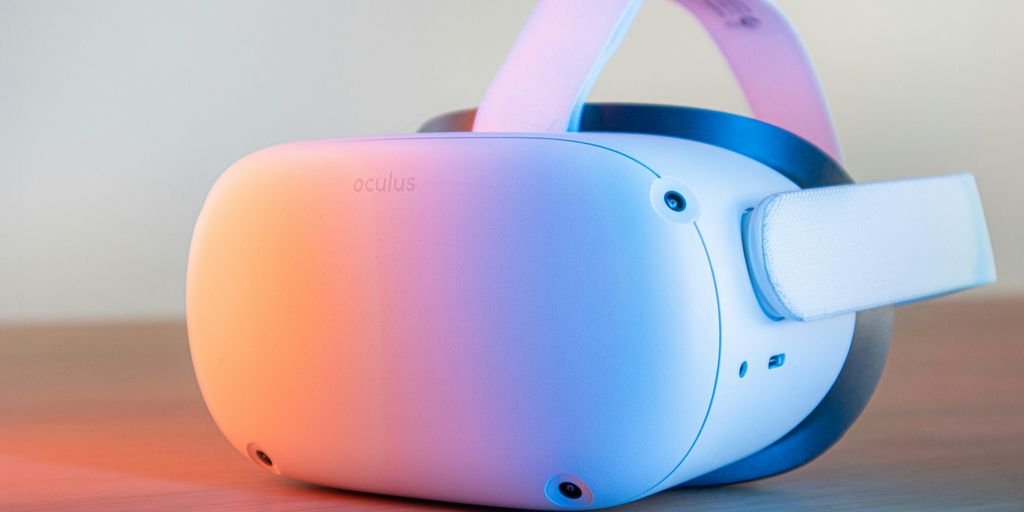
So, you’re thinking about jumping into the world of Oculus VR? Awesome! But before you strap on that headset and dive into virtual worlds, it’s super important to know if your computer can handle it. Nobody wants a choppy, laggy experience, right? This article will walk you through what your PC needs to run Oculus VR smoothly, from the absolute basics to what gets you the best performance. We’ll cover everything so you can avoid any headaches and just enjoy the ride.
Key Takeaways
- Meeting the basic Oculus VR minimum requirements is just the start; for a really good experience, you’ll want to aim for the recommended specs.
- Your graphics card (GPU) is probably the most important part of your PC for VR performance. Don’t skimp on this if you want smooth gameplay.
- Keeping your operating system (like Windows 10 or newer) and all your drivers up to date is a simple but important step for good VR performance.
- Properly setting up your Oculus software and connecting your hardware correctly from the beginning can save you a lot of trouble later on.
- Even with good hardware, optimizing your system by closing background programs and tweaking settings can make a big difference in your VR experience.
Understanding Oculus VR Minimum Requirements
So, you’re thinking about jumping into the world of VR with an Oculus Rift? Awesome! But before you drop any cash, let’s talk about what your PC needs to handle it. It’s not always as simple as just plugging it in and going. You need to make sure your system is up to snuff, or you’ll end up with a laggy, frustrating experience. Let’s break down the Oculus VR minimum requirements so you know what you’re getting into.
Minimum Hardware Specifications
Okay, so what’s the bare minimum to get the Oculus Rift running? Think of these specs as the "gets you in the door" level. If your PC barely meets these, you might be able to run some basic VR stuff, but don’t expect to crank up the graphics settings on the latest games. Here’s a quick rundown:
- CPU: Intel Core i3-6100 / AMD Ryzen 3 1200 / AMD FX4350 or better
- RAM: 8GB or more
- GPU: NVIDIA GeForce GTX 1050Ti / AMD Radeon RX 470 or better
- Ports: At least one USB 3.0 port (for Rift S)
- Video Output: Compatible HDMI 1.3 output
Keep in mind that for the original Rift, you’ll need extra USB ports to connect the headset and sensors. The Rift S is a bit easier on the USB situation. If you’re unsure, check your PC’s specs before buying anything. You can also check the compatible operating systems to make sure your computer is up to date.
Recommended Hardware for Optimal Performance
Alright, now let’s talk about what you really want. The minimum specs will get you started, but if you want a smooth, immersive VR experience, you’ll need to aim higher. These recommended specs will let you crank up the graphics settings and enjoy VR the way it’s meant to be played. Think of it as the difference between driving a beat-up old car and a sports car – both will get you there, but one is a lot more fun. Here’s what you should be shooting for:
- A beefier CPU (something like an Intel Core i5 or AMD Ryzen 5)
- A more powerful GPU (like an NVIDIA GTX 1060 or AMD Radeon RX 480 or better)
- Plenty of RAM (16GB is a good target)
- Fast storage (an SSD will make a big difference in loading times)
Is a High-Performance PC Necessary to Use Oculus Rift?
So, do you need a super-expensive, high-end gaming PC to use an Oculus Rift? Not necessarily. But it definitely helps. If you’re okay with turning down the graphics settings and dealing with occasional lag, you can get by with a mid-range PC that meets the minimum specs. However, if you want the best possible VR experience – the kind that really sucks you in and makes you forget you’re wearing a headset – then investing in a high-performance PC is worth it. Think about what kind of VR applications you want to run. Are you planning on playing demanding games, or just exploring some simple VR experiences? That will help you decide how much power you really need.
Essential System Requirements for Oculus VR
Before you even think about strapping on that headset, let’s talk about what your PC needs to handle the Oculus VR experience. It’s not just about having any computer; it’s about having the right computer. Trust me, trying to run VR on a machine that’s not up to snuff is a recipe for motion sickness and frustration. Let’s break down the essentials.
Compatible Operating Systems
Okay, first things first: your operating system. Oculus VR pretty much demands Windows 10 or newer. Forget about trying to dust off your old Windows 7 machine; it’s just not going to work. Meta (formerly Facebook) really wants everyone on Windows 10 or 11 for compatibility and security reasons. Also, make sure you’re running a 64-bit version of Windows. The 32-bit versions simply can’t handle the memory requirements of VR applications. Some users have reported needing to update their drivers after upgrading to Windows 11, so keep that in mind.
Minimum Hardware Specifications
So, you’ve got the right OS. Great! Now, let’s talk about the guts of your machine. Here’s what you absolutely need to get the Oculus Rift running, even if it’s not the smoothest experience:
- CPU: Intel Core i3-6100 / AMD Ryzen 3 1200 / AMD FX4350 or better. Basically, you need a decent processor to handle all the calculations VR throws at it.
- RAM: 8GB or more. VR apps are memory hogs, plain and simple. Don’t skimp on the RAM.
- GPU: NVIDIA GeForce GTX 1050Ti / AMD Radeon RX 470 or better. This is where things get serious. Your graphics card is doing the heavy lifting of rendering those virtual worlds.
- Ports: At least one USB 3.0 port (especially important for the Rift S). You need those fast data transfer speeds.
- Video Output: Compatible HDMI 1.3 output. This is how the video signal gets to your headset.
Keep in mind that these are minimum specs. You might be able to run some basic VR experiences, but don’t expect to crank up the settings on more demanding games. For the original Rift, you’ll need extra USB ports to connect the headset and sensors. The Rift S simplifies this a bit.
Recommended Hardware for Optimal Performance
Alright, so you want the good stuff, huh? You want that buttery-smooth, immersive VR experience that’ll blow your mind? Then you need to aim higher than the bare minimum. Here’s what I’d recommend for a truly enjoyable experience:
- CPU: Intel Core i5-4590 / AMD Ryzen 5 1500X or better. A more powerful CPU will reduce stuttering and improve overall performance.
- GPU: NVIDIA GeForce GTX 970 / AMD R9 290 equivalent or better. A beefier graphics card will let you crank up the graphics settings and enjoy those detailed VR worlds.
- RAM: 8GB+ RAM. Still important! More RAM is always better, especially for complex VR applications.
- Video Output: HDMI 1.3. Same as the minimum, but make sure it’s working properly!
Basically, if you want to avoid headaches (both literally and figuratively), aim for these basic requirements. You’ll thank me later.
Preparing Your PC for Oculus VR

Getting your PC ready for Oculus VR isn’t too hard, but it’s important to do it right so you don’t run into problems later. It’s like prepping ingredients before you start cooking – a little effort upfront makes the whole process smoother. Let’s walk through the steps to make sure your system is ready to go.
Minimum System Requirements
Before you even think about installing anything, you need to make sure your computer can actually handle VR. The Oculus Rift has certain minimum specs that your PC needs to meet. If you don’t meet these, you’re going to have a bad time. Here’s a quick rundown:
| Component | Minimum Requirement |
|---|---|
| CPU | Intel i5-4590 / AMD Ryzen 5 1500X or better |
| GPU | NVIDIA GTX 970 / AMD R9 290 equivalent or better |
| RAM | 8GB+ RAM |
| Video Output | HDMI 1.3 |
| USB Ports | 3x USB 3.0 ports |
| Operating System | Windows 10 or newer |
Make sure you check your system specs to confirm you’re good to go. You can usually find this info in your system settings.
Installing the Oculus Software
Once you’ve confirmed your PC meets the minimum requirements, the next step is to install the Oculus software. This is what lets your computer talk to the headset. Here’s how:
- Go to the official Oculus website and download the Oculus PC app. It’s a pretty big file, so make sure you have a stable internet connection.
- Run the installer and follow the on-screen instructions. The software will check if your computer meets the minimum requirements again, just to be sure.
- Create an Oculus account. You can use your Facebook account or create a separate one with your email address.
Updating Drivers and Operating System
This is a step a lot of people skip, but it’s super important. Outdated drivers can cause all sorts of problems with VR, from performance issues to the headset not even working at all. Here’s what you need to do:
- Update your graphics drivers. Go to the NVIDIA or AMD website and download the latest drivers for your graphics card. Make sure you choose the right ones for your card!
- Update your USB port drivers. Sometimes, outdated USB drivers can cause issues with the headset connecting properly. Check your motherboard manufacturer’s website for the latest drivers.
- Make sure your operating system is up to date. Install any pending Windows updates. These updates often include important bug fixes and performance improvements that can help with VR.
Taking the time to do these things will save you a lot of headaches down the road. Trust me, I’ve been there!
Initial Setup Process for Oculus VR

Getting your Oculus VR setup can seem like a big task at first, but it’s really not that bad. The whole process is pretty straightforward if you just take it one step at a time. I remember being intimidated when I first got mine, but I was exploring virtual worlds in no time. Let’s break it down.
Installing the Oculus Software
First things first, you gotta get the Oculus software on your PC. Head over to the official Oculus website and download the app. It’s a pretty big file, so make sure you have a decent internet connection. While you’re waiting, double-check that your computer meets the minimum requirements for running VR. Once it’s downloaded, run the installer and follow the instructions. The software will check if your system is up to snuff.
How Do I Pair the Oculus Rift Controllers With My Headset?
Pairing the controllers is usually pretty simple. The Oculus software should walk you through it during the initial setup. Basically, you’ll need to put the controllers into pairing mode, which usually involves holding down a button or two until a light starts flashing. The software will then detect the controllers and connect them to your headset. If you’re having trouble, make sure the controllers have fresh batteries and that they’re within range of the headset. Sometimes, interference from other devices can mess things up, so try moving away from any potential sources of interference.
Connecting Your Hardware
Now for the fun part: plugging everything in. Connect the headset to your computer using the USB and HDMI cables. Make sure you’re using the right ports – the USB cable should go into a USB 3.0 port (usually blue), and the HDMI cable should go into your graphics card. The Oculus software should automatically detect the headset. If it doesn’t, double-check that all the cables are securely connected and that your graphics drivers are up to date. Place the sensors in your play area. For the best tracking, position them a few feet apart and a few feet off the ground. The software will guide you through the sensor setup and boundary configuration.
Optimizing Your Oculus VR Experience
Alright, so you’ve got your Oculus Rift (or Quest, or whatever) all set up. Now, how do you make sure it actually runs well? It’s not always plug-and-play, unfortunately. Here’s what I’ve learned about getting the best performance.
Optimizing GPU Settings
Your graphics card is doing the heavy lifting here, so let’s make sure it’s ready. First, make sure your drivers are up to date. Seriously, do it now. Nvidia and AMD release new drivers all the time, and they often include VR-specific optimizations.
Then, dive into your GPU control panel (Nvidia Control Panel or AMD Radeon Settings). Look for settings like:
- Image Sharpening: A little can help, but too much can kill performance.
- Texture Filtering: Set this to "High Performance" if you’re struggling.
- Anti-aliasing: MSAA is a performance hog in VR. Try FXAA or just turn it off.
Managing Power Options
This one’s easy to overlook. Make sure your PC is set to "High Performance" mode. On Windows, you can find this in the Power Options control panel. You want your CPU and GPU running at full speed. Also, if you’re on a laptop, make sure it’s plugged in! You’d be surprised how much performance you lose running on battery. Speaking of laptops, you can optimize your gaming laptop for VR by ensuring it meets the minimum specs.
Closing Unnecessary Processes and Programs
Seriously, close everything you don’t need. Chrome with 20 tabs open? Gone. Spotify? Gone. That random program you haven’t used in months? Uninstall it! The more resources your PC has available, the better your VR experience will be. It’s like decluttering your desk – a clean system runs smoother. Also, consider optimizing Discord usage by disabling hardware acceleration. This can free up some resources, especially if you’re running into performance issues. You can also optimize your VR applications by reducing polygon count in 3D models.
Advanced Performance Tuning for Oculus VR
Utilizing Windows Game Mode
Windows Game Mode is designed to optimize your system for gaming. It prioritizes game processes and reduces background activity, which can lead to smoother VR performance. To enable it, just search for ‘Game Mode’ in your Windows settings and turn it on. It’s a simple tweak that can sometimes make a noticeable difference, especially if you have a lot of background apps running.
Maximizing Game Focus
Before jumping into VR, make sure your game window has focus. This might sound obvious, but it’s easy to accidentally click outside the game window, which can cause performance dips. Also, close any unnecessary applications running in the background. The fewer distractions your system has, the better it can dedicate resources to your VR experience. It’s like telling your computer, "Hey, this is the only thing that matters right now!"
Performance Enhancement With Overclocking
Overclocking can squeeze extra performance out of your CPU and GPU, but it’s not without risk. It involves pushing your hardware beyond its rated speeds, which can lead to instability or even damage if not done carefully. If you’re considering overclocking, do your research and proceed with caution. There are plenty of guides online, but here’s a quick overview:
- Research: Find out the safe limits for your specific hardware.
- Monitoring: Use monitoring software to keep an eye on temperatures.
- Incremental Changes: Increase clock speeds gradually and test for stability.
Overclocking can be a good way to boost performance, but it’s important to understand the risks involved. If you’re not comfortable with the process, it’s best to avoid it. If you are using Apple Vision Pro, you may not need to overclock.
Developing and Optimizing VR Applications
Integrating Oculus With Unity
So, you want to make your own VR game or experience? Cool! A lot of people use Unity, and it’s a solid choice. Getting Oculus to play nice with Unity is pretty straightforward these days. You’ll need to grab the Oculus Integration package from the Unity Asset Store. Once you’ve got that imported, you can start dragging and dropping prefabs into your scene to get basic VR functionality up and running. Don’t forget to configure your project settings for VR – things like setting the target platform and enabling VR support are key. It’s also worth checking out the Oculus developer documentation; they have tons of examples and tutorials to help you get started. I remember when I first tried this, I spent hours just trying to get the camera to work right. Good times!
Optimizing Applications for VR
VR is demanding. Like, really demanding. You’re rendering two images at a high resolution and frame rate, so performance is everything. Here’s the deal:
- Reduce, reduce, reduce: Polygon count in your 3D models. Use lower-resolution textures where you can get away with it. Every little bit helps.
- Occlusion culling is your friend: This prevents the engine from rendering objects that aren’t visible to the player. It can make a huge difference, especially in complex scenes.
- Level of Detail (LOD) groups: Use different versions of your models depending on how far away they are from the camera. Distant objects can be much simpler without the player noticing.
- Bake your lighting: Real-time lighting is expensive. Bake as much of it as you can to reduce the load on the GPU. This is especially important for static objects.
- Optimize your code: Poorly written code can kill your frame rate. Profile your application and look for bottlenecks. Avoid unnecessary calculations in your update loops.
It’s a constant balancing act between visual quality and performance, but it’s worth it to optimize your VR applications and avoid making people sick.
Choosing the Right Mode for Oculus Headsets
Okay, so Oculus headsets have a couple of different modes you can use, and picking the right one can actually impact performance. There’s the standard Oculus mode, and then there’s something called Open Composite. Basically, Open Composite lets you bypass the Oculus runtime and use the SteamVR runtime instead. Some people find that this can improve performance, especially if they’re already using SteamVR for other games. It’s worth experimenting with both to see which one works best for your particular application and hardware. Just remember to restart your game after switching modes to make sure the changes take effect. Also, make sure you have the latest drivers installed for your graphics card; that can also make a big difference. I’ve found that sometimes the
Wrapping Things Up
So, there you have it. Getting your Oculus VR setup just right really makes a difference. You can get by with the basic stuff, sure, but for games and apps that really push your system, you’ll want to aim for those recommended specs. Things like a good graphics card and enough RAM are super important. Taking the time to check your computer’s parts and making sure everything is up to date will save you a lot of headaches. It’s all about making sure your VR experience is smooth and fun, not choppy and frustrating. Happy gaming!
Frequently Asked Questions
Is a high-performance PC necessary to use Oculus Rift?
While a super-powerful computer isn’t absolutely required, having one makes your VR experience much better. If your computer just barely meets the minimum needs, some games might not run smoothly. For the best experience, a computer with a good graphics card like an NVIDIA GTX 1070 or AMD Radeon RX 590 (or better) is suggested. This helps everything run without choppiness.
How do I pair the Oculus Rift controllers with my headset?
To get your Oculus Touch controllers ready, first put fresh AA batteries into them. The battery spot is under the magnetic cover on the handle. When you’re setting up your Oculus app, it will tell you when to connect your controllers. Just press the buttons it shows you to start the connection. If they don’t connect, try holding the Oculus button and the Y button on the left controller, or the Oculus button and the B button on the right controller. Keep holding until the light flashes and then stays on.
What are the recommended hardware specifications for optimal performance?
For the best VR experience, you should aim for these computer parts: a CPU like an Intel Core i5 (3GHz or faster) or an AMD Ryzen 5 or better; 16GB to 32GB of RAM; a graphics card like an NVIDIA GeForce GTX 1070 / RTX 2060 or an AMD Radeon RX 5700 or better; and a solid-state drive (SSD) for faster loading. You’ll also need several USB 3.0 ports. Games that look really good or flight simulators will run much better with these stronger parts. Your graphics card is super important for VR, so if things are slow, that’s often the first thing to upgrade.
Which operating systems are compatible with Oculus VR?
To use Oculus Rift, your computer needs to be running Windows 10 or a newer version. Older Windows versions like 7 and 8.1 don’t work anymore. Make sure your Windows is the 64-bit version, as the 32-bit version can’t handle the memory VR needs. Windows 11 also works, but some people might need to update their computer’s drivers after upgrading to it.
How do I install the Oculus software?
Before you connect your Oculus Rift headset, you need to download and install the Oculus software on your computer. Go to the official Oculus website and click the “Download” button for the Oculus PC app. The installer is about 5GB, so make sure you have enough space and a good internet connection. Once it’s downloaded, run the installer and follow the instructions on your screen. The software will automatically check if your computer is strong enough for VR and help you set things up.
How can I optimize my VR applications for better performance?
To make your VR apps run their best, especially for Oculus Rift, they need to keep a speed of at least 90 frames per second. This prevents you from feeling sick and makes the experience smooth. To improve your VR apps, you can try things like making sure your computer’s graphics settings are optimized, closing other programs you don’t need, and using Windows Game Mode. Also, for game creators, using tools like Unity and making sure your app’s graphics are efficient can greatly help performance.

