Building your own PC can seem like a big task, right? Like, where do you even start? It’s not as scary as it looks, though. Think of it like putting together some fancy Lego. You pick the pieces you want, and then you snap them together to make something awesome. This guide is here to help you figure out which pieces you need and how to put them together so you end up with a computer that’s just right for you, whether you’re playing games or just browsing the web. It’s all about making your own perfect machine.
Key Takeaways
- Figure out what you want your PC to do first. This helps you pick the right parts.
- Make sure all the parts you pick actually work together. It’s like making sure your shoes match your outfit.
- Don’t forget about cooling! Keeping your PC from getting too hot is super important for it to run well.
- When you put it all together, take your time and be neat with the wires. It makes a difference.
- After it’s built, test it out and maybe add some cool lights to make it yours.
Understanding Your Custom PC Build Needs
Before you even think about picking out parts, you really need to figure out what you want this computer to do. It sounds obvious, but it’s the most important step. Are you planning on playing the latest games at super high settings? Or maybe you’re a video editor who needs to render big files quickly? Perhaps you just need something reliable for browsing the web and doing some office work. Knowing your primary use case will guide every single component choice you make.
Defining Your Computing Goals
Think about the specific tasks you’ll be performing. For gaming, you’ll want a strong graphics card and a fast processor. For video editing or 3D modeling, you might need more RAM and a CPU with lots of cores. Even for general use, a speedy solid-state drive makes a huge difference.
Here’s a quick breakdown:
- Gaming: Focus on GPU, CPU, and fast RAM.
- Content Creation (Video/Photo Editing, 3D): Prioritize CPU cores, RAM capacity, and fast storage.
- General Use/Office Work: A balanced system with an SSD is usually sufficient.
- Streaming: A good CPU and potentially a secondary capture card are important.
Researching Component Compatibility
This is where things can get a little tricky, but it’s super important. Not all parts play nicely together. For example, your CPU needs to fit into a specific type of motherboard socket. RAM also has to be compatible with the motherboard. It’s like trying to fit square pegs into round holes if you don’t check. You can find tons of resources online that help you check compatibility, like PCPartPicker, which is a lifesaver for avoiding build headaches.
Setting Your Budget for a PC Builder Project
Budget is king, right? You can spend a little or a lot, and the performance will change accordingly. It’s good to set a realistic budget early on. Decide how much you’re willing to spend overall, and then try to allocate that money across the different components. You might need to spend more on the graphics card if you’re a gamer, or more on the processor if you do a lot of heavy lifting with software. Don’t forget to factor in the cost of an operating system, monitor, keyboard, and mouse if you don’t already have them.
Selecting the Core Components for Your PC
Choosing the Right Processor (CPU)
The CPU, or Central Processing Unit, is basically the brain of your computer. It handles all the calculations and instructions. When picking one, you’ll see numbers like core count and clock speed. More cores generally mean better multitasking, while higher clock speeds help with tasks that need quick processing, like gaming. AMD and Intel are the main players here, and each has strengths. AMD’s Ryzen chips often do well with many tasks at once, good for video editing or streaming. Intel’s Core processors can be really fast for single tasks, which is great for games that rely on that.
Motherboard Selection: The Build’s Foundation
Think of the motherboard as the central nervous system. Everything plugs into it. The most important thing is making sure it’s compatible with your chosen CPU. Motherboards come in different sizes, like ATX, Micro-ATX, and Mini-ITX, which affects how many other cards or drives you can install. Also, check the number of RAM slots, USB ports, and any special features like built-in Wi-Fi or overclocking support. It’s the backbone, so pick wisely.
Graphics Processing Unit (GPU) Power
If you plan on gaming or doing any kind of visual work like video editing or 3D modeling, the GPU, or graphics card, is probably the most important component. This is what actually creates the images you see on your screen. Nvidia and AMD are the two big companies that make GPUs. Higher-end cards will let you play games at higher resolutions and with more detailed graphics, while budget cards are fine for less demanding games or general use. Your GPU choice will have the biggest impact on gaming performance.
Memory (RAM) and Storage Solutions
RAM, or Random Access Memory, is like your computer’s short-term memory. It holds data that your programs are actively using. For most people, 16GB of RAM is a good starting point for smooth multitasking and gaming. If you do a lot of heavy lifting, like video editing or running virtual machines, 32GB or more might be better. Storage is where your files and operating system live. Solid State Drives (SSDs) are much faster than traditional Hard Disk Drives (HDDs), meaning your computer boots up quicker and programs load faster. Many people use a smaller, fast SSD for the operating system and frequently used programs, and a larger, cheaper HDD for storing lots of files like movies or photos.
Essential Considerations for Your PC Build
So, you’ve picked out your CPU, motherboard, and graphics card. Awesome! But before you start screwing things together, there are a few other bits that really matter for making sure your new PC runs smoothly and doesn’t turn into a tiny, hot paperweight. These are the things that often get overlooked, but trust me, they can make or break your build.
Effective Cooling Strategies for Optimal Performance
Keeping your components cool is super important. When parts get too hot, they can slow down or even get damaged. You’ve got a couple of main ways to go here: air cooling and liquid cooling. Air coolers use fans and heatsinks to move heat away from your CPU. They’re usually simpler and cheaper. Liquid cooling, on the other hand, uses a fluid to carry heat away, which can be more effective, especially for high-end parts, but it’s also more complex and can cost more. No matter what you choose, you need to make sure your case has good airflow. This means having fans positioned correctly to pull cool air in and push hot air out. Think of it like giving your PC a constant supply of fresh air.
- Air Cooling: Generally simpler, often more affordable, and reliable. Good for most builds.
- Liquid Cooling (AIOs): Can offer better thermal performance, especially for overclocking or hot CPUs. More complex installation.
- Case Fans: Crucial for overall airflow. Aim for a balanced intake and exhaust setup.
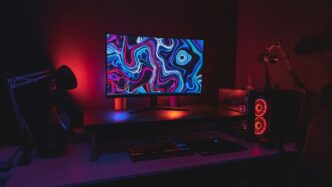
Selecting the Ideal PC Case
The case is basically the house for all your expensive parts. It’s not just about looks, though that’s a big part of it! You need to think about size – will all your components actually fit? Bigger cases usually mean more room to work and better airflow. Also, consider how easy it is to build in. Some cases have clever features like tool-less drive bays or good cable management options that make the whole process much less frustrating. And of course, there’s the aesthetic. Do you want something sleek and understated, or a case with tempered glass to show off your shiny new hardware? Make sure the case you pick supports your cooling choice and has enough space for any future upgrades you might dream up. Finding a good case can really make the building process smoother and the final result look great. Check out different case styles to get an idea of what’s out there.
Power Supply Unit (PSU) Requirements
This is the thing that actually gives your PC power. It’s really important not to skimp here. You need a PSU that can provide enough wattage for all your components, plus a little extra for headroom. If your PSU is too weak, your PC might not boot, or it could shut down unexpectedly under load. It’s also worth looking at the efficiency rating – things like 80+ Bronze, Gold, or Platinum. Higher ratings mean the PSU wastes less electricity as heat, which is good for your power bill and the environment. Make sure the PSU you choose has all the right connectors for your motherboard, graphics card, and any other devices you plan to use. Getting a reliable PSU from a reputable brand is one of the smartest moves you can make for a stable build.
| Component Type | Recommended Wattage Range |
|---|---|
| Basic Office PC | 300W – 450W |
| Mid-Range Gaming PC | 550W – 750W |
| High-End Gaming/Workstation | 750W – 1000W+ |
Assembling Your Dream Machine
Alright, so you’ve picked out all your parts, done your research, and now it’s time for the fun part: putting it all together. It might seem a little intimidating at first, like trying to assemble IKEA furniture without the instructions, but honestly, it’s pretty straightforward if you take your time. The key is to stay organized and not rush anything.
Preparing Your Workspace for Assembly
First things first, you need a good spot to work. Find a clean, well-lit area, preferably a large table or desk. Static electricity is the enemy of PC components, so it’s a good idea to ground yourself regularly. You can do this by touching a metal object, like the unpainted part of your PC case, before you start handling any parts. Keep your components in their anti-static bags until you’re ready to install them. Also, make sure you have all your tools handy – usually, just a Phillips head screwdriver is all you really need.
Step-by-Step Component Installation
Here’s a general order that usually works best:
- Motherboard Prep: Lay your motherboard on its anti-static bag or box. Install the CPU, making sure the little triangle on the CPU lines up with the triangle on the socket. Then, install your RAM sticks into the correct slots – check your motherboard manual for which ones to use if you’re not filling all of them. Finally, install any M.2 SSDs if you have them.
- Case Prep: Get your case ready. Install the motherboard standoffs if they aren’t pre-installed. Then, install your power supply unit (PSU).
- Motherboard into Case: Carefully place the motherboard into the case, lining up the screw holes with the standoffs. Screw it in gently.
- Graphics Card: Install your graphics card into the top-most PCIe slot. It usually clicks into place.
- Storage Drives: Mount any 2.5-inch or 3.5-inch SSDs or HDDs into their respective bays.
- Connect Everything: This is where it gets a bit more involved. Connect the power cables from the PSU to the motherboard, CPU, GPU, and storage drives. Then, connect the smaller front panel connectors from the case (power button, USB ports, audio) to the motherboard. This part can be tricky, so refer to your motherboard manual closely.
Mastering Cable Management Techniques
Cable management isn’t just about making your PC look pretty, though that’s a nice bonus. Good cable management actually helps with airflow, which means better cooling for your components. Most modern PC cases have cutouts and tie-down points specifically for this purpose. Try to route cables behind the motherboard tray and use zip ties or Velcro straps to keep them bundled neatly. It takes a bit of patience, but the result is worth it. Don’t be afraid to spend some extra time here; it can make a big difference. If you’re looking for some games to play on your new rig, check out some titles that don’t need a super powerful machine, like Hearthstone.
Once everything is connected and tidied up, you’re ready for the moment of truth: the first boot!
Post-Build Optimization and Personalization
So, you’ve got all your shiny new parts together, and the moment of truth has arrived – powering it on for the first time! It’s a pretty big deal, right? After the initial boot-up, which hopefully goes smoothly, you’ll want to get into the BIOS. This is where you check if all your components are recognized and set up your boot order. Think of it as the PC’s initial check-up.
Once the operating system is installed, the real fun begins with testing and benchmarking. You want to make sure everything is running as it should, and maybe even a little better. Running some stress tests can show you how your system handles heavy loads, and benchmarking tools give you a score to compare against others. It’s a good way to see if your cooling is doing its job or if you’ve got a bottleneck somewhere.
Here’s a quick look at what to test:
- CPU Stability: Run a CPU stress test for at least an hour.
- GPU Performance: Test with a few demanding games or graphics benchmarks.
- RAM Integrity: Use a memory diagnostic tool to check for errors.
- Storage Speed: Benchmark your SSD or HDD to confirm expected read/write speeds.
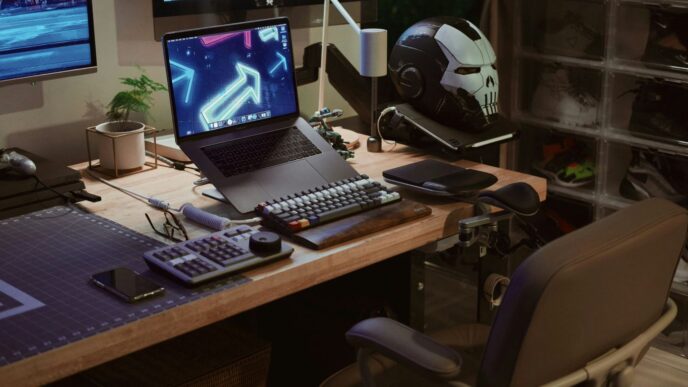
Now, for the part that really makes it your PC: personalization. This is where you can really let your style shine. Maybe you’ve got some RGB lighting components, and now’s the time to play with colors and effects. You can set up custom fan curves in the BIOS or software to balance noise and cooling. Making your PC look and feel exactly how you want is the final, satisfying step. It’s not just about performance; it’s about creating a machine that you’re proud of. You might even want to look into custom cable sleeving if you didn’t do it during the build, or perhaps add some decorative elements to the case. For those who like to tweak, exploring software optimizations, like setting up custom power plans or tweaking game settings, can further tailor the experience. It’s all about making this custom PC truly yours, reflecting your personality and needs, much like how advancements in laptop design focus on user experience [dde1].
Troubleshooting Common PC Builder Issues
So, you’ve put all your shiny new parts together, hit the power button, and… nothing. Or maybe it boots, but then it just crashes. Don’t panic! This is pretty normal when you’re building a PC for the first time, or even the tenth. It’s all part of the process, really. Think of it like assembling IKEA furniture; sometimes a piece is upside down, or you missed a screw.
Diagnosing Boot Failures
When your PC refuses to even show the BIOS screen, it’s usually a power or connection issue. First, double-check all the power cables. Are they fully seated on the motherboard, GPU, and power supply? Sometimes a cable just needs a firm push. Also, make sure your CPU power cable is plugged in – that’s a common oversight. Another culprit could be the RAM. Try reseating your memory modules, or even booting with just one stick to see if that makes a difference. If you’re still stuck, it might be worth checking if your motherboard’s BIOS needs an update for your specific CPU. You can often find out if your motherboard supports your CPU out of the box by checking the manufacturer’s website. A faulty component, like a dead stick of RAM or a bad motherboard, is also a possibility, though less common.
Resolving Hardware Conflicts
Hardware conflicts usually pop up after the initial boot, often when you’re installing drivers or new peripherals. You might get strange error messages or devices that don’t work correctly. The first step is to check Device Manager in Windows. It’ll often show devices with yellow exclamation marks, indicating a problem. Uninstalling the problematic driver and reinstalling the latest version from the manufacturer’s website is usually the fix. Sometimes, two devices might try to use the same system resources, though this is rarer with modern plug-and-play hardware. If you’ve recently added a new component, try removing it temporarily to see if the issue resolves. This helps isolate the problem to that specific piece of hardware or its driver.
Addressing Performance Bottlenecks
Once your PC is running smoothly, you might notice it’s not as fast as you expected, or it struggles with certain tasks. This is often a performance bottleneck, meaning one component is holding back the others. For gaming, a common bottleneck is an underpowered CPU paired with a powerful GPU, or vice-versa. You can monitor your component usage while running demanding applications using tools like Task Manager or more specialized software. If your CPU usage is consistently at 100% while your GPU usage is low, your CPU is likely the bottleneck. Conversely, if your GPU is maxed out and your CPU isn’t, the GPU might be the limiting factor. Upgrading the slower component is the usual solution. Sometimes, though, simply optimizing your software or ensuring your cooling solutions are adequate can make a surprising difference.
Maintaining and Upgrading Your Custom PC
So, you’ve put together your dream machine. Awesome! But the journey doesn’t end at the first boot-up. To keep that beast running smoothly and to make sure it doesn’t feel like a dinosaur in a year or two, you’ve got to think about upkeep and future improvements. It’s not rocket science, but a little attention goes a long way.
Routine PC Maintenance Practices
Think of PC maintenance like changing the oil in your car. You don’t have to do it every week, but skipping it entirely is a bad idea. Dust is the enemy here. It gets into fans, heatsinks, and generally makes things run hotter than they should. A can of compressed air and a soft brush are your best friends.
- Dusting: Periodically (every few months, maybe more if you have pets) open up your case and give the fans, heatsinks, and general interior a good blast of compressed air. Be gentle, though; you don’t want to spin fans too fast or knock anything loose.
- Cable Check: While you’re in there, give the cables a quick look. Make sure nothing has vibrated loose, especially the power connectors. A loose connection can cause all sorts of weird issues.
- Software Cleanup: Don’t forget the inside of the operating system. Uninstall programs you don’t use anymore. Run disk cleanup tools. It’s like tidying up your digital desk.
Planning for Future Hardware Upgrades
Technology moves fast, and what’s cutting-edge today might be mid-range tomorrow. Planning for upgrades means your PC can stay relevant without you needing to buy a whole new system. Building your own PC offers a deep understanding of how each component functions and allows for complete customization to create a system that perfectly suits your needs. When you’re picking parts initially, think about what might be a bottleneck down the line.
- CPU: If you went with a mid-range CPU, maybe a higher-end one from the same generation will be a drop-in upgrade later. Check motherboard compatibility first, though!
- RAM: It’s usually pretty easy to add more RAM if your motherboard has empty slots. Just make sure you buy sticks that match the speed and type of what you already have.
- Storage: Running out of space? Adding another SSD or a larger HDD is typically straightforward. Just make sure you have the necessary power and data connectors available.
Keeping Software and Drivers Updated
This is probably the easiest and most impactful thing you can do. Outdated drivers can cause performance issues, instability, and even security vulnerabilities. Think of drivers as the translators between your hardware and your operating system.
- Graphics Drivers: Always keep your GPU drivers up to date. NVIDIA and AMD release new drivers frequently, often with performance improvements for new games. You can usually get these directly from their websites.
- Chipset Drivers: Your motherboard’s chipset drivers are also important for system stability and performance. Check your motherboard manufacturer’s support page for the latest versions.
- Windows Updates: Don’t ignore Windows updates. They often include security patches and performance tweaks that benefit your entire system.
Staying on top of these things will help your custom build perform its best for years to come.
The Journey’s End, and a New Beginning
So, you’ve done it. You’ve gone from a pile of parts to a fully functional, custom-built PC. It might have seemed like a lot at first, maybe even a little intimidating, but you stuck with it. That’s the cool part about building your own computer – it’s a learning process, and every step, even the tricky ones, teaches you something. Now you’ve got a machine that’s exactly what you wanted, built with your own hands. It’s not just a computer; it’s your creation. Go ahead, fire it up, and enjoy the fruits of your labor. Plus, you’ve got the skills now for the next build, or maybe just to keep this one running perfectly.
Frequently Asked Questions
What’s the main reason to build my own PC instead of buying one?
Building your own PC lets you pick exactly what parts you want. This means you can get a computer that’s perfect for what you do, whether it’s gaming, schoolwork, or making videos. Plus, you can often get more power for your money and learn a lot about how computers work!
How do I know if the parts I pick will work together?
This is super important! You need to make sure your parts are compatible. For example, your CPU needs to fit the socket on your motherboard. Websites often have tools that check if parts will work together. It’s like making sure all the LEGO bricks you have will connect properly.
What’s the most important part for gaming?
For gaming, the graphics card (GPU) is usually the most important part. It’s what makes the game look good and run smoothly. The processor (CPU) is also very important, as it helps the GPU do its job. Getting a good balance between the two is key.
Do I really need a fancy cooling system?
Keeping your computer cool is essential so it doesn’t overheat and slow down or break. Most CPUs come with a basic cooler, which is fine for normal use. But if you plan on gaming a lot or doing demanding tasks, a better cooler, either air or liquid, will help your PC run better and last longer.
What if my new PC doesn’t turn on?
Don’t panic! This happens sometimes. The first thing to check is if all the power cables are plugged in correctly, both to the parts and to the power supply. Make sure the power switch on the back of the power supply is flipped on. If it still doesn’t work, you might need to check if a component is seated properly or if a part is faulty.
How often should I clean my PC?
It’s a good idea to clean the dust out of your PC every few months. Dust can block airflow and make your computer run hotter. You can use compressed air to blow out the dust from fans and components. Keeping your PC clean helps it perform better and last longer.