So, you’re trying to figure out if you should use 3D metal printing or CNC machining for your project, huh? It’s a common question, and honestly, it’s not always a clear-cut answer. Both methods are pretty awesome for making custom parts, whether you need a quick prototype or a whole batch of something. But they work in totally different ways, and what’s best really depends on what you’re trying to make, what materials you’re using, and how much you want to spend. Let’s break down the 3D metal printing vs CNC debate to help you make the right choice.
Key Takeaways
- CNC machining cuts material away from a solid block, while 3D printing builds parts layer by layer.
- CNC machining is often better for simpler shapes and when you need really tight tolerances and a smooth finish right off the machine.
- 3D metal printing excels at creating complex geometries, internal features, and parts with intricate designs that would be difficult or impossible with CNC.
- The choice between 3D metal printing vs CNC can also depend heavily on material availability, cost-effectiveness for specific volumes, and the required mechanical properties of the final part.
- Both methods start with a 3D CAD model, but they use different software (CAM for CNC, slicing software for 3D printing) to create the instructions for the machines.
1. CNC Machines
CNC machines are pretty amazing tools that have been around for a while, and they work by taking away material to make things. Think of it like a super precise sculptor, but instead of chisels, it uses computer-controlled cutting tools. This whole process is called subtractive manufacturing. You start with a solid block of material – could be metal, plastic, you name it – and the machine carves out the shape you need. It’s all about precision and getting those exact dimensions just right.
There are a couple of main ways CNC machines do their thing:
- Milling: This is where a spinning cutting tool moves into a stationary piece of material. The tool and the material can move in several directions, kind of like how a drill press works but way more advanced.
- Turning: Here, the material spins around, and a cutting tool moves into it. Lathes are a classic example of turning machines.
Because they start with a solid block and use cutting tools, CNC machines are fantastic for making parts that need to be really strong and have very smooth surfaces. They’re super common in industries like aerospace and automotive where accuracy is king. If you’re looking to get into this, understanding the basics of CNC machining is a good first step. It’s a reliable way to get high-quality parts, especially when you need tight tolerances that 3D printing might struggle with on its own.
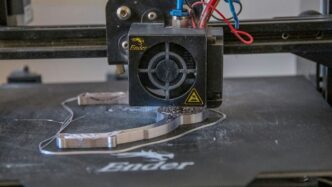
2. DMLS Printers
Direct Metal Laser Sintering, or DMLS, is a mouthful, but it’s a pretty neat way to make metal parts. Think of it like a super-precise 3D printer that uses a laser to melt and fuse fine metal powder, layer by tiny layer. This process is fantastic for creating intricate designs that would be really tough, if not impossible, to make with traditional methods like CNC machining.
It’s not just about making fancy shapes, though. DMLS parts can be just as strong, if not stronger, than their CNC-milled counterparts, especially when you’re dealing with complex geometries. Because it builds parts up from powder, it uses material pretty efficiently, which can sometimes make it more cost-effective than subtractive methods, especially for certain designs. You get a lot of design freedom with this technology, allowing for things like internal channels or lattice structures that you just can’t achieve otherwise. It’s a big step forward in additive manufacturing.
Here’s a quick rundown of what makes DMLS stand out:
- Complex Geometries: DMLS excels at creating parts with internal features, undercuts, and intricate details that are difficult or impossible with CNC.
- Material Efficiency: It uses only the material needed for the part, minimizing waste compared to subtractive processes.
- Part Consolidation: You can often combine multiple components into a single, complex DMLS part, reducing assembly time and potential failure points.
- High Strength: DMLS parts can achieve mechanical properties comparable to or exceeding those made by traditional methods, depending on the material and post-processing.
While it’s a powerful tool, it’s not always the best fit for every job. For simpler parts or when you need a massive quantity of identical items, CNC might still be the way to go. But for those really challenging designs where precision and complexity are key, DMLS is definitely worth a look.
3. Titanium Alloys
Titanium is a pretty amazing metal, known for being super strong yet surprisingly lightweight. It also doesn’t rust easily, which is a big plus for parts that need to last. When we talk about making things with titanium, both 3D printing and CNC machining have their place.
3D printing titanium is fantastic for creating complex shapes that would be really hard, if not impossible, to make with traditional methods. Think intricate internal structures or designs that minimize material use. This additive approach can significantly reduce waste, especially with expensive materials like titanium. Because it builds layer by layer, it can create geometries that CNC machining just can’t touch. This makes it a great option for prototypes or small batches of highly specialized parts. You can find more about the benefits of 3D printing for small batches of complex titanium parts here.
On the other hand, CNC machining titanium is still the go-to for parts that need extremely tight tolerances and a very smooth surface finish right off the bat. While 3D printing has gotten much better, CNC machining often still has the edge when it comes to absolute precision and repeatability, often within ±0.02 mm. This is important for applications where even tiny variations can cause problems. For high-volume production runs of simpler titanium components, CNC machining is usually more cost-effective. It’s a solid choice when you need a lot of identical, high-quality parts and don’t require the extreme geometric freedom that 3D printing offers. The choice really boils down to what you need the part to do and how many you need.
4. Aluminium Al-Si10Mg
When we talk about aluminum for 3D printing, Al-Si10Mg is a pretty common choice. It’s an alloy that mixes aluminum with silicon and magnesium, and it’s known for being strong and having good thermal properties. This makes it suitable for a bunch of different parts, especially those that might need to handle some heat or dissipate it well.
This alloy is a go-to for many applications because it balances cost and performance effectively. It’s often used for things like housings, brackets, and even some impeller designs where you need a lightweight yet sturdy material. Because it’s a powder-based material for 3D printing, you can create complex shapes that would be really difficult, if not impossible, to make with traditional subtractive methods like CNC machining. Think intricate internal channels or very thin walls.
Here’s a quick look at some of its characteristics:
- Strength: It offers good mechanical properties, making parts durable.
- Printability: It generally prints well with DMLS (Direct Metal Laser Sintering) technology.
- Post-processing: Parts can be heat-treated and machined after printing to achieve even better properties or tighter tolerances.
While CNC machining can also work with aluminum alloys, Al-Si10Mg in a 3D printed form allows for a design freedom that’s hard to beat. You can really explore optimal settings and material properties for robust parts that might not be feasible otherwise. It’s a great option when you need complex geometries and good performance without breaking the bank, offering a cost-effective alternative for many projects.
5. Stainless Steel 316L
Stainless Steel 316L is a popular choice for both 3D printing and CNC machining, but they definitely have different strengths when it comes to this material.
When it comes to cost-effectiveness for certain applications, CNC machining often has the edge with 316L. This is especially true if you’re looking at higher volumes. CNC machines start with a solid block of metal, and while they do remove material, the process can be more economical than the powder-based approach of metal 3D printing for larger batches. You can find more details on how CNC machining compares in specific scenarios.
However, 3D printing with 316L opens up a world of design possibilities that machining just can’t touch. Think intricate internal channels, complex lattice structures, or parts that are incredibly difficult to make with traditional subtractive methods. While the initial cost might sometimes be higher for 3D printing, the ability to create these complex geometries in a single piece can lead to significant advantages in terms of part consolidation and performance.
Here’s a quick look at some general points:
- Design Freedom: 3D printing excels at creating complex shapes that are impossible or very costly with CNC.
- Material Usage: While CNC can be efficient, 3D printing can sometimes use less raw material for very complex parts, reducing waste.
- Post-Processing: Both methods often require some post-processing. Machined parts might need deburring or surface treatments, while 3D printed parts often benefit from support removal, heat treatment, or surface finishing to achieve the desired look and feel.
- Surface Finish: As-printed 316L might have a slightly rougher, layered appearance compared to a finely machined surface. However, post-processing can significantly improve the surface quality of 3D printed parts.
Ultimately, the choice between 3D printing and CNC for 316L really boils down to your specific needs – complexity, volume, and desired surface finish all play a part. It’s worth exploring how these two methods integrate for advanced manufacturing solutions.
6. Inconel 718
When you need a metal that can handle some serious heat and stress, Inconel 718 is often the go-to choice. This superalloy is famous for its strength, especially at high temperatures, and its resistance to corrosion and oxidation. Think jet engines, gas turbines, and rocket motors – places where things get really hot and demanding.
3D printing Inconel 718 is definitely possible, but it’s not exactly a walk in the park. It’s a tough material to work with, both in traditional machining and in additive manufacturing. The powder used for 3D printing needs careful handling, and the printing process itself requires precise control to get the properties right. Because of its high melting point and tendency to warp, it can be more challenging to print compared to, say, aluminum.
Here’s a quick rundown of why Inconel 718 is special:
- High-Temperature Strength: It keeps its mechanical properties even when things get really hot, which is a big deal for aerospace and energy sectors.
- Corrosion Resistance: It holds up well against harsh environments and chemicals.
- Weldability: It can be welded, which is important for building complex assemblies.
While CNC machining is a well-established method for Inconel 718, 3D printing offers a way to create intricate geometries that would be impossible or extremely difficult to machine. Often, parts printed from Inconel 718 will still need some post-processing, like CNC machining, to achieve the final precise dimensions and surface finish required for critical applications. This combination allows for the best of both worlds: the design freedom of 3D printing and the accuracy of CNC machining.
7. Cobalt Chrome
Cobalt Chrome (CoCr) is a superalloy that’s pretty tough stuff, known for its high strength and resistance to wear and corrosion. This makes it a go-to material for some pretty demanding applications, especially in the medical field for implants and surgical tools, and also in the aerospace industry for turbine components.
When it comes to 3D printing, Cobalt Chrome is usually processed using Direct Metal Laser Sintering (DMLS). This method uses a laser to fuse fine metal powders layer by layer, allowing for complex geometries that would be a real headache to make with traditional methods. The ability to create intricate, patient-specific implants is a major win for DMLS Cobalt Chrome.
Here’s a quick look at why CoCr is chosen:
- Biocompatibility: It plays nicely with the human body, which is why it’s so popular for medical devices.
- Wear Resistance: It holds up really well against friction and abrasion, meaning parts last longer.
- Corrosion Resistance: It doesn’t easily degrade when exposed to harsh environments or bodily fluids.
- High Temperature Strength: It maintains its integrity even when things get really hot, important for jet engines.
While CNC machining can also work with Cobalt Chrome, it’s often more suited for simpler shapes or for finishing parts that were initially 3D printed. The material’s hardness can make it challenging and time-consuming to machine, sometimes leading to higher costs for complex parts compared to additive manufacturing. For intricate designs, 3D printing often takes the lead in material availability for this alloy.
8. 3D CAD Models
Before any manufacturing process kicks off, whether it’s a CNC machine or a 3D printer, you need a digital blueprint. This blueprint comes in the form of a 3D CAD (Computer-Aided Design) model. Think of it as the architect’s drawing for your part.
These models are incredibly detailed, capturing every curve, angle, and dimension. They’re not just pretty pictures; they contain all the geometric data needed to build the physical object. This means you can get a really good look at your design before you even think about making it. It’s super helpful for spotting potential issues early on.
The accuracy and completeness of your CAD model directly impact the final part. If the model has errors, the manufactured part will likely have them too.
Here’s a quick rundown of why they’re so important:
- Design Visualization: See your part from every angle, zoom in on details, and make sure it looks exactly how you want it.
- Error Detection: Catch design flaws or potential manufacturing problems before they become costly mistakes.
- Data for Machines: The CAD model is the source file that gets translated into instructions for the manufacturing equipment. Without it, the machines don’t know what to build.
- Collaboration: Share precise digital models with teams or clients for feedback and approval.
While CAD models are primarily for design, they can even be used for things like factory layout planning, though they aren’t typically built for that specific purpose [8287]. The core function, however, remains creating a precise digital representation of your intended product [1248].
9. G-Code Files
So, you’ve got your 3D CAD model all sorted out, and you’re ready to make something real. Whether you’re using a CNC machine or a 3D printer, there’s a common language these machines understand: G-code. Think of G-code as the step-by-step instructions that tell the machine exactly where to move, how fast to go, and what to do.
For CNC machines, G-code is pretty much the backbone of the whole operation. It’s generated by CAM (Computer-Aided Manufacturing) software after you’ve designed your part. This code dictates the precise movements of the cutting tools. The accuracy of your final part heavily relies on the quality and correctness of the G-code.
Here’s a simplified look at what G-code commands might involve:
- Movement Commands: Like
G01for linear movement orG02/G03for circular arcs, telling the tool where to go. - Spindle Control: Commands like
Sfor speed andM3/M4to turn the spindle on or off. - Tool Changes: Instructions (
TandM6) to swap out cutting tools. - Feed Rate:
Fcommands specify how fast the tool moves into the material.
While G-code is the standard for CNC, many 3D printing processes also use it, especially those based on powder bed fusion like DMLS. The slicing software used for 3D printing essentially converts the 3D model into layers and then generates G-code to control the laser or print head’s path for each layer. It’s a bit like translating a blueprint into a series of very specific directions. Understanding this code, or at least how it’s generated, helps in troubleshooting and optimizing the manufacturing process, whether you’re milling a part or printing one.
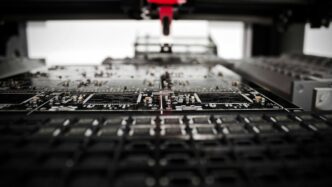
10. CAM Software
So, you’ve got your 3D CAD model all ready to go. What’s next for CNC machining? That’s where CAM software comes in. Think of it as the translator between your design and the machine itself. It takes that digital blueprint and figures out the exact path the cutting tools need to follow to carve out your part from a block of material. This software is absolutely key to making sure your part comes out exactly as you designed it.
CAM software does a lot more than just draw lines. It helps you:
- Choose the right cutting tools for the job.
- Set up the machining strategies, like how deep to cut or how fast to go.
- Simulate the whole process virtually to catch any potential problems before they happen on the machine.
- Generate the G-code, which is the actual set of instructions the CNC machine understands.
Without good CAM software, you’re basically flying blind. It’s the bridge that connects your digital design to the physical reality of a machined part. For many, Autodesk Fusion is a popular choice because it bundles CAD and CAM capabilities, streamlining the whole workflow. It’s pretty amazing how this software can take a complex design and break it down into simple, executable steps for the machine. It really is the brains behind the operation when it comes to CNC. It’s also worth noting that CAM software is what differentiates the CNC workflow from the slicing software used in 3D printing, even though both start with a CAD model.
Wrapping It Up
So, when it comes down to it, picking between 3D printing and CNC machining isn’t really about one being ‘better’ than the other. They’re just different tools for different jobs, you know? CNC is your go-to for super precise parts, especially when you need them made from solid blocks of metal or plastic and you’re making a bunch of them. But if you’ve got a really wild design, need something fast for a prototype, or want to cut down on material waste, 3D printing is probably your best bet. Think about what you’re making, how many you need, and what kind of finish and strength you’re after. Sometimes, the best answer might even be using both methods together. It’s all about matching the tech to your project’s specific needs.