So, you’ve got a Cybertruck. That’s pretty cool. Now, you’re probably thinking about how to make it even more *you*. Whether you want it to look different, perform better, or just be more useful, there are a ton of cybertruck mods out there. We’re going to look at some of the most popular ways people are changing up their trucks for 2025.
Key Takeaways
- You can change the look of your Cybertruck with wraps, ceramic coatings, or different finishes without repainting.
- Performance mods can include aero parts for better range and stability, plus custom wheels and tires for more grip.
- The truck bed can be upgraded with storage solutions, liners, and even on-board air systems for work or play.
- Lighting and safety can be improved with extra lights, window tints, and integrated security systems.
- Personal touches like custom emblems, carbon fiber bits, and color accents can really make your Cybertruck stand out.
Exterior Cybertruck Mods That Transform Your Truck
You don’t have to paint the Cybertruck to make it look new, tougher, or easier to live with. Between wraps, PPF, and coatings, you can change the vibe in a weekend and protect the stainless while you’re at it.
Factory Wrap Colors And Pro PPF Stacks
If you’re tired of fingerprints and micro-marring on the raw finish, film is your friend. Tesla’s own wrap program gives you color that fits the truck’s sharp geometry, while pro shops can layer films to boost protection.
- Wrap choices today: factory color wraps, color PPF (paint-protection film with pigment), or vinyl wrap topped with clear PPF.
- “Stacking” options: single-layer color PPF for simplicity, or vinyl color + clear PPF for the highest impact resistance and easier replacement of the top layer later.
- Coverage strategy: full-body for uniform wear, or a hybrid (front clip, rockers, bed edges) if you want to save money where it counts.
PPF is the one mod that both changes the look and seriously cuts down on scuffs and wash-induced haze.
Wrap and PPF quick comparisons:
| Option | Typical Thickness (mil) | Installed Cost (USD) | Lifespan (years) | Look | Notes |
|---|---|---|---|---|---|
| Factory color wrap | 3–5 | 3,000–6,000 | 3–5 | Gloss or satin | Clean OEM fit, limited palette |
| Color PPF (single layer) | 7–10 | 4,500–8,500 | 5–10 | Matte, satin, pearl | Strong chip resistance, fewer seams |
| Vinyl + clear PPF (stack) | 10–15 total | 6,000–10,000 | 5–10 | Any color/texture | Most durable; slightly heavier |
| Targeted PPF (front/rockers) | 7–10 | 1,200–2,500 | 5–10 | Matches base finish | Smart budget option |
Pro tips:
- Ask for edge wrapping where safe; leave sensors, cameras, and panel gaps clean.
- Add extra layers on door kick zones and bed edges that see abuse.
- Get a written film brand, thickness, warranty, and care sheet.
Ceramic Coatings For Stainless Steel Sheen
Coating the raw metal helps with fingerprints and water spots, but prep is everything. Stainless can streak if you rush. If you’re coating PPF or a wrap, curing is easier and durability tends to be longer.
- Prep basics: degrease, panel-wipe with a body-shop safe solvent, then apply in small sections. Avoid strong chloride cleaners on stainless; rinse off road salt.
- On raw metal: try a test patch low on the truck; some coatings darken tone slightly. If you don’t like the look, switch brands before doing the whole body.
- On films: ceramic adds slickness that helps bugs release and makes drying faster. “9H” hardness is mostly marketing; focus on hydrophobic performance and re-coat intervals.
Small quality touches can feel like a full refresh—think about how some brands tune cabins for concert hall acoustics. Same idea here: reduce grime sticking, make weekly washes quick, and the truck just feels nicer to use.
Care schedule:
- Light wash weekly; pH-neutral soap
- Decon wash every 3–4 months; top up spray sealant
- Re-coat every 18–36 months depending on climate and use
Matte, Satin, And Pearl Finishes Without Paint
You can change the finish without touching a spray gun. Matte and satin PPF mute reflections and hide minor swirls. Pearl films add a shimmer the stainless can’t do on its own.
What to pick:
- Matte PPF: flattens reflections, hides wash marks, “stealth” look
- Satin PPF: soft glow that still shows the truck’s edges
- Pearl color PPF: subtle color shift in sun, glossy or satin top
Selection and install game plan:
- Look at large samples outdoors; phone photos are misleading.
- Decide on gloss level first, color second—finish changes the whole mood.
- Confirm how the shop treats sharp Cybertruck edges and panel alignment.
- Ask for a test panel (small area inside the bed or rocker) before full wrap.
- Get post-install care rules in writing: first wash timing, safe soaps, no automatic brushes.
Good to know:
- Film is reversible; paint isn’t. Removing quality film with heat won’t harm panels.
- Matte/satin need soft towels and clean wash buckets to avoid polishing the sheen.
- If you off-road, keep spare film offcuts for quick patch repairs on leading edges.
Performance-Focused Cybertruck Mods For Real-World Gains
If you want upgrades you can feel every day—not just at cars & coffee—focus on drag, grip, and brake consistency. Small aero tweaks, smarter tires, and cooler brakes add up to noticeable range and steadier handling.
Aero Add-Ons That Help Range And Stability
The Cybertruck is already pretty slippery for a brick, but airflow around the nose, wheel wells, and bed edges still wastes energy. Think tidy, reversible changes first, then go bigger if you need more.
Quick wins most owners actually notice:
- Front air dam or low-profile splitter to cut underbody airflow at highway speeds
- Smooth wheel covers and narrow-profile mud flaps to reduce tire churn
- Bed seal kit and tailgate cap to calm the wake without ugly spoilers
- Ride-height tweaks (when loaded or via suspension settings) to reduce frontal area
Estimated effects (typical values at 65–75 mph):
| Aero mod | Approx. drag change | Highway range impact |
|---|---|---|
| Smooth wheel covers | −1% to −2% | +0.5% to +1.5% |
| Low front air dam | −2% to −3% | +1% to +2% |
| Bed/tailgate edge caps | −1% | +0.5% to +1% |
| Tight underbody panels | −2% | +1% to +2% |
| Narrow mud flaps | −0.5% | +0.2% to +0.5% |
Notes that save headaches:
- Keep sensors and tow hooks clear; test Autopilot/parking after any aero change
- Check fasteners after 100–200 miles; highway vibration will find weak clips
- If you hear new wind noise, something’s misaligned—fix it before it costs range
Wheel And Tire Packages Tuned For Grip
Rubber choice decides how the truck feels on turn-in, braking, and noise. It also sets how far you go on a charge. Bigger isn’t always better; weight and compound matter more than flexing a sidewall.
What actually works on a heavy EV truck:
- Stick with lighter wheels (flow-formed or forged) to cut unsprung mass; target similar or lower weight than stock
- Choose tires with lower rolling resistance if you do lots of highway, or a dual-duty all-terrain with mild tread if you split pavement and dirt
- Keep overall diameter close to stock to avoid speedo errors and range model quirks
- Set alignment with near-zero front toe for range, slight toe-in rear for stability
- Re-check pressures cold; many owners find 2–3 psi over door-jamb spec steadies steering with heavy loads
Real-world tradeoffs you can plan for:
- Upsizing one inch in wheel diameter (same tire OD) often costs ~1–3% range from mass and aero
- Aggressive all-terrain tread can cost ~5–10% range, but snow/mud grip shoots up
- Softer compounds stop shorter but wear sooner; keep an eye on outer shoulders
As driving tech pushes toward driverless cars, tire choice still decides how the truck sticks to the road in the messy bits—potholes, rain grooves, sudden stops.
Painted Calipers, Pads, And Cooling For Confidence
Braking on an EV is weird at first—regen does a lot, until the battery is full or hot, and then the friction system suddenly matters. You want predictable bite without fade, and hardware that shrugs off heat.
Do this, feel the difference:
- High-friction street pads rated for heavier vehicles; bed them in properly (5–8 medium stops, cool, then 3–4 hard stops)
- High-temp brake fluid (fresh DOT 4 LV or better) and a full bleed if you tow or hit mountain descents
- Stainless lines for a firmer pedal, especially if you road-trip loaded
- Simple airflow: rotor deflectors or small ducts aimed at the inner rotor face; avoid bulky caliper covers that trap heat
Painting calipers the right way:
- Clean and de-rust, mask seals/bleeders, and use true high-temp caliper paint
- Light coats, plenty of cure time; don’t rush and end up with sticky dust magnets
- If you’re off-road often, prefer a satin finish that hides chips and cleans easier
Safety and setup reminders:
- Torque lugs properly after any wheel/brake work, and re-check after 50–100 miles
- After lowering or wheel changes, recalibrate ADAS if required and verify steering centering
- On long downhill grades, shift to a lower speed early so regen and friction share the work without overheating
Bed And Utility Upgrades Built For Work And Weekends
Your bed should work like a weekday toolbox and a weekend basecamp, without making you wrestle with it every time.
Modular Storage, Tie-Downs, And Bed Slides
If you’ve ever opened the vault, tossed in gear, and hoped it wouldn’t slide around, you know the pain. Start with rails you can actually use: L-track or E-track along the bed walls and floor. Add adjustable rings, cleats, and cam-buckle straps so you’re not choking everything with two ratchet straps and a prayer. For small stuff—compressors, recovery kits, groceries (yep)—drop-in totes or drawer modules keep the chaos down.
What moved the needle on my truck was a mid-weight bed slide. Pull-out access saves your knees and your back, especially with coolers or toolboxes. Watch the payload math, though. Slides add weight and you may be hauling more than you think.
Quick picks:
- L-track/E-track with 1,000–2,000 lb rated rings for real tie-down points
- Adjustable dividers or milk-crate-style bins to stop roll-around
- Bed slide with a positive lock and 70–100% extension for easy reach
- Low-profile ramps that stash under the slide deck
Bed slide shorthand:
| Spec | Typical Range | Why it matters |
|---|---|---|
| Payload rating | 750–1,500 lb | Higher rating = less flex under coolers and tools |
| Extension | 70–100% | Full extension is great for deep vaults |
| Added weight | 120–220 lb | Impacts range and payload headroom |
| Deck material | Composite/Aluminum | Composite is quiet; aluminum shrugs off abuse |
Bed Liners, Ceramic Coats, And Cargo Protection
The Cybertruck’s bed can take a beating, but scuffs, rattles, and water pooling still add up. A thick rubber mat is the fastest win—better grip, less road boom, and you can yank it out to wash. If you want a cleaner look, consider a spray-on over the factory surface for extra bite on the walls and tailgate. For folks that haul bikes or coolers every weekend, PPF on high-wear zones (bed floor, tailgate cap) cuts down on scratches and is easier to clean after muddy trips.
Tech sneaks in here too. The same wave that pushed smartphone features into cars—those early auto tech trends—has spilled into bed gear with quick-release hardware, smart locks, and even sensor-friendly liners that don’t mess with proximity alerts.
Simple protection stack:
- Rubber bed mat for grip and noise cut
- PPF strips on tailgate lip, bed floor channels, and load points
- Tailgate seal kit to reduce dust swirl into the vault
- Foam blocks or wheel chocks for bikes so pedals don’t tattoo the sidewalls
Liner choices at a glance:
| Option | Grip | Noise | Cleanup | Removable | Cost |
|---|---|---|---|---|---|
| Rubber mat | High | Low | Easy | Yes | $100–$250 |
| Spray-on topcoat | Medium-High | Medium | Hose-off | No | $400–$900 |
| PPF sections | Medium | Low | Wipe | Yes | $150–$400 |
| Carpet-style rug | Medium | Very low | Vacuum | Yes | $200–$400 |
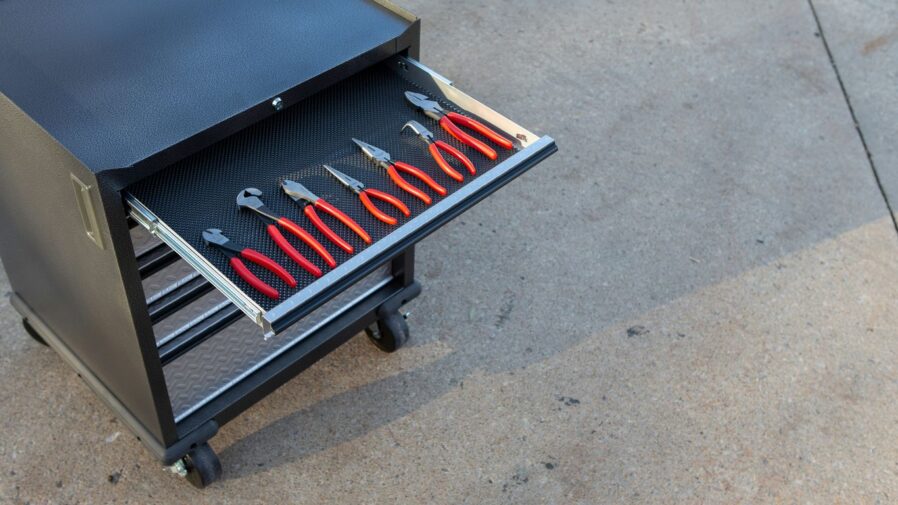
On-Board Air, Power Banks, And Trail Tools
Airing down for washboard roads and airing back up at pavement makes a real difference. You can mount a compact compressor in a side cubby with a quick-disconnect at the tailgate, or stash a cordless inflator in a bin and call it good. Pair it with a plug kit and a real gauge and you’re not stuck waiting on a tow for a small puncture.
For power, think about what you actually charge: phones, cameras, maybe a laptop and a fridge on long weekends. A small inverter handles tools in a pinch; a rugged power bank lives in the truck and gets used way more than you’d expect. I learned that the hard way after a dead headlamp on a cold trail.
Road-and-trail loadout:
- Cordless inflator plus a compact compressor for faster fills at home base
- Tire plug kit, valve cores/caps, four-way tool, and gloves
- Recovery strap (20,000–30,000 lb MBS), soft shackles, and folding shovel
- Flat pack first-aid kit and headlamp tucked in a side bin
Wiring basics for a permanent compressor:
- Size the wiring for the amp draw (short runs, thicker cable); 2) fused at the source; 3) weatherproof switch; 4) quick-connect coupler at the tailgate; 5) keep lines away from moving bed hardware.
Power planning cheat sheet:
- Compressors: 1.0–2.5 CFM at 0 PSI = faster fills; duty cycle over 30% is nicer for multiple tires
- Inverters: 300–1,000 W covers chargers and light tools; watch continuous vs surge
- Power banks: 20–40 Wh tops up phones; 250–500 Wh handles laptops and lights overnight
Set it up once, and the bed stops being a black hole for gear and starts being the part of the truck you brag about.
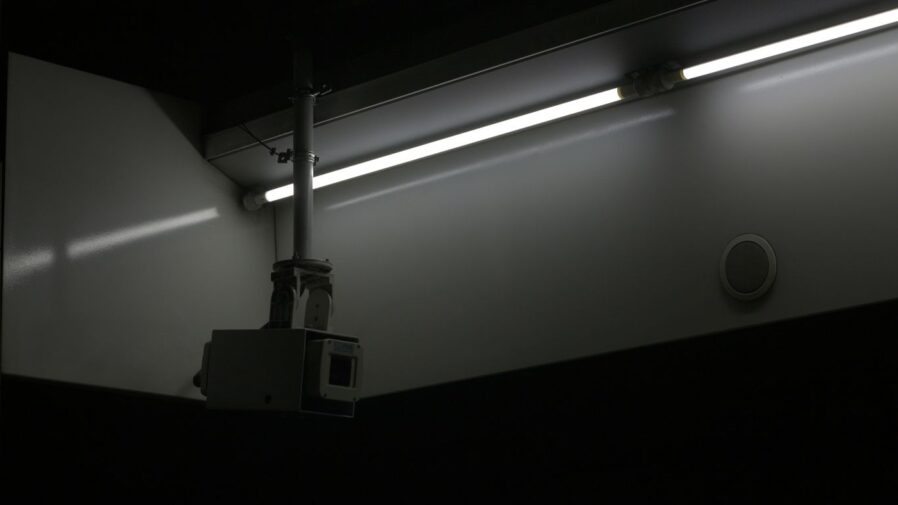
Lighting, Visibility, And Driver Safety Enhancements
Good lighting isn’t just for looks on a Cybertruck. It’s about seeing sooner, being seen sooner, and not getting hassled for glare or illegal mods. The trick is picking pieces that sit cleanly in the body lines and play nice with the truck’s 48V system.
Fog, Auxiliary, And Work Lights That Blend In
Factory lighting is solid, but weather and work don’t always cooperate. Low-mounted fog pods help in rain, snow, and dust. A slim behind-fascia light bar can add reach on rural roads (use it off-road or where legal). Bed and scene lights make loading at night a lot less annoying.
Quick picks that keep the look tidy:
- Fog: SAE J583–rated pods with a hard cutoff; consider white/amber switchable for mixed weather.
- Driving/spot: single-row bar tucked behind openings; dimmer or multiple power levels help.
- Work lights: flood pattern under bed rails or rear pillars; a soft-start switch so you don’t blast your pupils.
- Power: the Cybertruck runs 48V—use 48V-ready lights or a quality 48V-to-12V step-down with fusing.
- Durability: IP67/69K, powder-coated housings, and anti-corrosion fasteners.
- Aiming: slight downward tilt to avoid glare; test on a wall at night and adjust.
| Use case | Beam standard | Target output (lm) | Clean mounting idea |
|---|---|---|---|
| Fog pods | SAE J583 | 1,200–2,400 each | Low in the lower fascia pockets |
| Driving/spot bar | SAE J581/off-road only | 4,000–10,000 total | Behind upper fascia or bumper slot |
| Work/scene | — | 1,000–2,000 each | Under-bed rails or rear corners |
Keep all cameras and sensors clear. Route harnesses away from moving suspension bits, seal any drilled holes, and use loom plus grommets so you don’t chase shorts later.
Legal Tints For Glass And Windshield Care
Dark isn’t always better. Heat rejection comes from film tech, not just shade. Ceramic film can cut a lot of IR heat even at high VLT, so the cab stays cooler without going limo-dark. Metallic films can mess with antennas and phone-as-key, so skip those on this truck.
- Film choices in plain terms:
- Dyed: low cost, decent glare cut, tends to fade.
- Carbon: stable color, decent heat cut, no metal.
- Ceramic: best heat/IR cut at light shades, no signal issues.
- Windshield: many areas allow only a clear or very light film (top strip rules vary). Use a high-VLT ceramic for heat control without drama.
- Glass care: apply a silica-based glass sealant every 3–6 months, replace wipers when they chatter, and don’t coat over camera/sensor zones.
Always confirm your state tint and lighting limits before you buy parts.
Simple rule: prioritize IR/TSER numbers over “5% vs 20%” bragging rights, and keep the windshield nearly clear so night rain doesn’t turn into a headache.
Sentry, Dash, And Anti-Theft Integrations
Tesla’s built-in cameras do a lot, but storage, uptime, and blind spots still matter. A fast, high-endurance SSD cuts corruption and missed clips. Some owners add a tiny auxiliary cam for the bed or trailer zone with its own fuse and a clean step-down from 48V.
Smart setup checklist:
- Use a 256GB–1TB high-endurance SSD, format exFAT, keep the TeslaCam folder tidy, and archive big events often.
- Set Sentry exclusions for trusted spots, and use schedules/low-power options for long airport parking so the truck doesn’t trickle away range.
- Add a secondary dashcam if you want inside-cab or bed coverage; fuse it, hide the wiring, and avoid airbag paths.
- Turn on PIN to Drive and a glovebox PIN; consider disabling passive entry in sketchy areas.
- Physical deterrents still help: pedal lock or wheel clamp at trailheads, and a covered bed keeps gear out of sight.
What about energy use? Sentry can draw roughly 0.1–0.25 kWh per hour depending on temps and software—call it 1–3 kWh over 12 hours. That’s a few miles of range you might want to keep if you’re parking for days. Third-party dashcams in parking mode sip less, but wire them cleanly and keep an eye on battery protection settings.
Last tip: label every add-on circuit, stash spare fuses in the glovebox, and keep your install reversible. Future you will thank you when it’s time to troubleshoot or sell.
Off-Road Cybertruck Mods For Trails And Travel
Planning to get the Cybertruck dirty this year? Good call. The truck is stout, but weight, wheelbase, and torque mean you want the right parts before you wander off the pavement.
Skid Plates, Rock Rails, And Recovery Points
The stainless body shrugs off brush, but the underbody still needs armor. Prioritize plates that protect the approach, steering gear, battery front edge, and rear drive unit. 1/4-inch aluminum (or 3/16-inch steel) keeps weight reasonable while taking real hits. Rock rails should be true sliders, not steps—look for rails that tie into multiple factory hard points and can support a jack.
- Plate priorities (in order): front impact plate, battery leading edge, mid-belly, rear motor/gearbox
- Hardware: use torque-spec’d fasteners and thread locker; re-torque after the first trail day
- Sliders: choose designs with internal sleeves/spacers so you’re not crushing thin sections
Recovery points make or break a trail day. Rated shackle mounts tied to structural members beat bumper loops every time. Keep a recovery kit in the truck:
- 7/8-inch x 30-foot kinetic rope (rated 28,000–35,000 lb)
- Two soft shackles (7/16–1/2 inch, UHMWPE)
- Tree saver strap (3–4 inch wide), snatch block, line dampener, gloves
- Never pull from a tow ball; stay clear of the line path
Protect the underbody before the first trail—repairs cost more than plates.
All-Terrain Tires, Wheels, And Lift Approaches
Tires change everything: grip, clearance, and range. Pick size with eyes open and don’t forget load ratings. Wheels need to be hub-centric with a high load capacity (3,800–4,500 lb per wheel is a smart target) and a sensible offset to avoid rubbing on upper control arms.
Recommended ballpark trade-offs:
| Tire size (approx) | Typical wheel offset | Est. highway range change | Clearance gain | Notes |
|---|---|---|---|---|
| 34-inch (e.g., 285/70R18) | +18 to +25 mm | −5% to −8% | ~0.5 in | Mild trim at most; good daily/trail mix |
| 35-inch (e.g., 295/70R18, 35×11.5) | 0 to +12 mm | −8% to −12% | ~1.0 in | Likely splash-guard delete, minor liner massage |
| 37-inch (e.g., 37×12.5) | −12 to 0 mm | −15% to −20% | ~2.0 in | Needs lift and careful fitment; steering weight goes up |
Airing down helps traction and comfort:
- Gravel/washboard: 28–32 psi
- Rocky trail: 22–26 psi
- Sand/snow (no beadlocks): 16–18 psi max, keep speeds low
- Reinflate before highway speeds; carry a compressor
Lifts: use the factory height range first. If you add a 1–2 inch spacer or leveling kit, get a fresh alignment and check for full-bump and full-lock clearance. After any height change, verify headlight aim and radar/camera views in daylight.
For camp errands, some folks stash a tiny electric board or scooter; Audi’s Connected Mobility concept shows how compact that last‑mile gear can be.
Roof Racks, Tents, And Power Management
If you plan to sleep out of the truck, think structure and watts. A low, cab-height bed rack keeps wind drag down and supports rooftop tents better than most roof glass areas. Check dynamic vs static ratings before you load up.
- Rack targets: dynamic 250–400 lb; static 700–1,000 lb
- Tent weights: soft-shell 100–130 lb, hardshell 130–180 lb; add ladder and bedding weight
- Range hit with RTT up high: often −5% to −12%; a cab-height bed rack can trim that a bit
Quick setup tips:
- Pack heavy gear (water, tools, recovery kit) low in the bed; light items go up high
- Use ratchet straps or cam buckles with edge protectors to avoid fraying
- Add awning mounts and a collapsible privacy room for rainy cook stops
Trail power is simple if you plan it. Mix the truck’s onboard outlets (if equipped) with a portable power station and a folding solar blanket. Here’s a tiny power budget for a long weekend:
| Device | Avg watts | Hours/day | Daily Wh |
|---|---|---|---|
| 12V fridge/freezer (50L) | 10–25 | 24 | 240–600 |
| Area lights (LED string) | 10–20 | 5 | 50–100 |
| Air compressor (duty-cycled) | 120–300 | 0.5 | 60–150 |
| Laptop + phone charging | 60–100 | 2 | 120–200 |
Notes:
- A 1–2 kWh power station with 200–400 W solar keeps the above running comfortably
- Use Anderson SB50/SB175 or similar connectors for clean, quick power tie-ins
- Keep cords short and protected along rack bars; add a fused distribution block
One last thing: weight creeps up fast. Before a trip, weigh the truck loaded, confirm tire pressure for the load, and do a short shakedown loop close to home.
Interior Comfort, Storage, And Tech Refinements
You spend more time inside the Cybertruck than you do staring at it, so it’s worth dialing in the cabin. Think quiet, clean, and easy to live with. A few small changes go a long way, and you don’t need a full teardown to feel the difference.
Sound Deadening, Seals, And Quiet-Cabin Tricks
Wind and tire hum creep in faster than you think, especially on coarse highways. A quiet cabin makes long drives less tiring. Here’s what actually works without turning the truck into a rolling recording studio:
- Door seal kits: add secondary bulb seals around the doors and frunk perimeter to cut wind hiss.
- Targeted butyl mats: floorpans, rear wall, and front wheel wells. Skip 100% coverage to keep weight in check.
- Closed-cell foam: over butyl in large panels to tame mid-frequency buzzes.
- Felt tape and clips: quiets trim where plastic meets metal (A/B pillars, center console edges).
- Acoustic windshield film: a thin laminate that shaves a few dB of high-frequency noise.
Quick method I use on trucks so I don’t go overboard:
- Road test with a phone dB app at 65–75 mph; note the loud zones.
- Treat only those areas with butyl + foam.
- Re-test, then add seals last for the final step-down.
Estimated results if you keep it reasonable:
| Upgrade mix | Typical dB drop @70 mph | Added weight | DIY cost | Time |
|---|---|---|---|---|
| Seals only | 1–2 dB | ~2–4 lb | $80–$160 | 45–90 min |
| Seals + targeted mats | 2–4 dB | ~12–20 lb | $160–$320 | 2–4 hrs |
| Add acoustic film | 3–5 dB | ~1–2 lb | $350–$600 | 1–2 hrs |
Tip: Leave drainage paths clear in doors. Trapping moisture is worse than a little road noise.
Seat Covers, Floor Liners, And Pet-Proofing
The factory seats look tough, but sand, wet gear, and dog claws will win if you let them. Go for covers that fit tight, breathe a bit, and won’t block side airbags.
- Materials that actually hold up: leatherette (easy wipe-down), neoprene (grippy, water-resistant), and canvas (abrasion-resistant). Check for airbag-safe stitching.
- Floor liners with a high lip and heel pads: stops mud from escaping under the pedals and preserves the carpet edges.
- Pet setup that works: rear-seat hammock with seatbelt tethers, door card protectors, and a cargo-area liner with a bumper flap for paw-friendly loading.
- Cleanup kit in the side cubby: compact vacuum, rubber hair brush, enzyme spray for accidents.
If your dog rides a lot, keeping the cabin cool matters more than fancy fabric. Remote climate and lock controls through modern car apps make that simple; look for trucks that support solid smartphone controls so you’re not sprinting back to crack a window.
Safety notes most folks skip:
- Don’t trap seat sensors or block airbag seams with universal covers.
- Re-torque seat bolts to spec if you ever remove the seats to fit covers or run wiring.
- Check mats for pedal interference after every wash.
Mounts, Chargers, And Hidden Storage Bins
Cables everywhere make a new truck feel old fast. Plan power first, then mounts, then organizers.
- Front phone mounts: a low-profile MagSafe plate on the dash shelf or a clamp at the console side. Run a short 60–100W USB‑C cable, not a 6-foot spaghetti noodle.
- Power you’ll actually use: a compact PD hub (45–100W) in the console for laptops, plus a rear USB‑C splitter for kids’ tablets. Label the high-watt port.
- Rear tablet arms that clamp to headrest posts: keeps screens steady and saves necks on long trips.
- Hidden storage ideas: under-seat lockbox for tools/documents, molded center-console trays for keys and coins, and a shallow bin above the glove area for toll tags and badges.
- Cable management: adhesive cable clips along the console tunnel; leave a little slack to avoid stress on the ports.
Quick setup order to avoid a mess:
- Map your power (which devices, how many watts, front vs rear).
- Install the mounts with the shortest workable cables.
- Add organizers only after you see where the daily items land.
- Test-charge every device before you button up.
Small upgrades, less rattling, fewer “where did I put that?” moments. That’s a good day in a big truck.
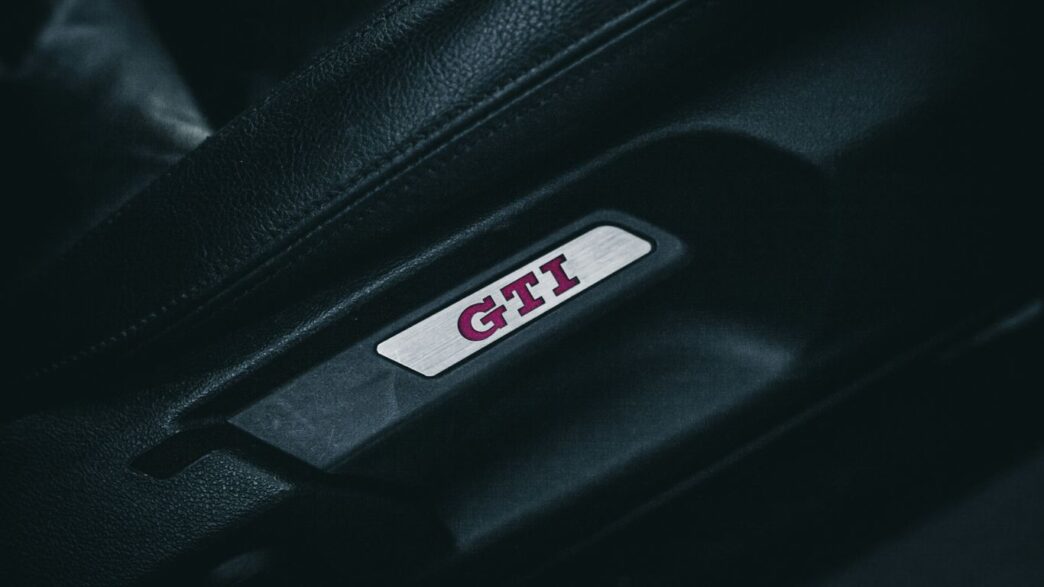
Branding, Emblems, And Subtle Style Statements
Some folks go wild; others keep it quiet. The Cybertruck wears minimal branding from the factory, so even tiny changes stand out. Keep logos minimal and aligned to the truck’s flat planes—it’s the difference between sharp and sloppy. I messed up a badge by a few millimeters once, and it bugged me for weeks.
Tesla Wordmarks, Stealth Badges, And Emblem Placement
If you’re adding a front T, rear TESLA wordmark, or blackout badge set, plan it like a small home project. The stainless skin shows misalignment instantly.
Quick fit tips:
- Measure twice from panel edges, not body gaps; edges are more consistent.
- Use a hinge of painter’s tape so the badge swings into position without drifting.
- Warm the panel (not hot) so adhesive activates; avoid installs in cold garages.
Suggested specs at a glance:
| Piece | Size range (in) | Install method | Adhesive cure (hrs) |
|---|---|---|---|
| Front emblem | 2.5–4.0 | 3M VHB + promoter | 24–72 |
| Rear wordmark | 7–12 | Pre-spaced letters, VHB | 24–72 |
| Side stealth badge | 2.0–3.0 | VHB, no drilling | 24–72 |
Aftercare basics:
- No pressure washes for 72 hours; hand rinse only.
- If you need to reposition, use dental floss and citrus adhesive remover—go slow.
- Matte or satin badges hide fingerprints better than gloss.
Carbon Fiber Accents That Match The Geometry
The truck’s edges are straight, not curvy. That means carbon pieces look best when the weave direction follows a body line.
Smart placements:
- Mirror caps and sail-panel covers: small area, big visual change.
- Lower bumper trim and bed-rail caps: keeps weight low and lines clean.
- Interior pulls and console trims: satin finish to cut glare on glass.
Fit and finish notes:
- Pick satin or matte topcoats; glossy carbon can reflect like a mirror.
- Align the weave parallel to beltlines or 45° on pillars so it doesn’t fight the angles.
- Real carbon is light but stiff; test-fit with painter’s tape before committing to adhesive.
Design trends favor subtle, geometric cues—think of the crisp panels shown on the BMW Vision Vehicle. Different brand, same lesson: clean surfaces make small accents pop.
Color Details On Calipers, Caps, And Trim
A splash of color can live on the wheels without shouting from across the parking lot. Calipers are the usual move, and it’s not hard if you prep them right.
Do it right:
- Use high-temp caliper paint or 2K paint (rated 900°F/482°C or higher).
- Mask bleeders, rubber boots, and rotors; only color the caliper body.
- Let coats flash fully and bake/cure as directed; don’t rush the first drive.
Easy match-ups that work:
- Red calipers + black center caps + brushed lug covers: sporty, still tidy.
- Satin bronze calipers + gunmetal caps: good with earth-tone wraps.
- Subtle gray calipers + stainless valve caps: stock look, cleaner in person.
Final small touches:
- Vinyl ring decals on aero covers add a thin color halo with zero weight.
- Colored stem caps are cheap, but get metal with O-rings so they don’t seize.
- If you change trim color, keep it to one or two accent points per side to avoid clutter.
Your Cybertruck, Your Way
So, we’ve looked at a bunch of ways to make your Cybertruck truly yours. From wraps that change its whole look to little touches that add personality, there’s a lot you can do. It’s not just about having a cool truck; it’s about making it fit your life and style. Whether you’re adding a subtle emblem or going for a full color change, these mods show off your individuality. The Cybertruck is already a head-turner, but with a few smart customizations, you can make it uniquely yours. Keep an eye out for more ideas as owners continue to explore what’s possible with this unique vehicle.
Frequently Asked Questions
Can I change the color of my Cybertruck?
Yes! While the Cybertruck comes with a tough stainless steel body, you can change its look with vinyl wraps. Tesla offers several colors, or you can find custom options to make your truck unique. Some people even use protective films that also add color.
What are some popular exterior upgrades?
Many owners like to add protective coatings, like ceramic coatings, to keep the stainless steel looking shiny and new. Others opt for special wraps that give a matte, satin, or pearl finish without actually painting the truck. You can also find custom emblems and decals to add personal touches.
How can I improve the Cybertruck’s performance or utility?
For better performance, you can look into aerodynamic add-ons that might help with how far the truck can go on a charge and how stable it is. Upgrading wheels and tires can give you better grip. For utility, things like modular storage systems, bed liners, and onboard air compressors can make the truck more useful for work or adventures.
Are there ways to make the Cybertruck safer or more visible?
Absolutely. You can add extra lights, like fog or work lights, that blend in with the truck’s design. Tinting the windows and windshield can improve comfort and privacy, and some people install integrated systems for security and recording, like dashcams or anti-theft features.
What kind of mods are good for off-roading?
If you plan to hit the trails, consider adding skid plates for protection, rock rails to guard the sides, and stronger recovery points. All-terrain tires and wheels are a must for better grip, and some people even add lift kits for more ground clearance. Roof racks and tents are great for camping trips.
How can I make the Cybertruck’s interior more comfortable or organized?
To make the inside quieter, you can add sound-deadening materials. Seat covers and floor liners protect the interior and can make it more comfortable, especially if you have pets. Storage bins, mounts for your phone or devices, and hidden storage compartments can help keep things tidy.